Puff Pastry

lamination4.jpg

If nothing else, this quarantine period has given us a bounty of time. People who have never had interest in baking before are suddenly churning out loaves of sourdough on a regular basis. We’re signing up for free photography/painting/writing classes online, and working on becoming gardeners or teaching ourselves how to give haircuts. The phrase “It’s a great day to learn something new” has never been truer, so in that ultra-motivated spirit, let’s learn to make puff pastry at home!

Puff pastry is a bit of an outsider in the pastry world. It’s like that person who is friends with everyone so they don’t fit squarely into a specific group (but their versatility makes us love them even more). Puff pastry is a laminated dough, like croissants and danishes, but because it doesn’t use yeast or natural leavening, it’s not technically considered a viennoiserie (the French word for leavened pastries with added sugar, butter, eggs, and usually laminated—its the bridge category between breads and pastries). There are four main types of puff pastry, and I would venture to say that three of them are best left up to professional bakers with sheeting machines in order to save a lot of headaches. Traditional puff pastry is sheeted similarly to croissant dough, with a detrempe (dough) that envelops a butter block that’s then rolled and folded to create lots of flaky layers. Italian puff pastry includes eggs and white wine in the dough and is mixed more intensively than other puffs. Inverted puff pastry laminates the butter on the outside of the dough, rather than the inside creating a flakier, crispier pastry (and really needs fancy equipment like a reversible dough sheeter, which I unfortunately do not have the space or money for in my tiny duplex kitchen). Finally, blitz (or rough) puff pastry is the most basic and quickest puff pastry and it’s what we are going to learn today.

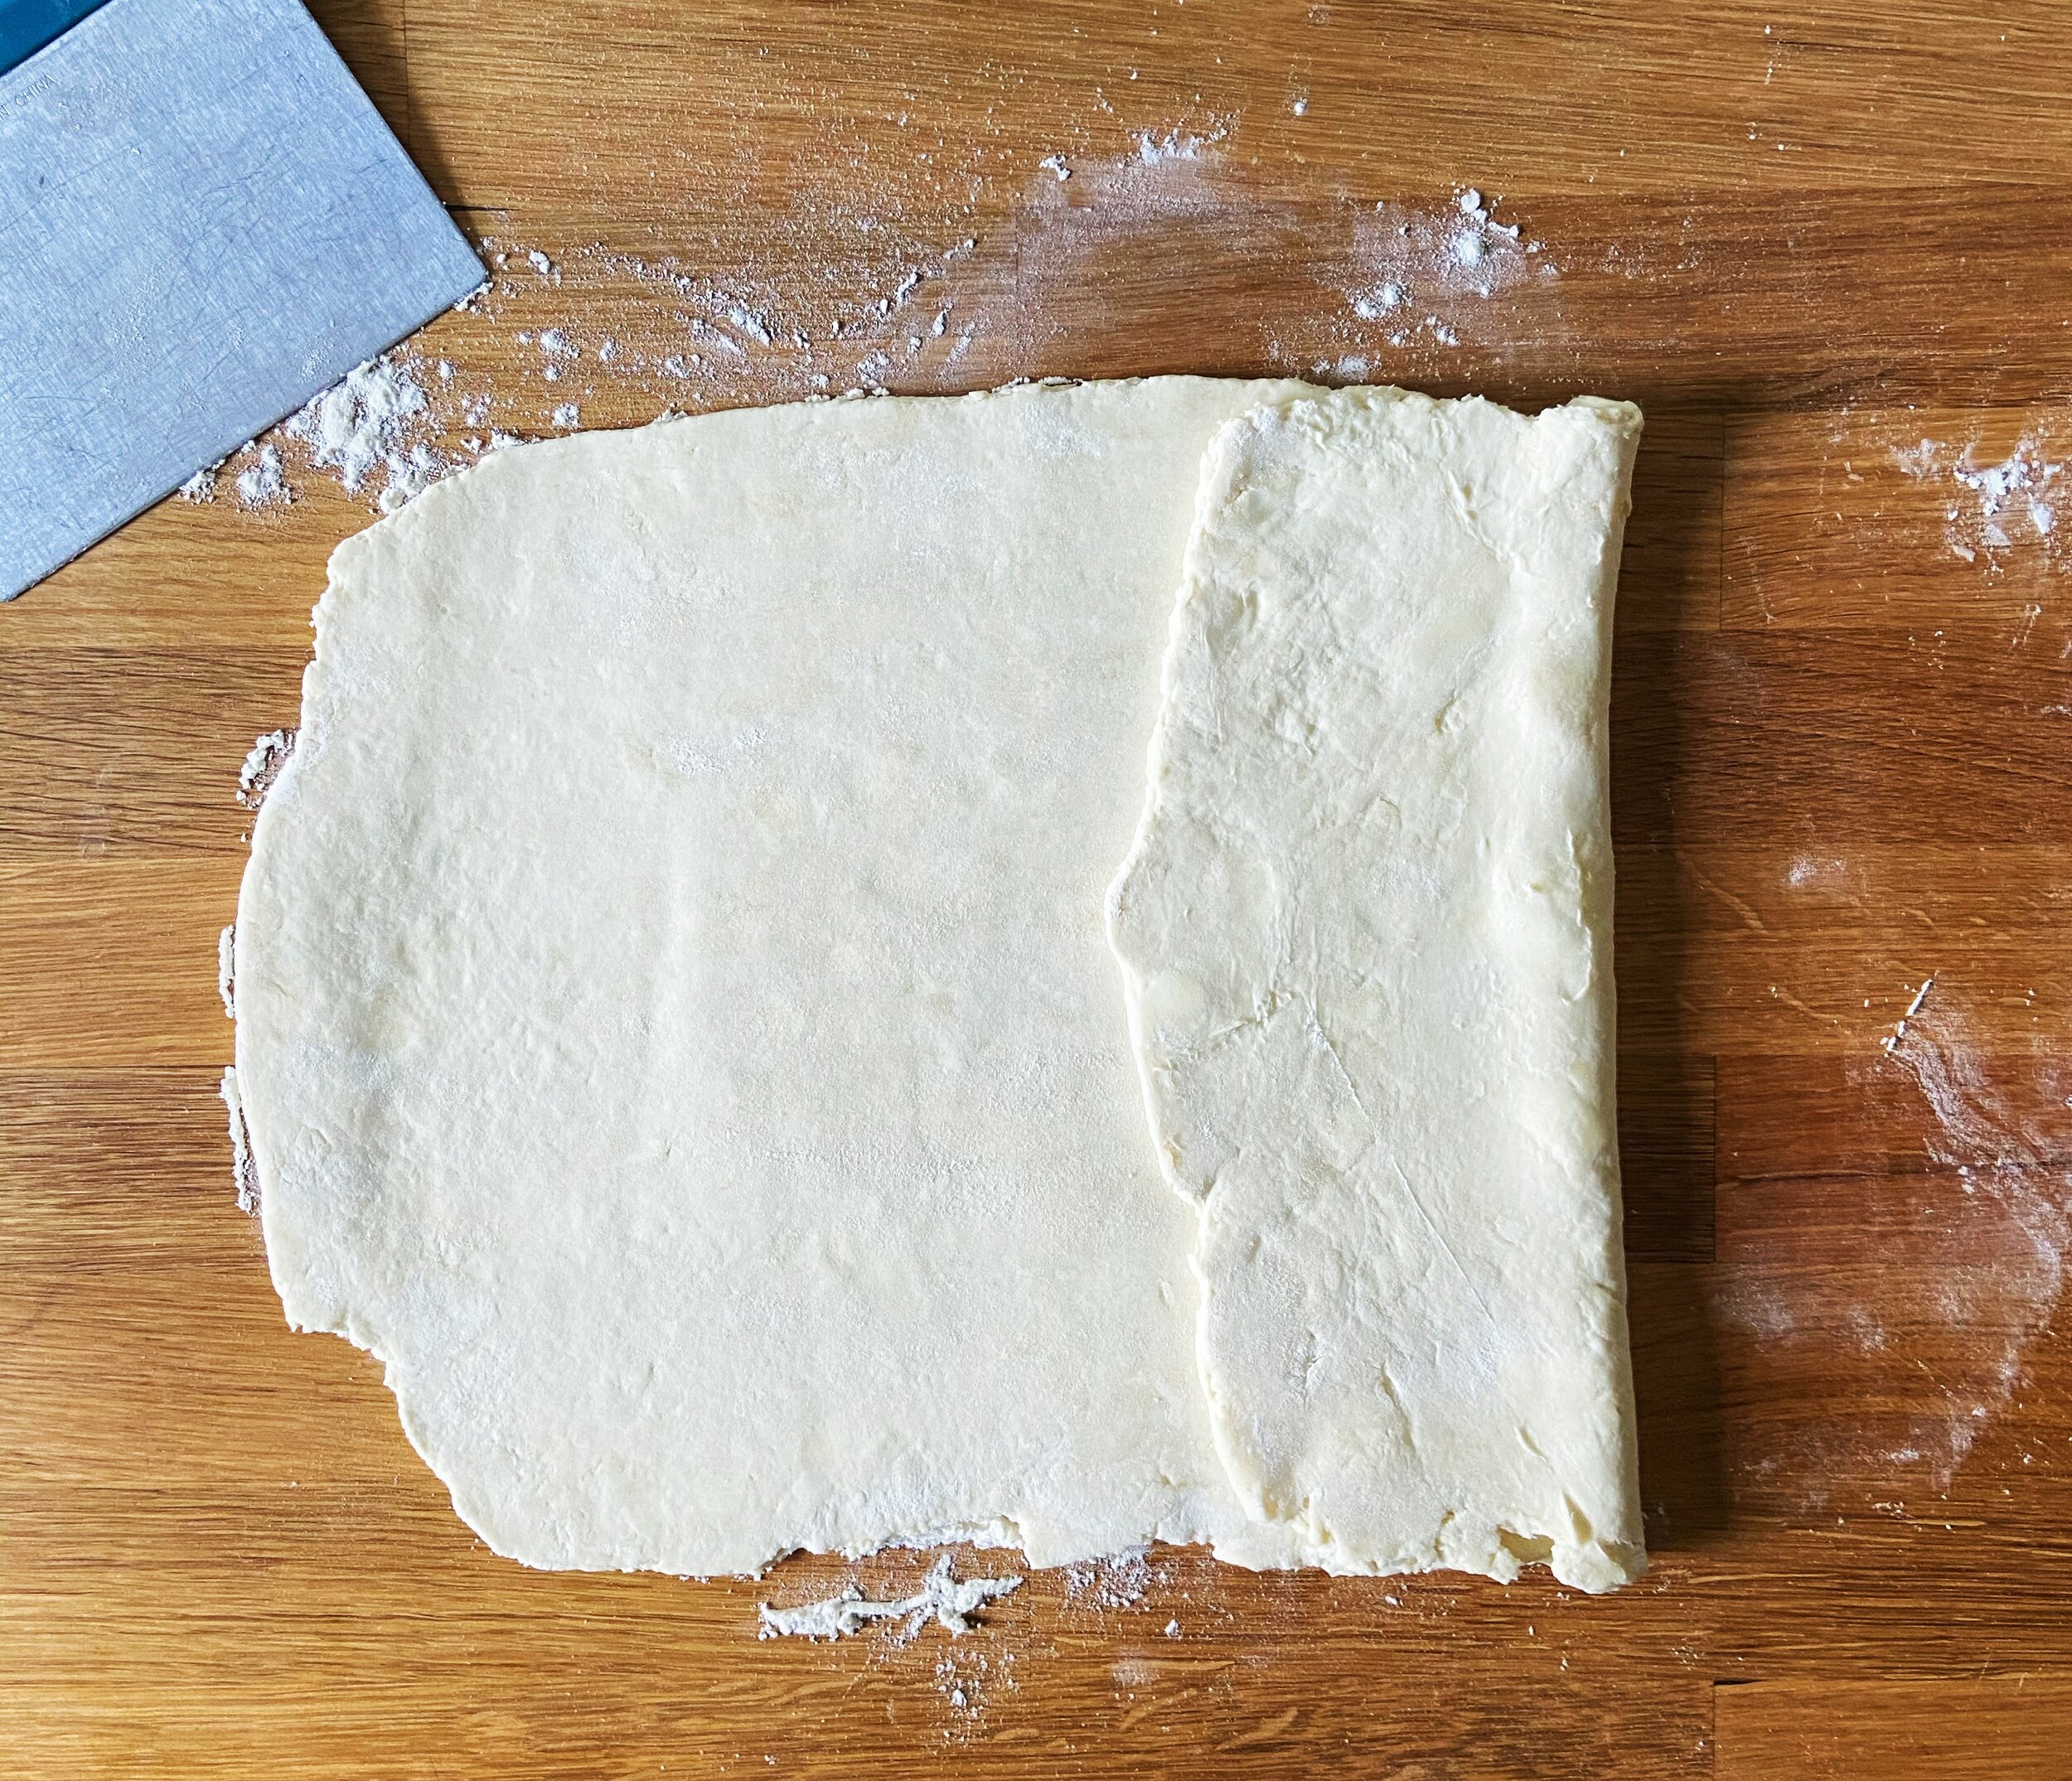
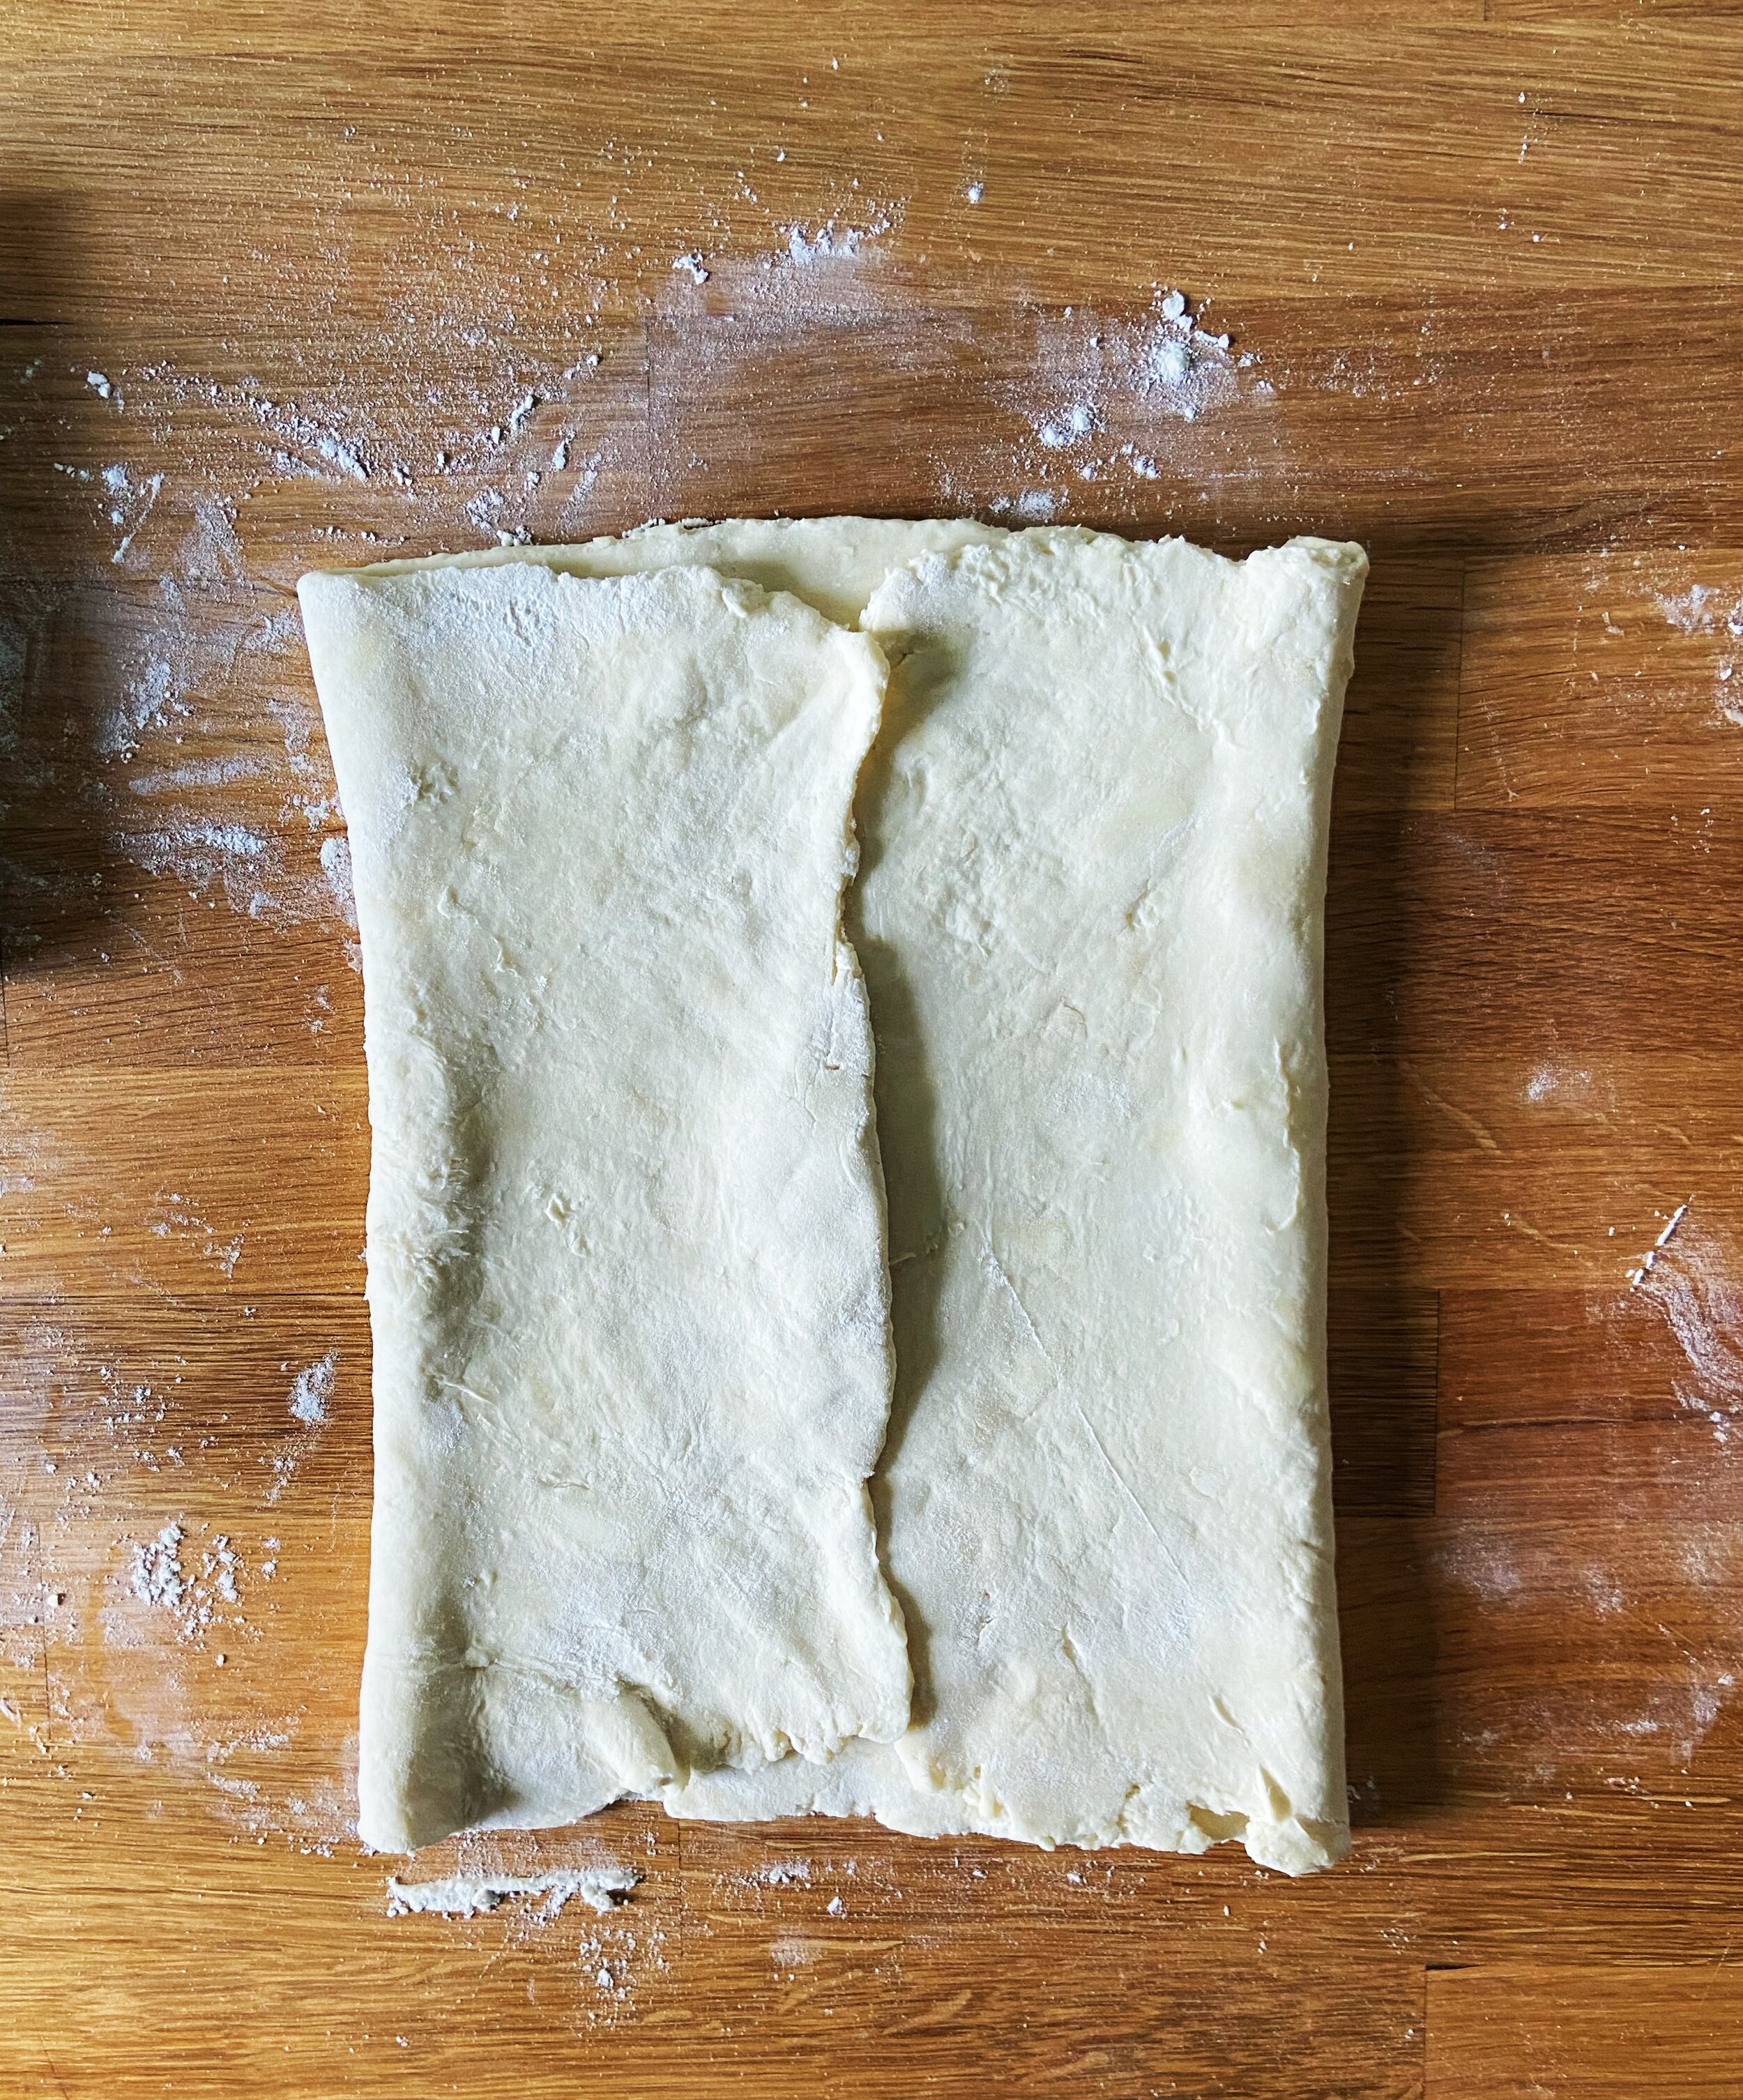
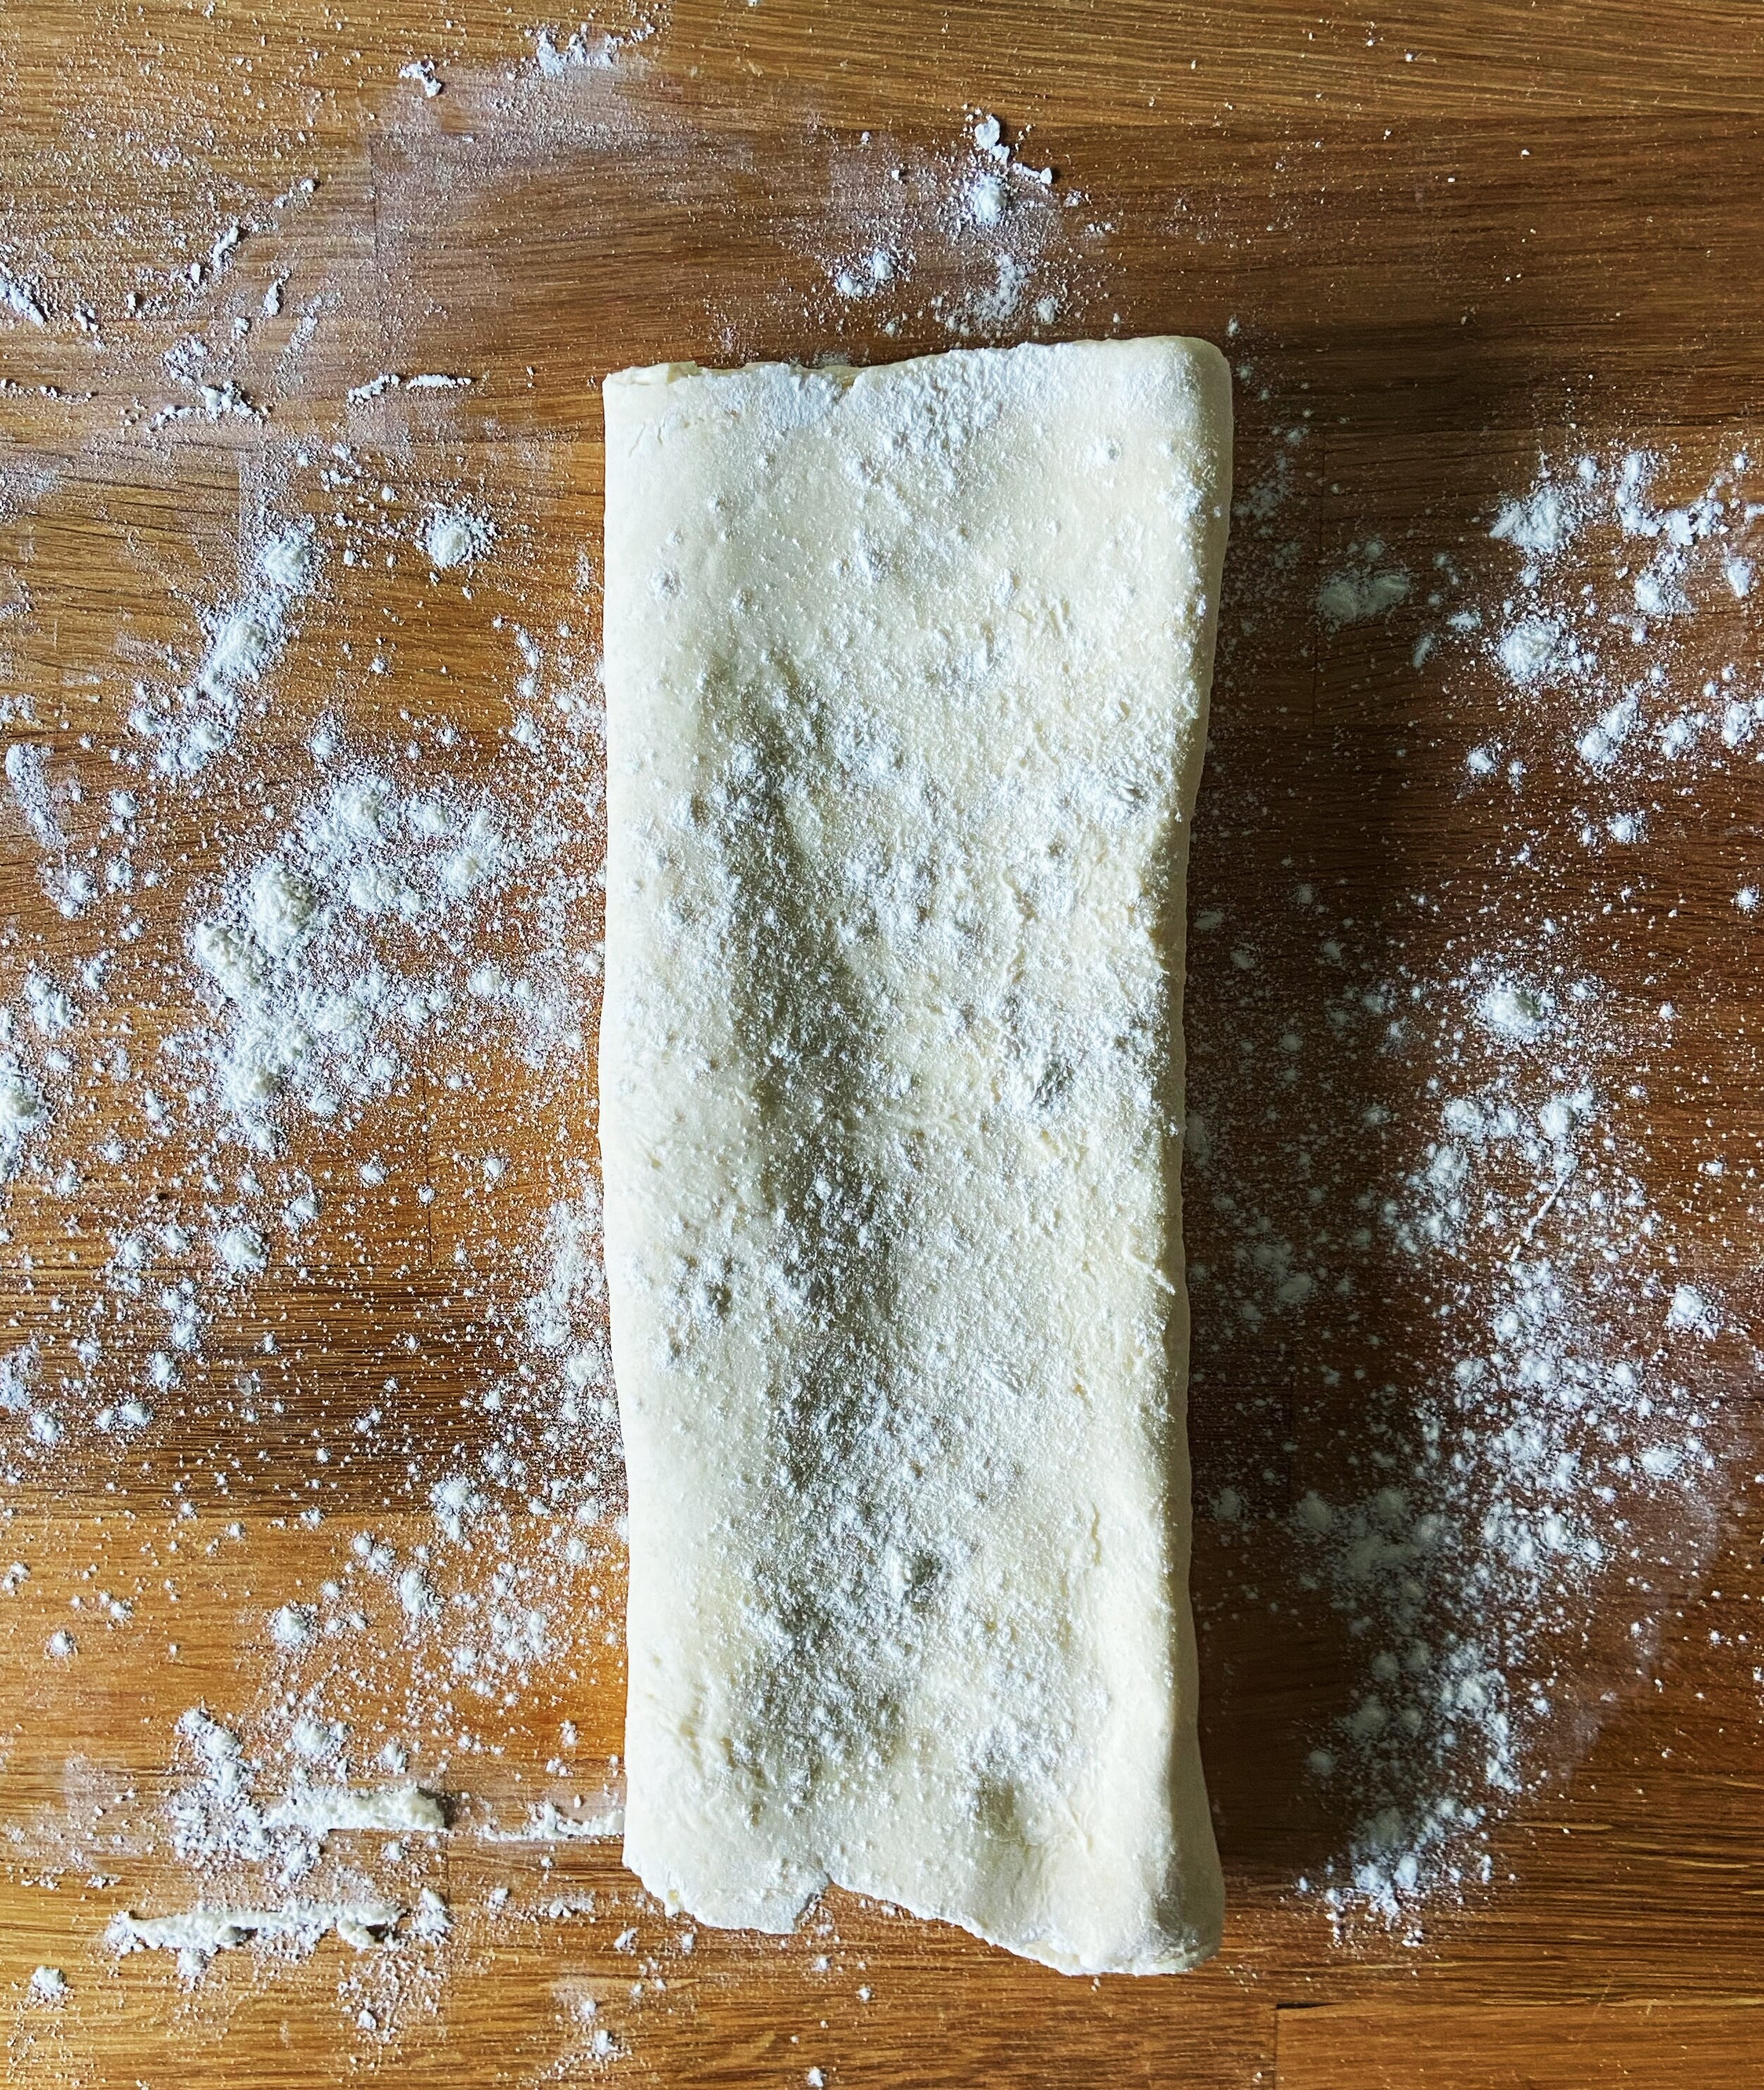
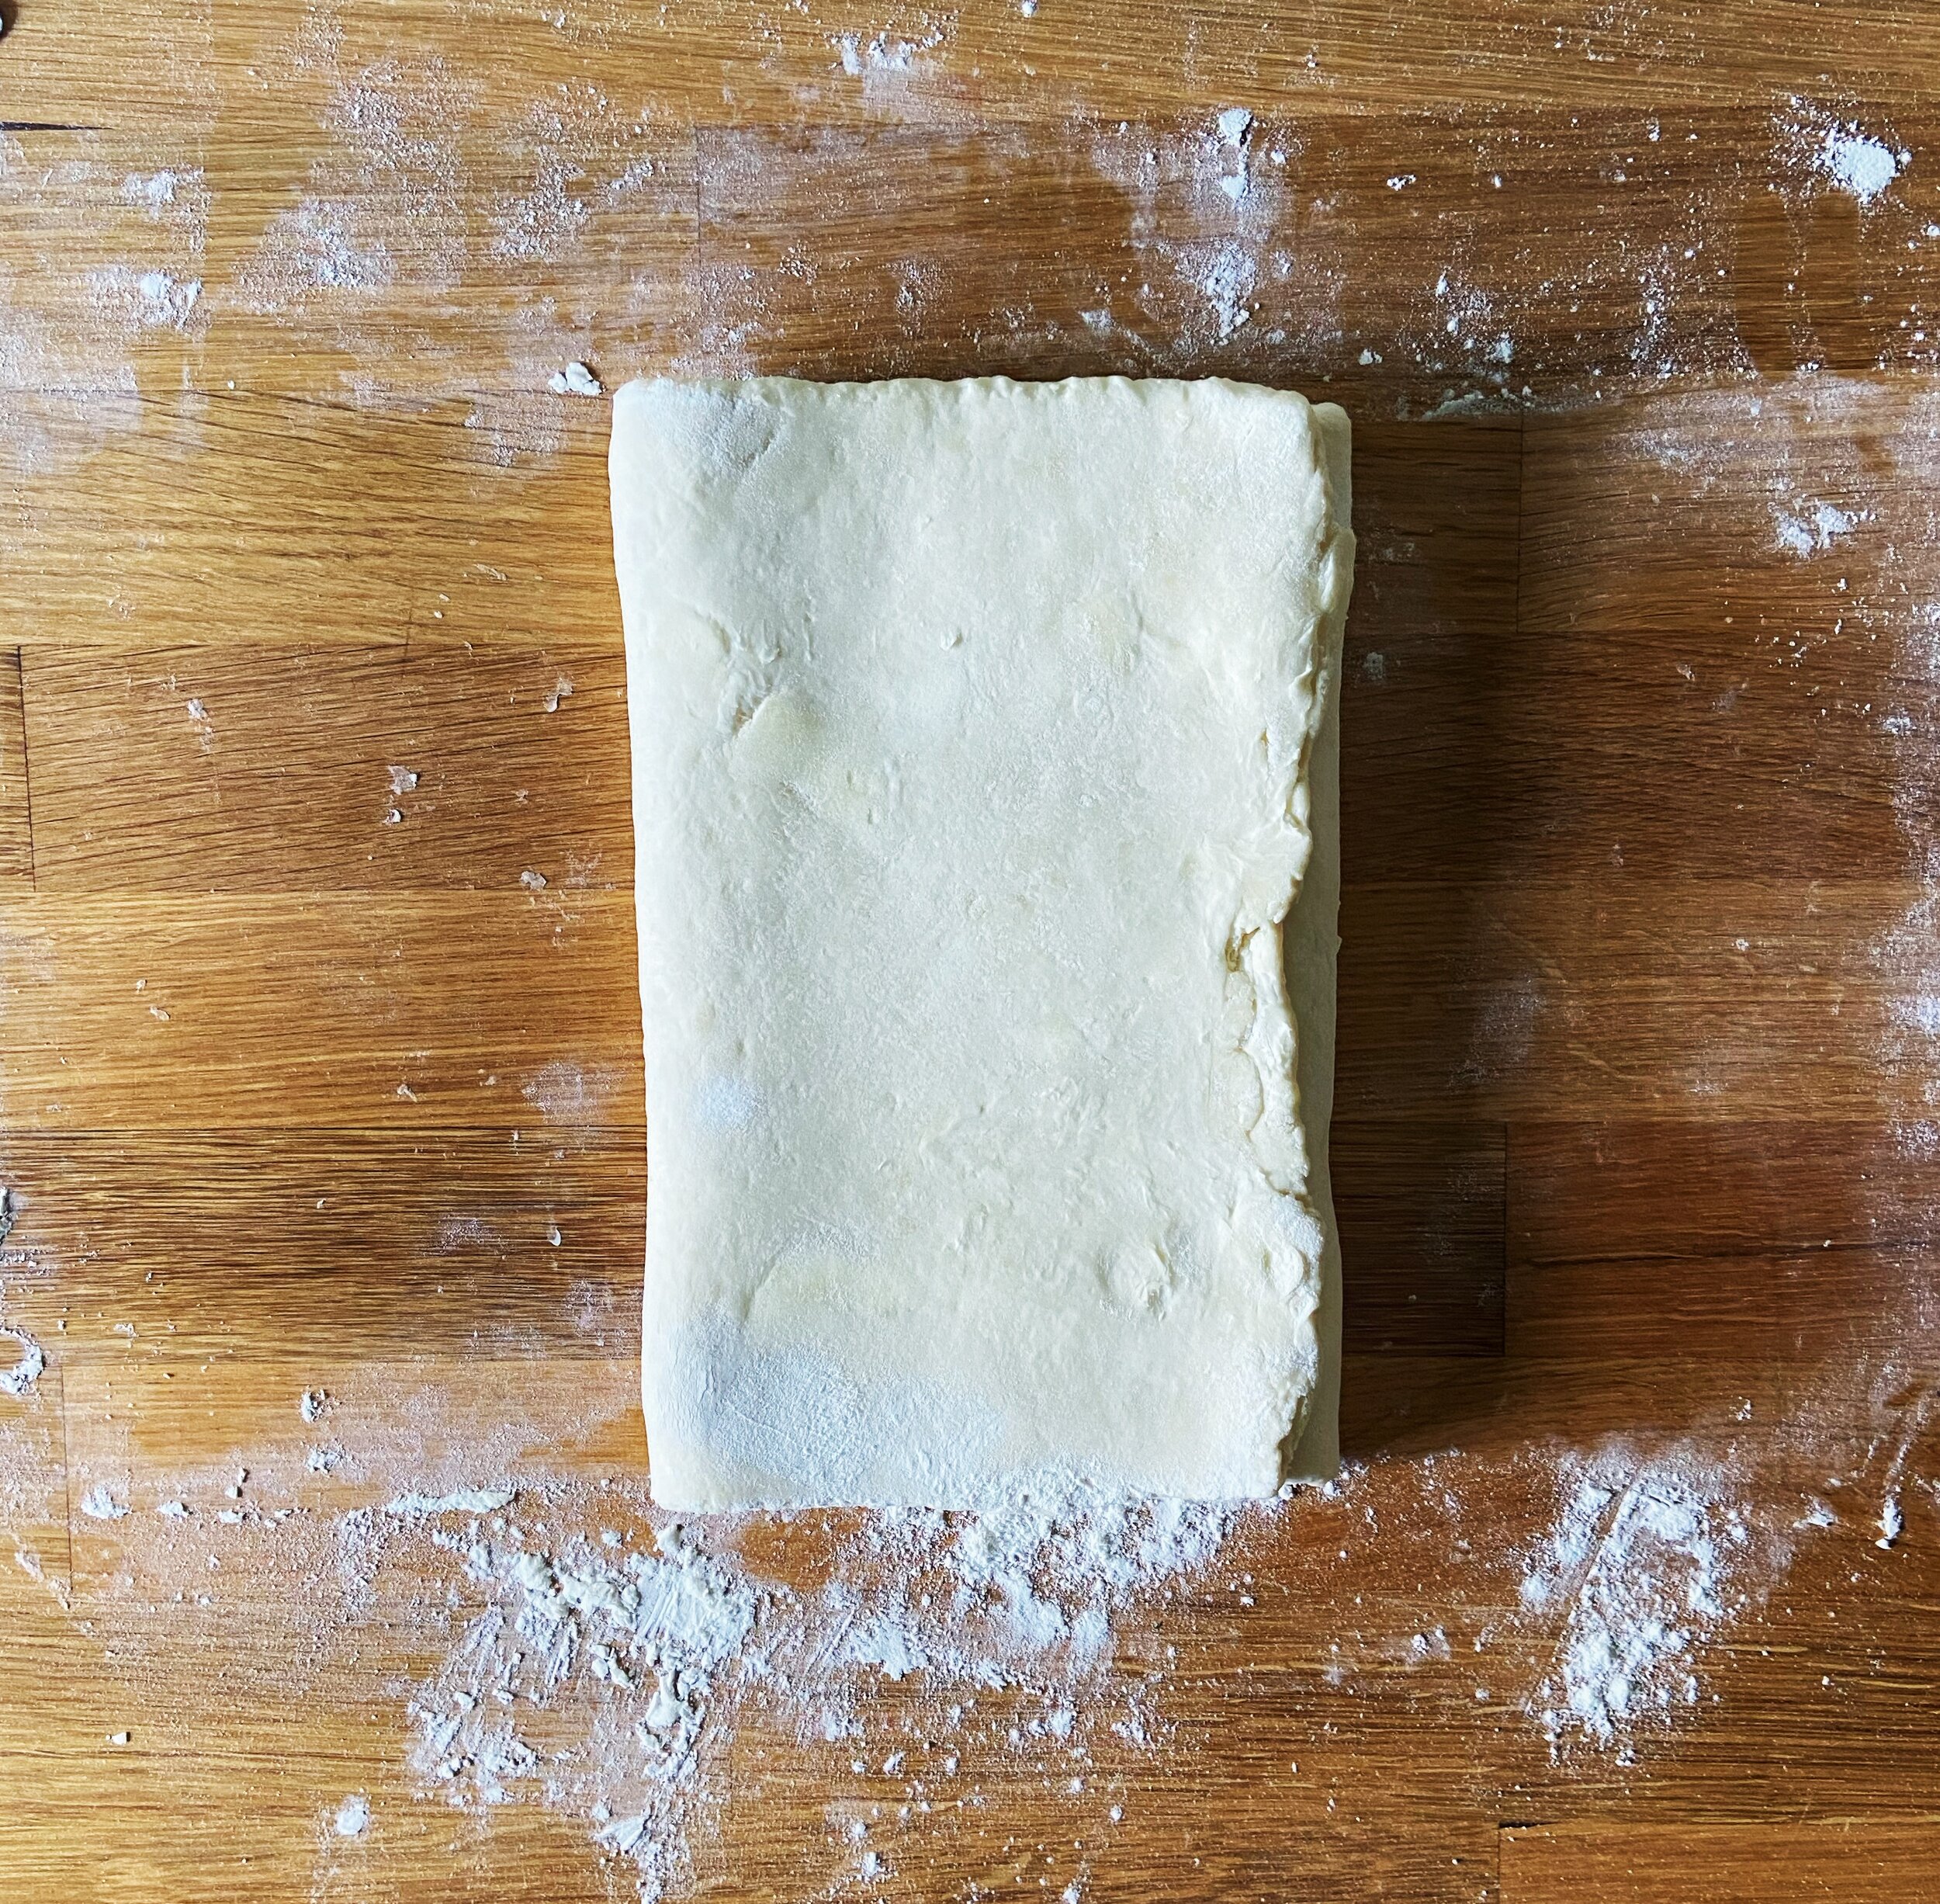
To make blitz puff pastry, cold butter is worked into the dough into pea-sized chunks, as if you are making a pie or tart dough. The dough is then given a series of folds over the course of a couple hours to create those flaky layers before it’s tucked in for an overnight chill. Below, I’ve broken down two of the most common types of dough folds, used in any laminated dough, and added pictures to help you better understand exactly what each should look like.

P.S. I’ll be sharing a few different recipes later this week that use this blitz puff pastry so keep an eye out!

Double Fold

A double fold is usually the first fold completed in a laminated dough. One of my professors in pastry school referred to it as the “church door fold” and it’s very much like closing doors. The dough is rolled to a rectangle and then the edges are folded in to meet in the middle, like closing a double door. The dough is then folded in half, like closing a book.

Single Fold

A single fold, or letter fold, is the most common laminating fold. The dough is simply rolled to a rectangle shape and then folded in thirds like a letter.


Blitz Puff Pastry 

Yield: 2 lbs puff pastry dough

Ingredients 

14 oz (397 g) all purpose flour

10.5 oz (298 g) unsalted butter, cold and cubed

2 tsp kosher salt

1 tsp lemon juice 

7 oz (198 g) cold water


Procedure 

  1. In the bowl of a stand mixer fitted with the paddle attachment, combine flour and salt. Mix on low speed for 30 seconds, just to combine. 

  2. Add the cold, cubed butter to the pie dough and mix on medium-low speed until butter is broken up into pea-sized cubes throughout the flour. This is should resemble pie dough and the butter should not be completely combined. 

  3. In a measuring cup, combine lemon juice and water. With the mixer running on low speed, gradually stream in water mixture and mix until just barely combined. Be careful here not to overmix!

  4. Turn the dough onto a well-floured work surface and gently press into a rectangular shape. Wrap in plastic wrap and refrigerate for 30 minutes. 

Lamination

  1. For the lamination process, we will complete a series of five folds in total in three intervals. *refer to the photos above for a visual reference of the folds*. 

  2. Turn #1: Remove dough from refrigerator, unwrap and place onto your well-floured work surface. Roll the dough into a large rectangle, 18x12” and is about 1/4” in thickness. Make sure that the 18” length of the dough is the horizontal end. Take the far-edge of the dough and fold it in, about 1/3 of the length. Then take the far-left edge of the dough and fold it 2/3 of the way in, until it meets the edge of the first fold just off-center of your rectangle. Grab the left side of the dough and fold it in half like you are closing a book. You will have just completed what’s called a double fold. Wrap the dough in plastic wrap again and return to the refrigerator to chill for another 30-45 minutes. 

  3. Turn #2: Remove the dough from the refrigerator and bring back to your well-floured work surface. This time, you will complete two single-folds. Again, roll the dough back out into your 18x12” rectangle with 1/4” thickness. Bring the right edge of the dough in 1/3 of the way, like you are folding a letter. Then bring the left edge of the dough over the right all of the way over the folded right side. This is one single fold. Turn the dough 90° so that the open sides are now facing horizontally. Roll the dough back out to your 18x12” rectangle and fold like a letter one more time. Re-wrap the dough and return to the refrigerator for another 30-45 minute rest. 

  4. Turn #3: This last turn will consist of the exact same folds as turn #2. Roll the dough out to the 18x12” rectangle, fold like a letter, and then turn 90° and repeat the whole thing. Re-wrap the dough tightly and return to the refrigerator. Let the dough rest overnight and then use however you would like! You can also divide the dough into two, 1-lb squares, wrap them individually and then freeze them for later use. If freezing the dough, be sure to let them defrost in the refrigerator overnight before you plan to use them. 


Note: When you are completing folds back to back, remember that the dough should always be turned 90° between folds so that the open edges are facing horizontally.

more recipes like this…

Croissants1.jpg

classic croissants

Baklava2.jpg

traditional baklava

Babka5.jpg

chocolate tahini brioche babka

plated1.jpg

fig and blue cheese rugelach

Print Friendly and PDF

Ingredient Spotlight: Sugars

allsweeteners5.jpg

Before we get started here, go to your Spotify, Pandora, Amazon Music etc… and play Def Leppard’s “Pour Some Sugar On Me”. I’ll wait. I’ve had that song stuck in my head on repeat throughout all of my research process (and really every time I think about writing this post) so, there. Now it can be stuck in your head too. 

The subject of sugar in baking is a broad, chemistry-filled one and I’m going to do my very best to explain it in a way that helps you understand their role at a fundamental level without weighing you down with too much science. We will not be revisiting 10th grade chemistry, I promise. 

Sweeteners, as we will call the big broad umbrella category from here on out, can be broken up into two categories— dry sugars and syrups. The chemistry behind each category is a little different which significantly affects the way each works in a baked good. 

What exactly is sugar?

There are five different types of sugar—lactose (generally found in dairy products), maltose, glucose, fructose (found in fruits), and sucrose. Essentially, anything with an -ose ending refers to a sugar, but the word sugar is most often used in reference to sucrose. All sugars are considered simply carbohydrates, made up of carbon, hydrogen, and oxygen atoms arranged in a certain way. They are further broken up into monosaccharides and disaccharides, mono meaning one sugar unit and di meaning two sugar units bonded together. Sucrose, for example, is a disaccharide, made up of one glucose molecule bonded with one fructose molecule. Sugar crystals are highly ordered arrangements of these sugar molecules bonded together. 

So we don’t get bogged down in lots of unnecessary technical terms, we will be focusing specifically on sucrose and further exploring the two most common iterations found in the home baking kitchens: sugar crystals and syrups. 

Sugar Crystals 

Regular Granulated Sugar:

Sucrose is found in lots of different environments like maple tree sap, dates and bananas, but the dry crystal sugars you find in the grocery store are commercially produced from either sugar cane or sugar beets. In the U.S., it’s about a 50/50 split in production. Sugar harvested from sugar cane and sugar beets is about 99.9% pure sucrose and it goes through a multi-step refining process after harvesting to become the little granulated crystals that stock our store shelves. 

Unrefined Sugars:

Often you can find less-refined sugars, especially in the health food’s sections of your grocery stores. These are sugars that haven’t gone through the complete refining process, and have not been filtered to decolorize which is why you will often notice that they are slightly less white than their refined counterparts. They can be substituted for regular granulated sugar, but are often more expensive and will impart their slightly off-white coloring to a final products so they may not be the best choice when making white cakes or icings. *Also, unrefined sugars shouldn’t be used when making caramel. Because they are not as refined as granulated white sugar, there can sometimes be impurities that can cause crystallization (and lots of headaches).

Coarse Sugars:

You can often find larger grain sugars that are more coarsely-ground and sometimes have an added edible wax for shine purposes. They may be labeled as ‘sanding sugar’ or ‘pearl sugar’ and should not be substituted for regular granulated sugar in a recipe. These sugars are generally used for added decoration or texture, like the sugar topping on a bakery-style muffin. 

Powdered (Confectioner’s) Sugar:

Powdered sugar is simply sucrose crystals ground ultra-finely into powder form. They dissolve easily and are primarily used in icings and confections. Powdered sugars typically also contain a small amount of corn starch to prevent caking. 

Regular Brown Sugar:

Brown sugar is regular granulated sugar with a small amount of molasses added into it (usually less than 10%). The addition of molasses not only gives a brown hue to the sugar, but adds a little bit moisture and a caramel flavor. Dark brown sugar contains more molasses than light brown sugar. 

Other Brown Sugars:

There are a few other specialty brown sugars that have become more accessible to the home baker in recent years. 

Muscavado sugar is a rich, dark, brown sugar made up of super-fine sugar crystals combined with molasses. It provides a strong molasses flavor to a baked good and is often used in things like gingerbread or rich chocolate desserts. 

Turbinado sugar is similar to light brown sugar in color and molasses content, but is dry and doesn’t stick together in the same way. It is sometimes referred to as “raw” or “unrefined” though it is actually partially refined. 

Demerara sugar is a type of turbinado sugar. It’s a light brown sugar made up of large, coarse crystals. It’s often used similarly as coarse sugars— for decoration and texture. 

drysugar3.jpg

Syrups 

Syrups are mixtures of one or more sugars dissolved with water. The thicker the syrup, the lower the water amount it contains. 

Simple Syrup:

The simplest of syrups, a simple syrup is generally made by heating water and granulated sugar together (usually in a one-to-one ratio) until the sugar is completely dissolved. Sometimes, lemon juice is added to prevent sugar crystallization and bacteria growth. 

Molasses:

Molasses is the concentrated juice of sugarcane. It is used primarily for color and flavor, but also provides moistness and softness to baked goods. Molasses contains vitamins and minerals beneficial to health and it varies in flavors and strength. Molasses is graded, much like maple syrup, and higher grades refer to a lighter, sweeter molasses while lower grades refer to stronger, darker molasses. 

Glucose Corn Syrups:

Often called glucose syrup or just glucose, are produced from the breakdown of a starch. In the U.S. the most common starch used is cornstarch and it is commonly called corn syrup, but other starches like rice or potato can also be used. There is a whole, very intricate heating process which breaks down some molecules and rearranges others in certain ways, but I did promise to cut a lot of the chemistry so we will leave it at that. (But feel free to add a comment or send me a message if you have any burning glucose-related questions and I will do my best to answer them for you!)

Honey:

Honey is flower-nectar produced by honeybees. After it is collected from bees, it is separated from the honeycomb and heated to dissolve crystals and destroy spoilage yeast. It is then filtered to remove impurities. Honeys are named from the flowers the nectar is collected from. 

Maple Syrup:

Maple syrup is made by boiling and evaporating the sap from maple trees. Maple syrups are graded by color and when in the season they are produced. You can read all about the maple syrup grading system here.

Agave Syrup:

Agave syrup is made from the sap of the agave plant, a succulent farmed in Mexico. Darker, stronger agave syrups are less processed, while lighter syrups are generally highly refined. 

souffles1.jpg

In a souffle, sugar is whipped with egg whites to create leavening and provide that quintessential souffle rise

slicedloafcanoncloseup1.jpg

the sugar in the bananas and the added sugar provide sweetness and tenderness, while also helped banana bread retain moisture

pavlovanewedit3.jpg

sugar stabilizes egg whites to create thick, glossy meringues

What function does sugar play in baked goods?

Sweeteners (sugars or syrups) do a lot of different jobs in a baked good outside of providing sweetness, so it’s important to consider the role that your sweetener is playing in each baked good to determine the best one for the job. 

  1. They sweeten. The main function of sugar or syrups is to provide a sweet flavor to a baked good. Some provide more sweetness than others. 

  2. They tenderize. Sugars get in the way of gluten formation, protein coagulation, and starch gelatinization, and any other structure building activity going on in your baked good. Sugars are also hygroscopic, which means that they attract and bond to water. Gluten, eggs, and starch all require liquid in order to build structure, so sugar, in its ability to suck up water, keeps water from reaching those other ingredients, thereby delaying structure building and increasing tenderness. Too much sugar, however, can cause too little structure to form, resulting in cookies that never rise or cakes that sink after being baked. 

  3. They help retain moisture. Remember how sugar is hygroscopic and really loves water? This is a good thing as it help retain moisture in baked goods, thereby increasing the shelf life. This is why your banana bread stays nice and moist a few days after baking, but a baguette gets hard and dries out overnight. 

  4. They provide flavor. Many sugars provide a signature brown color and caramelized flavor to baked goods. Caramelization happens when sugar is heated to a high temperature which is why even baked goods without dark molasses or brown sugar will still begin to brown and develop a slight caramel flavor. 

  5. They help leaven. This is such an important role of sugar that is often overlooked. When sugar crystals are creamed with butter at the beginning of a recipe, the granules are coated in fat and trap air. Air is important in a batter is one of the three main leavening agents in baked goods. Even when dry sugar is added to a batter without being creamed, there is a small amount of air added that will contribute to leavening later on. 

  6. They stabilize egg foams. When making a meringue or a whipped egg based cake like angel food, the addition of sugar stabilizes the egg whites, helping them to retain their shape and preventing weeping and collapse later on. 

  7. They provide food for yeast fermentation. Through yeast fermentation, sugars provide carbon dioxide gas for leavening doughs which is why most yeast-based recipes will call for a pinch of a sugar or a bit of honey to be added when activated yeast. 

Practical Applications

Sugar does so much more for our baked goods besides sweetening and understanding the characteristics and functions of each type will help in knowing when they can be changed or substituted in a recipe. When looking to change up your sugar, knowing the role that it is playing will be helpful. If I am making a cookie recipe that calls for granulated sugar to be creamed with butter, I know that sugar is providing leavening as well as sweetness. If I want the cookies to have a deeper, more caramelized flavor, I would substitute a brown sugar, not molasses because the crystallization is important to the final product. 

I hope that by understanding a little more about what sugar does in baking, you begin to feel more confident when it comes to experimenting and baking at home. As always, let me know if you have any questions!

allsweeteners7.jpg

Ingredient Spotlight: Flour

If you’ve ever taken a stroll down the baking aisle of your local grocery store, you’ve probably noticed there are close to a billion different types of flour (I might be exaggerating a smidge, but there are definitely a lot). You have also probably cooked from a recipe that has a measurement listed as “one cup of flour” and you’ve thought to yourself “What kind of flour am I supposed to use?” Or “Aren’t all flours the same?” Well, let’s answer those questions!

I have been wanting to write about this for a long time because understanding flour is empowering. Once you understand what exactly flour does in a recipe, what all the different types are, and you know how to read a bag of flour, the culinary world is your oyster, so to speak. You have the power not only to follow a recipe and understand it, but you have the freedom and know-how to change a recipe to suit your needs. You can begin to stretch your baking muscles and even create your own recipes. So take a peak at the flours in your pantry, pull up a chair, and let’s start from the beginning.

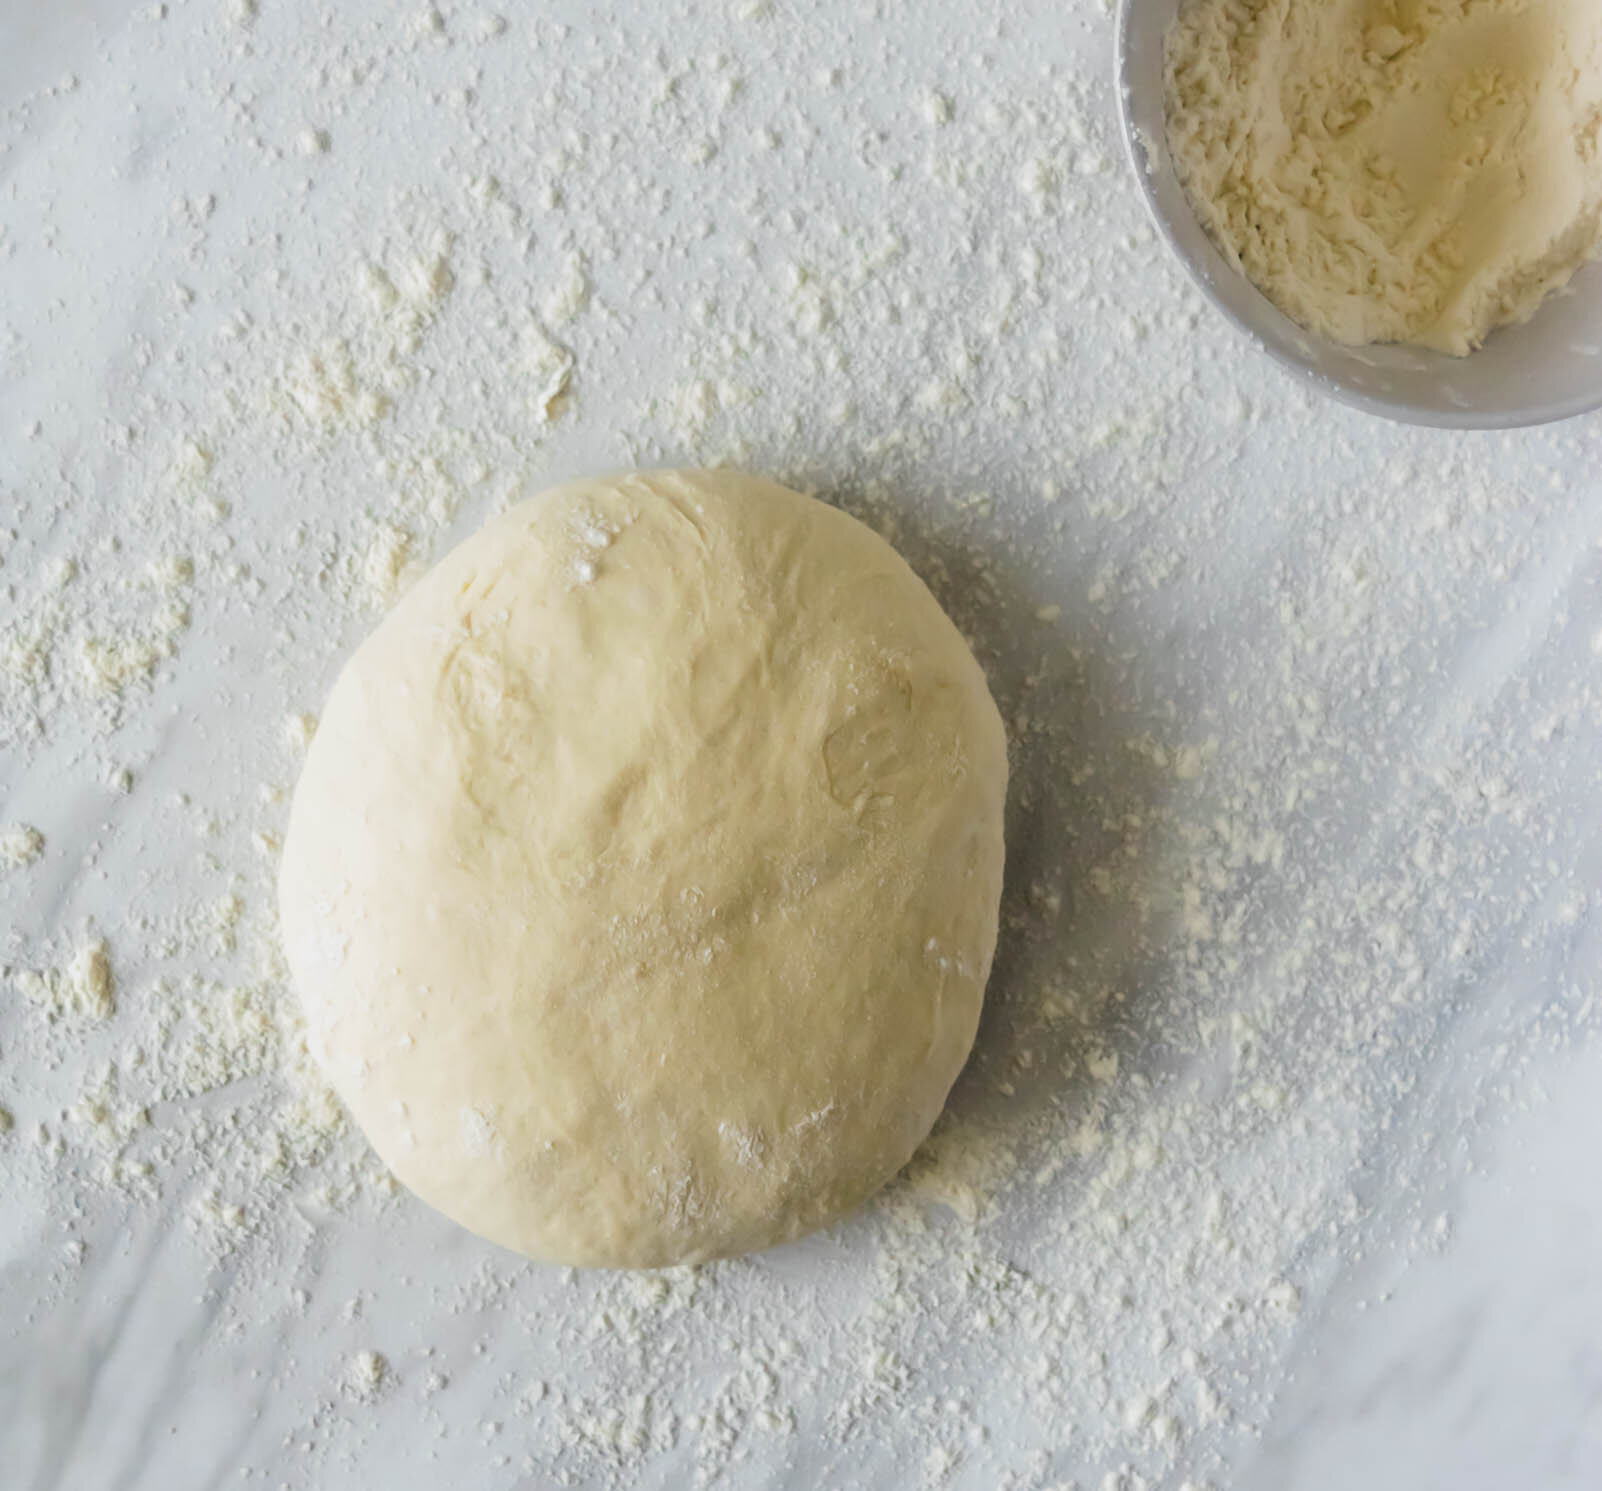
PizzaDough1.jpg

What is flour?

For the purpose of our little lesson here, we will only be talking about wheat flour, meaning flour that comes from the wheat plant (not necessarily whole wheat flour). We will leave those specialty flours like buckwheat, spelt, and kamut for a later discussion. The part of the wheat plant that gets milled into flour is called the wheat kernel, or wheat grain. A wheat kernel looks like a cute little oval seed and it is made up of three different parts: the bran, the germ, and the endosperm

-The bran is a protective layer that covers the outside of the wheat kernel and is usually darker in color than the endosperm. It is high in dietary fiber, which is why you will see “wheat bran” on the shelves of the grocery store that can be added to foods for a little fiber boost. The bran does not form gluten, adds a dark rustic appearance, and imparts a slightly nutty flavor. 

-The germ is the embryo of the wheat kernel and in the right conditions, can sprout into a new plant. It is full of nutrients, but also does not form gluten. 

-The endosperm is the largest part of the wheat kernel. It makes up around 80% of the kernel and is the whitest part of the kernel, mostly because of its high starch content. The starch in the endosperm is embedded in chunks of protein. There are two different proteins located in the endosperm, glutenin and gliadin, and when mixed with water, these proteins form the all-important gluten. 

A note on whole wheat flour:

All flour that comes from the wheat kernel is considered wheat flour. The most common white-colored flour found on the shelves of grocery stores and in white-flour products is made from milling just the endosperm of the wheat kernel.  Remember that the endosperm is mostly white in color due to its starch content, so it’s naturally a whiter flour. Whole Wheat flour is made using the entire wheat kernel (bran, germ, and endosperm), which provides extra nutrients, but doesn’t always work the same way in baking due to its lowered ability to form gluten (because of the addition of non-gluten forming bran and germ). The inclusion of the bran and germ also gives whole wheat flour its signature rusty color.

Whew. That feels like a lot of science, but let’s look practically at what exactly that all means when it comes to the role flour plays in baking. 

What role does flour play in baking?

Flour does a number of different jobs in baking, but its primary function is the development of gluten. If we go back to those proteins in the endosperm, you’ll remember that when glutenin and gliadine come in contact with water, they develop the ability to form gluten. When you apply hydration and friction (or mixing), these proteins form gluten strands that essentially bind your baked goods together and give them structure. (This is why if you are making a bread dough, you can stretch the dough to determine whether enough gluten has been developed). Flour also contains a significant amount of starch, which helps to absorb liquid in a dough or batter and which also provides sugar to aid in fermentation. 

PizzaDough5.jpg

What are the different types of flour and when do I use them?

Flour is made from six different types of wheat- hard red winter wheat, hard red spring wheat, hard white winter wheat, durum wheat, soft white winter wheat, and soft white spring wheat. These names refer to the types of wheat kernels and how they are grown and cultivated.

Hard wheat kernels are able to withstand harsh winters, have a greater amount of protein, and high water absorption. Soft wheat kernels are cultivated in less harsh winters, have lower amounts of protein, and have a higher proportion of starch. Basically, the flour source depends on your final product. If you are making a rustic sourdough bread where gluten structure is of upmost importance, you would use flour milled from a hard wheat. If you are making a cake, where tenderness and moisture are desired, you would use flour milled from a softer wheat. 

The 5 main types of flour

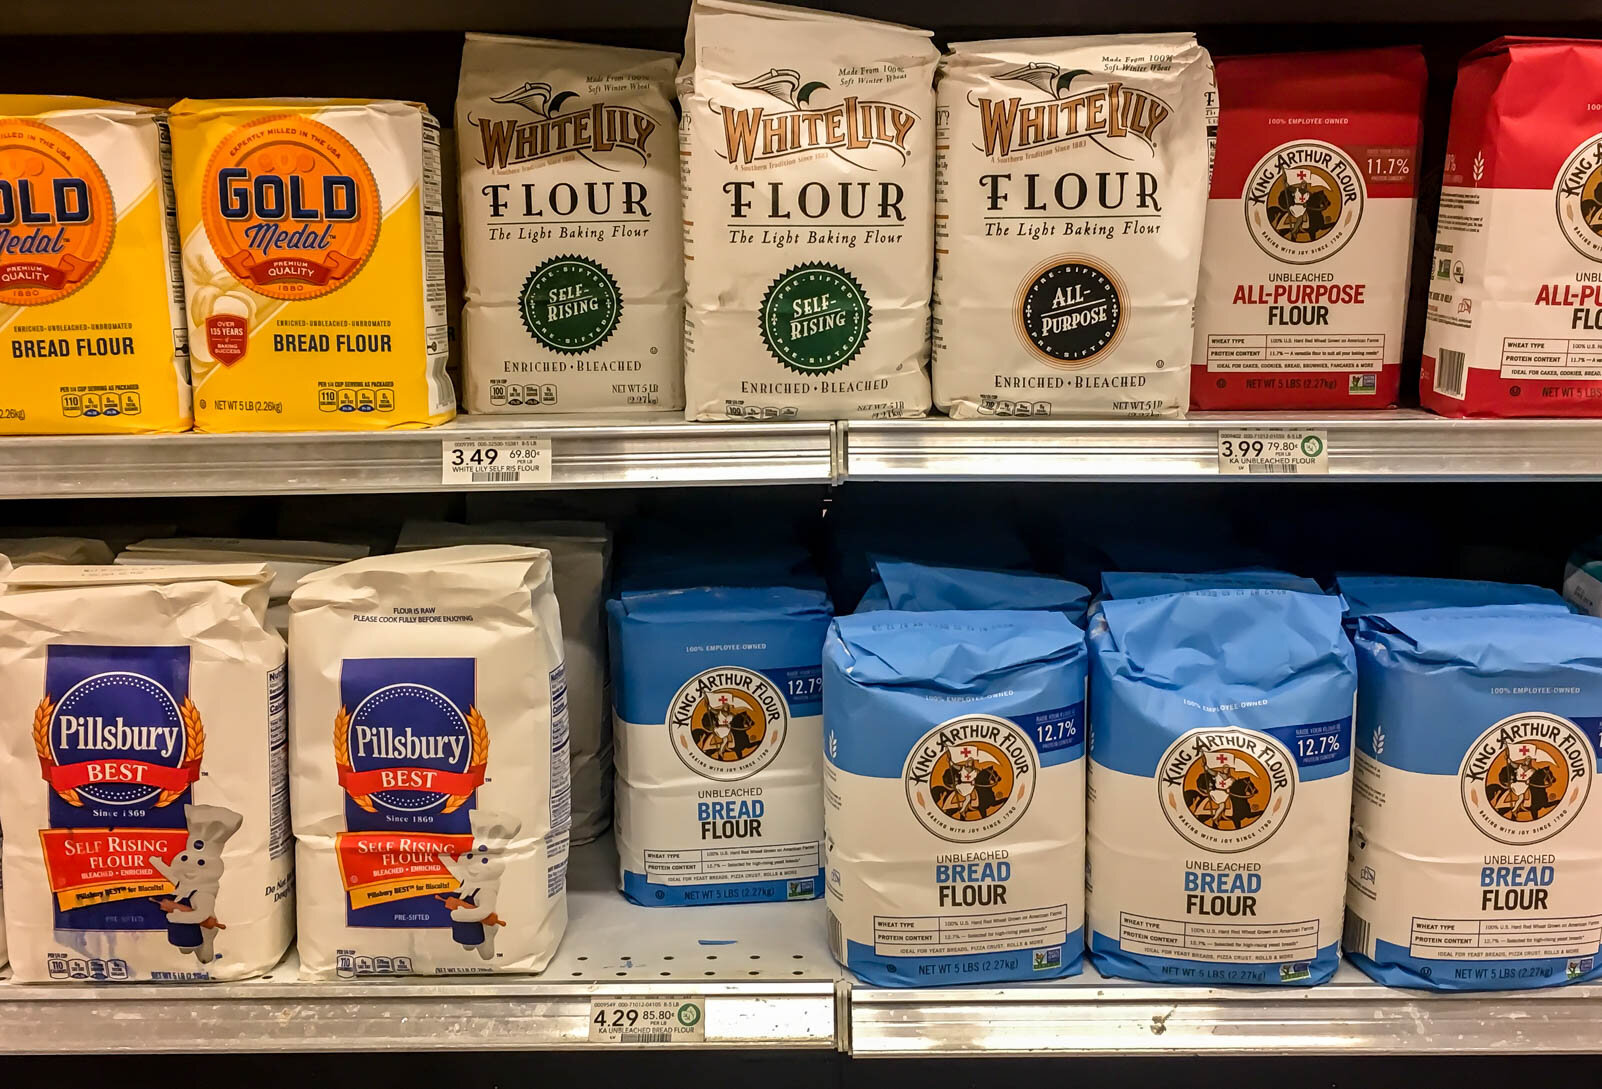
These are what you see in the aisles of grocery stores and the major difference between flour types is the fluctuation of protein levels. 

Higher protein content = higher gluten development ability. 

  1. High Gluten Flour: High gluten flour is often found in commercial bakeries and it is used primarily for bread making. You will have trouble finding this type of flour on the shelves of your local grocery store and would find it in a specialty store or online. Its protein levels typically range from 13%-15%.

  2. Bread Flour: Bread flour forms good quality gluten due to its higher protein levels and is milled from hard wheat kernels. You can usually find it bleached or unbleached and bread flour contains protein levels that range from 11%-13%.

  3. All-Purpose Flour: All-purpose flour is milled from a combination of hard and soft wheat and typically ranges from 9%-11% protein content. Because of it’s versatility and mid-range protein content, it’s the most common type of flour and can be used across a variety of applications.

  4. Pastry Flour: Pastry flour typically has a protein content of 7%-9% and is milled from soft wheat. It is not usually bleached and its low protein levels make it good for use in things like pie crusts, laminated pastries, and cookies.

  5. Cake Flour: Cake flour has the lowest protein levels of any of the various flour types coming in at 6%-8%. It is milled from soft wheat kernels, comes from the very heart of the endosperm, and has a higher starch content than any other flour. It is often bleached and is used in applications where tenderness is desired, like cakes.

What about self-rising flour? Self Rising Flour is a softer all-purpose flour that already has baking powder and salt added. I would only use self-rising flour if a recipe specifically calls for it. If you choose to substitute self-rising flour for all-purpose flour, you will need to adjust your baking powder and salt levels accordingly. 

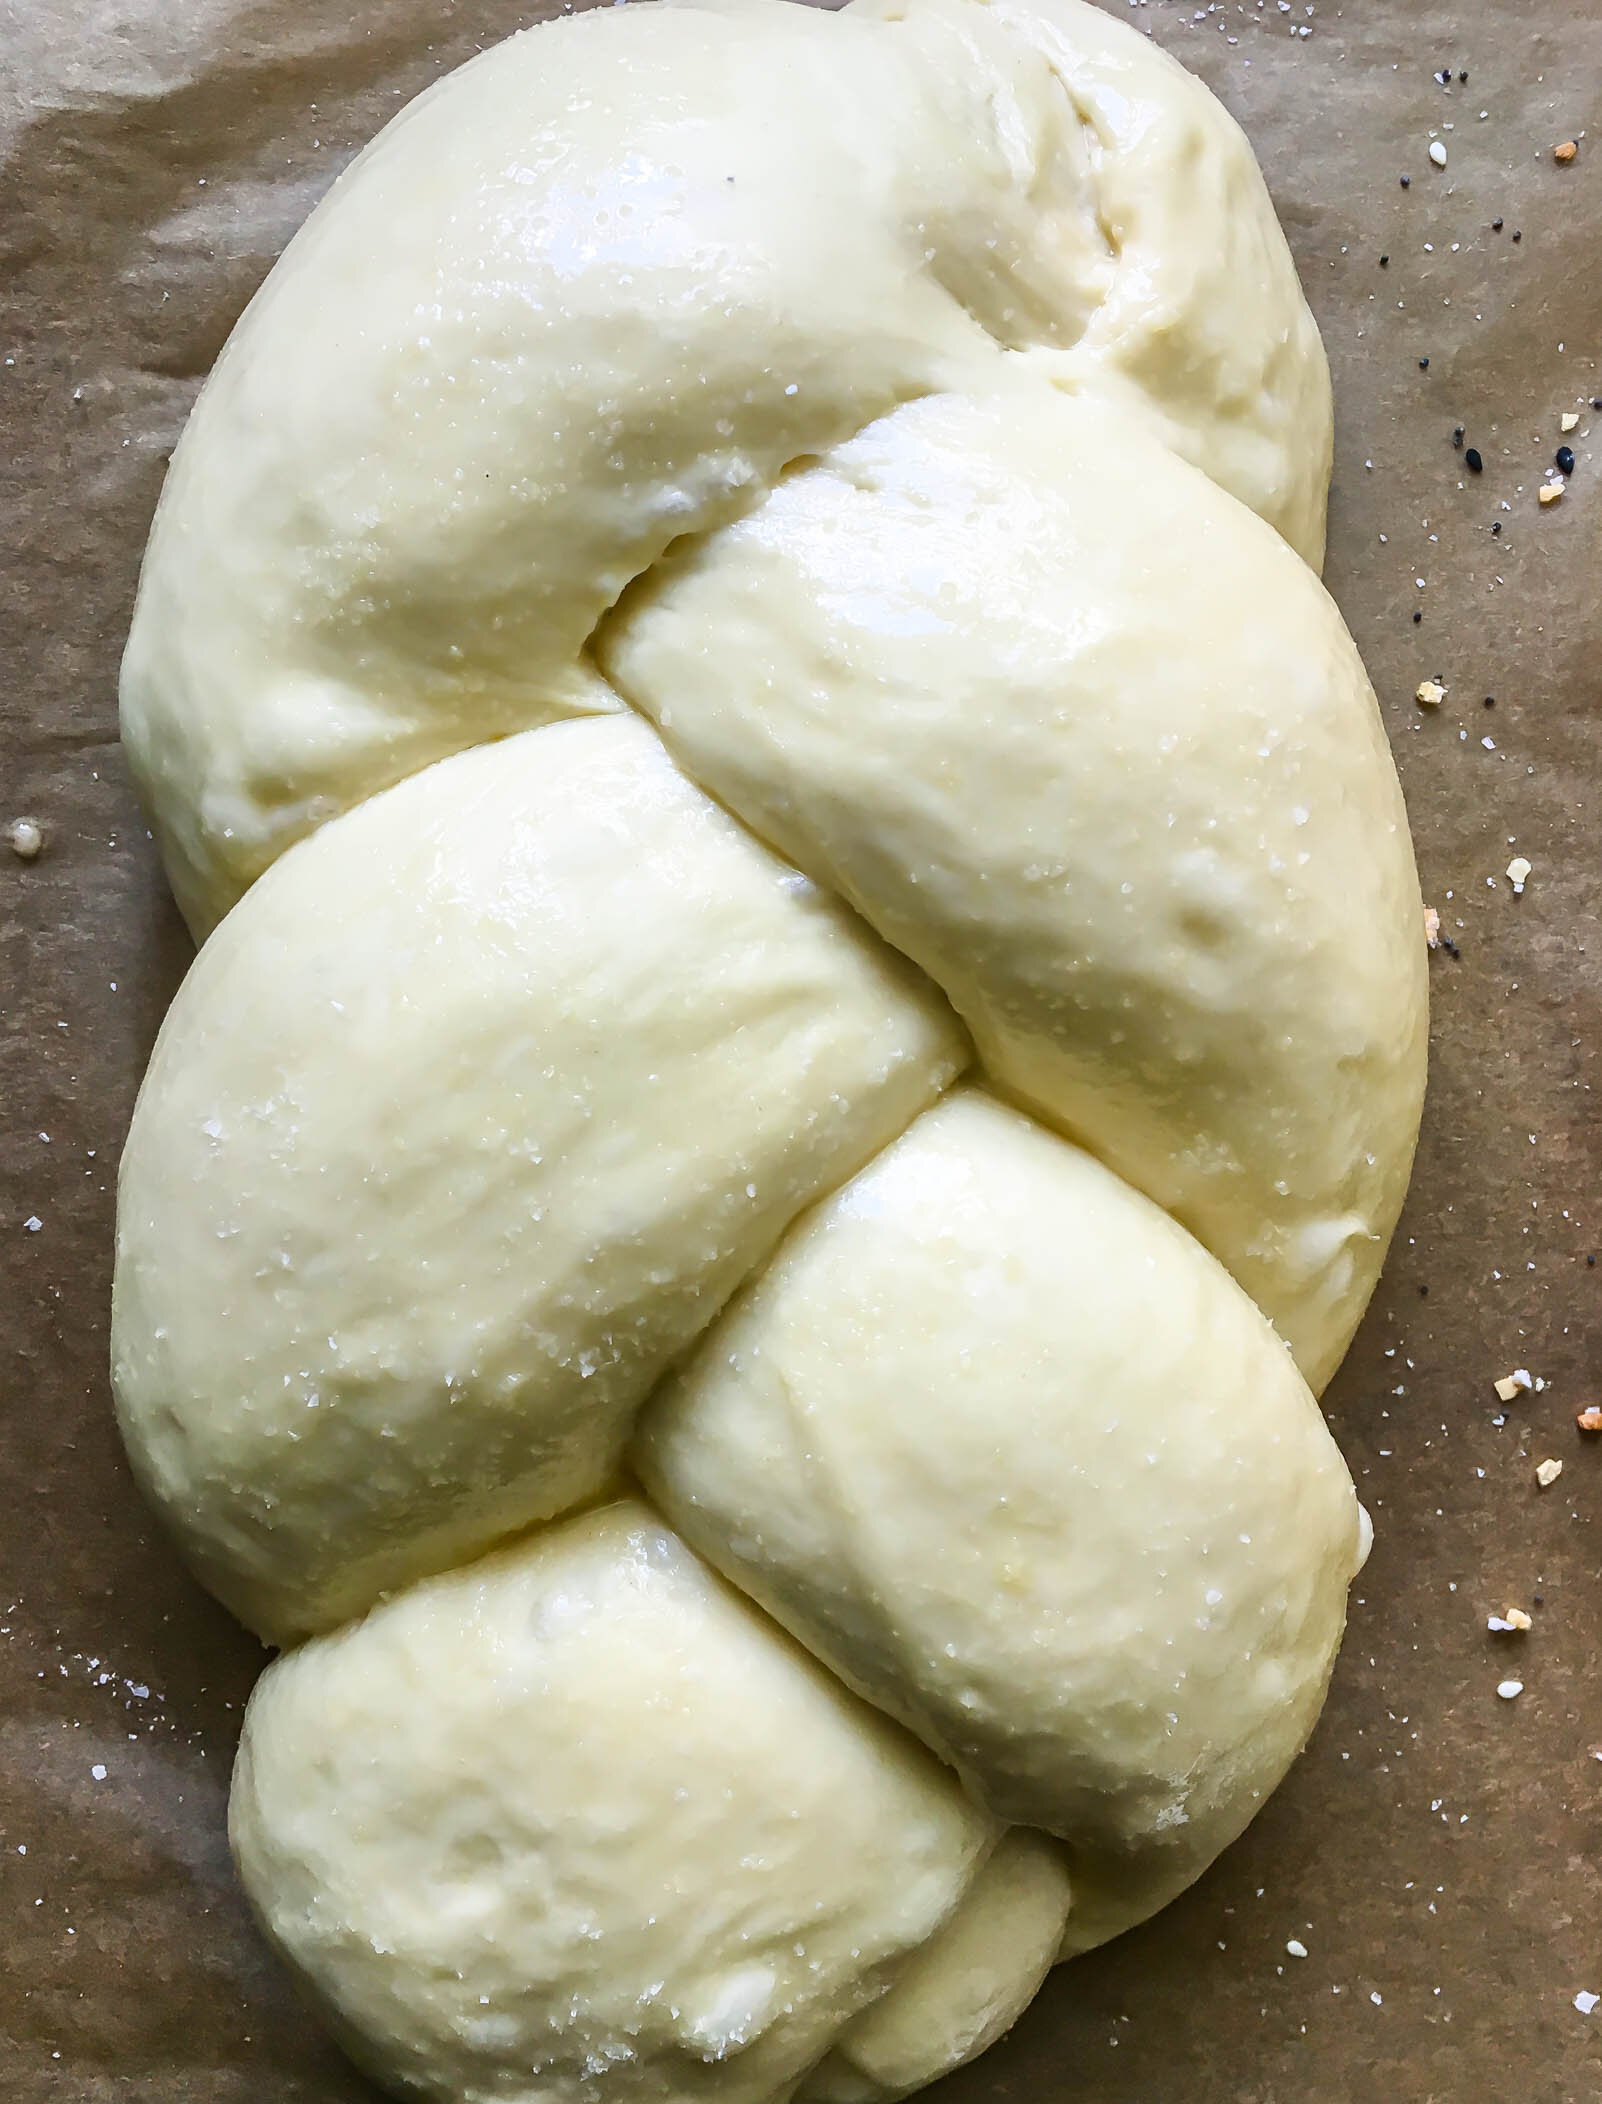
Challah.jpg


Reading the labels

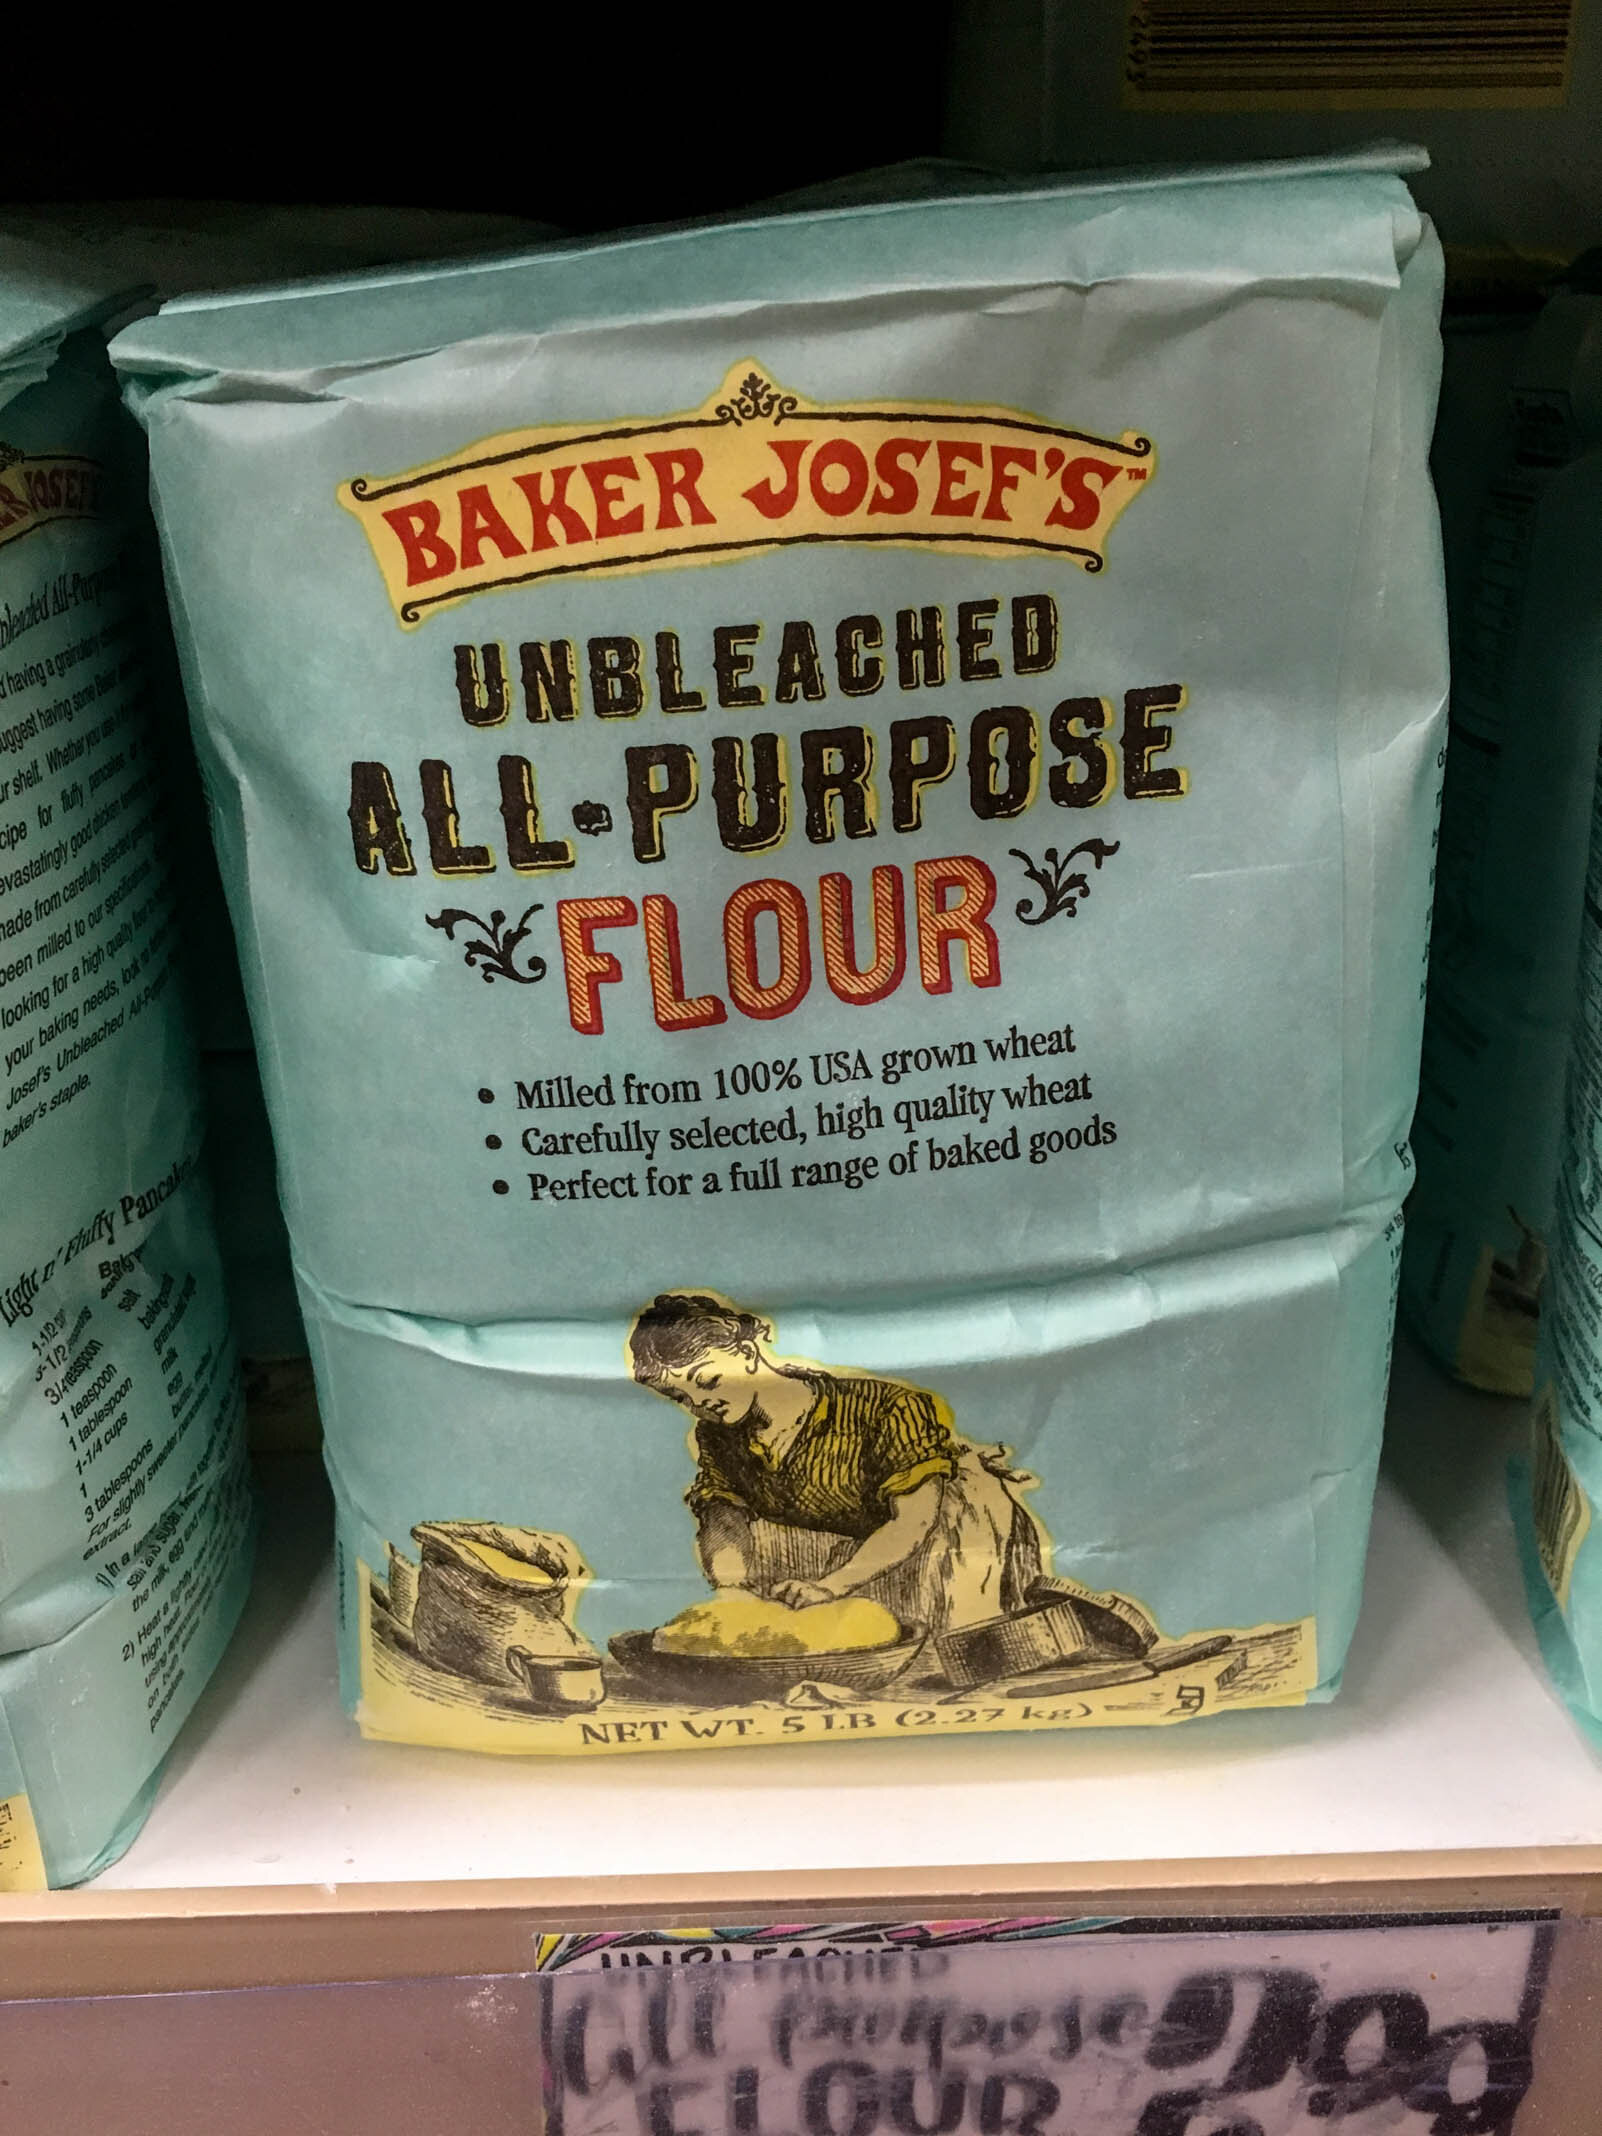
Two words show up a lot on flour labels: bleached and enriched. But what do they mean? And are they good or bad? 

Let’s talk about bleaching first.

Freshly milled flour is exposed to chlorine gas or benzoyl peroxide which makes the yellowish hued flour bright white in color. It also provides a better chance for air or carbon dioxide to become trapped in gluten webs which can result in better volume and texture. It also can diminish nutritional value and can interfere with bacteria development when working with wild yeast and starters. 

Enriched Flour

Enriched flour is flour that has been supplemented with conditioners to increase gluten production and improve overall baked good quality. Millers add potassium bromate, ascorbic acid, and diastase to the newly milled flour. A flour with potassium bromate added can also be called “bromated” and it’s a chemical that has been banned in Canada and Europe because it’s now considered carcinogenic. Ascorbic acid is added to improve and strengthen gluten, and diastase is an enzyme that is naturally occurring in flour, but is damaged during milling so it often gets added back in. 

Whether you decide to use bleached and enriched flour is a choice entirely up to you, as bleached and enriched flours are often cheaper. I personally like to use flours that are not bleached and enriched. Whatever you decide, it’s important to remember that bleaching and enriching may affect the quality of your baked goods and bleached flour should not be used when working with wild yeast applications, like sourdough. 

How do I pick the right flour? and some practical applications

If you are a casual baker, sticking to the occasional cookie and brownie, all-purpose flour will usually be sufficient for you. It’s nice to keep a box of cake flour around for the cake or cookie recipe you will stumble upon that calls for it. If you are dabbling in any sort of bread baking, I would also recommend keeping bread flour on hand. You will definitely need it. 

Find a brand or two that you like and stick with it. I prefer King Arthur Flour. They always produce high-quality flour, don’t bleach or enrich their products, and include the protein content right on the label so I always know what I’m working with. I also like White Lily flour, which has a bit lower protein levels, for things like cakes and biscuits. 

If you purchase whole wheat flour and don’t use it on a regular basis, store it in your freezer. Whole wheat flour contains the wheat germ, which contains fat and can go rancid if left in the pantry for long periods of time. 

To sift or not to sift? I strongly encourage sifting when you are using cake flour or cocoa powder. The high starch content in both of these causes little clumps that are hard to break up without sifting. Otherwise, you probably don’t need to go through all the trouble of sifting. Just take a fork and give your flour a quick fluff if it looks a little clumpy.

Consider your desired results when selecting a flour. Do you want strong gluten structure? Do you want a soft and tender crumb? Decide what role you need the flour to play in your recipe and choose accordingly. 

I know this was an exceptionally long read so congratulations for making it all the way through! I hope that you learned a few things that will help in your future baking endeavors. Please comment any other questions you may have.

PistachioRoseWhole.jpg