Tahini Oatmeal Ice Cream Sandwiches with Java Fudge Ice Cream

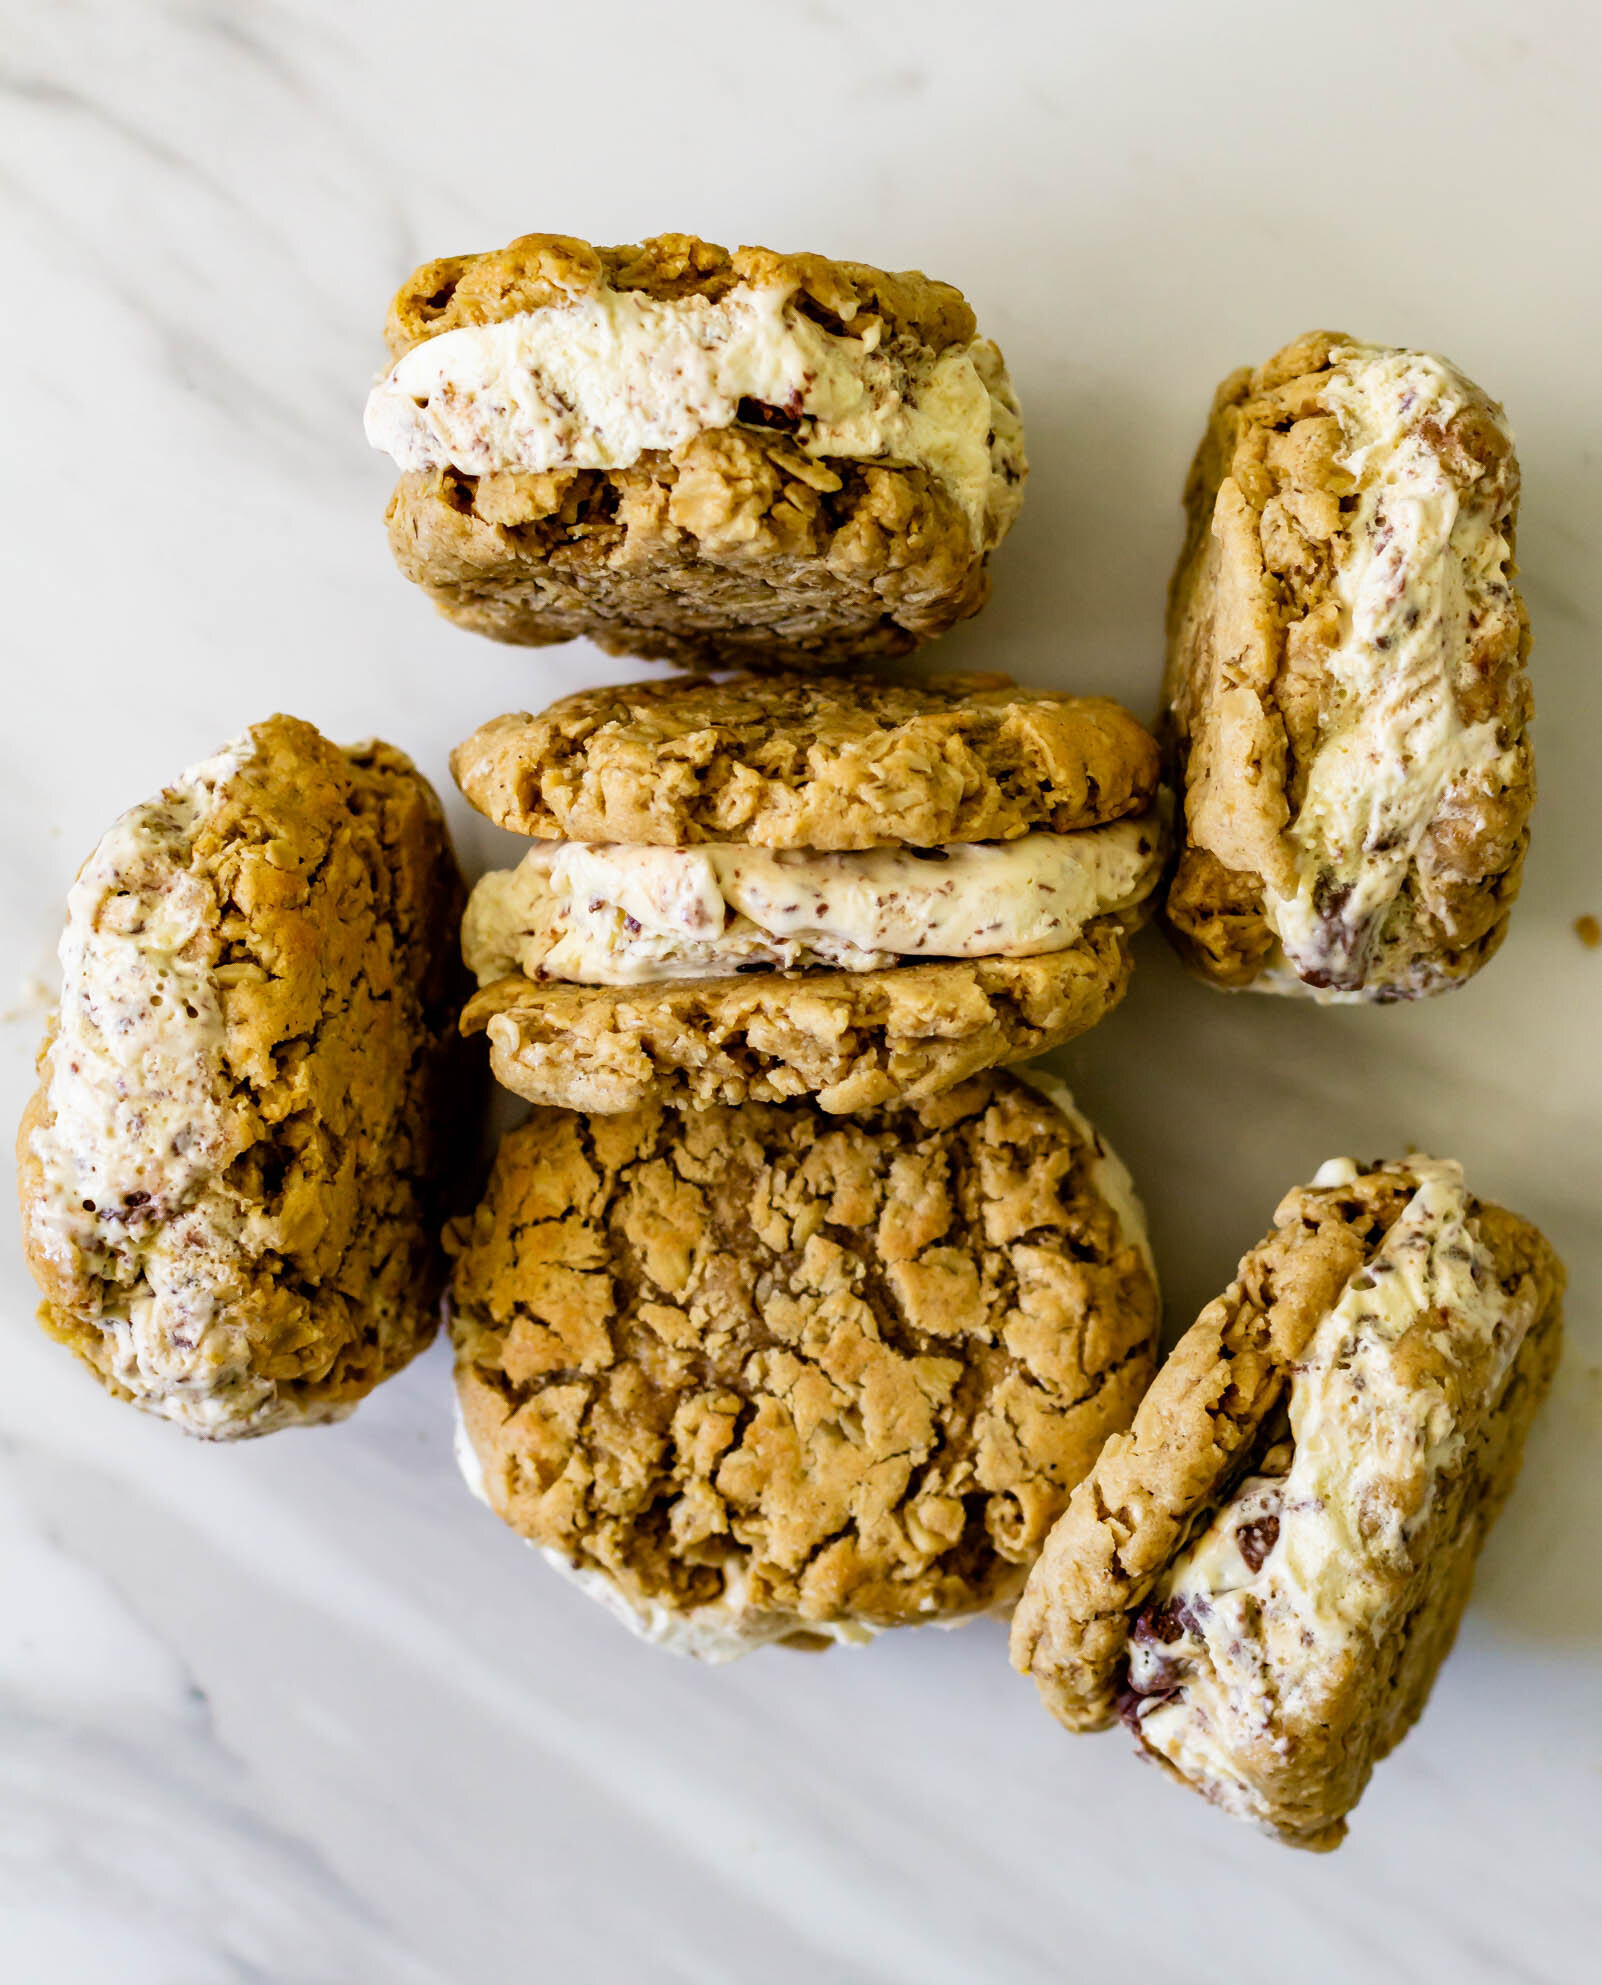
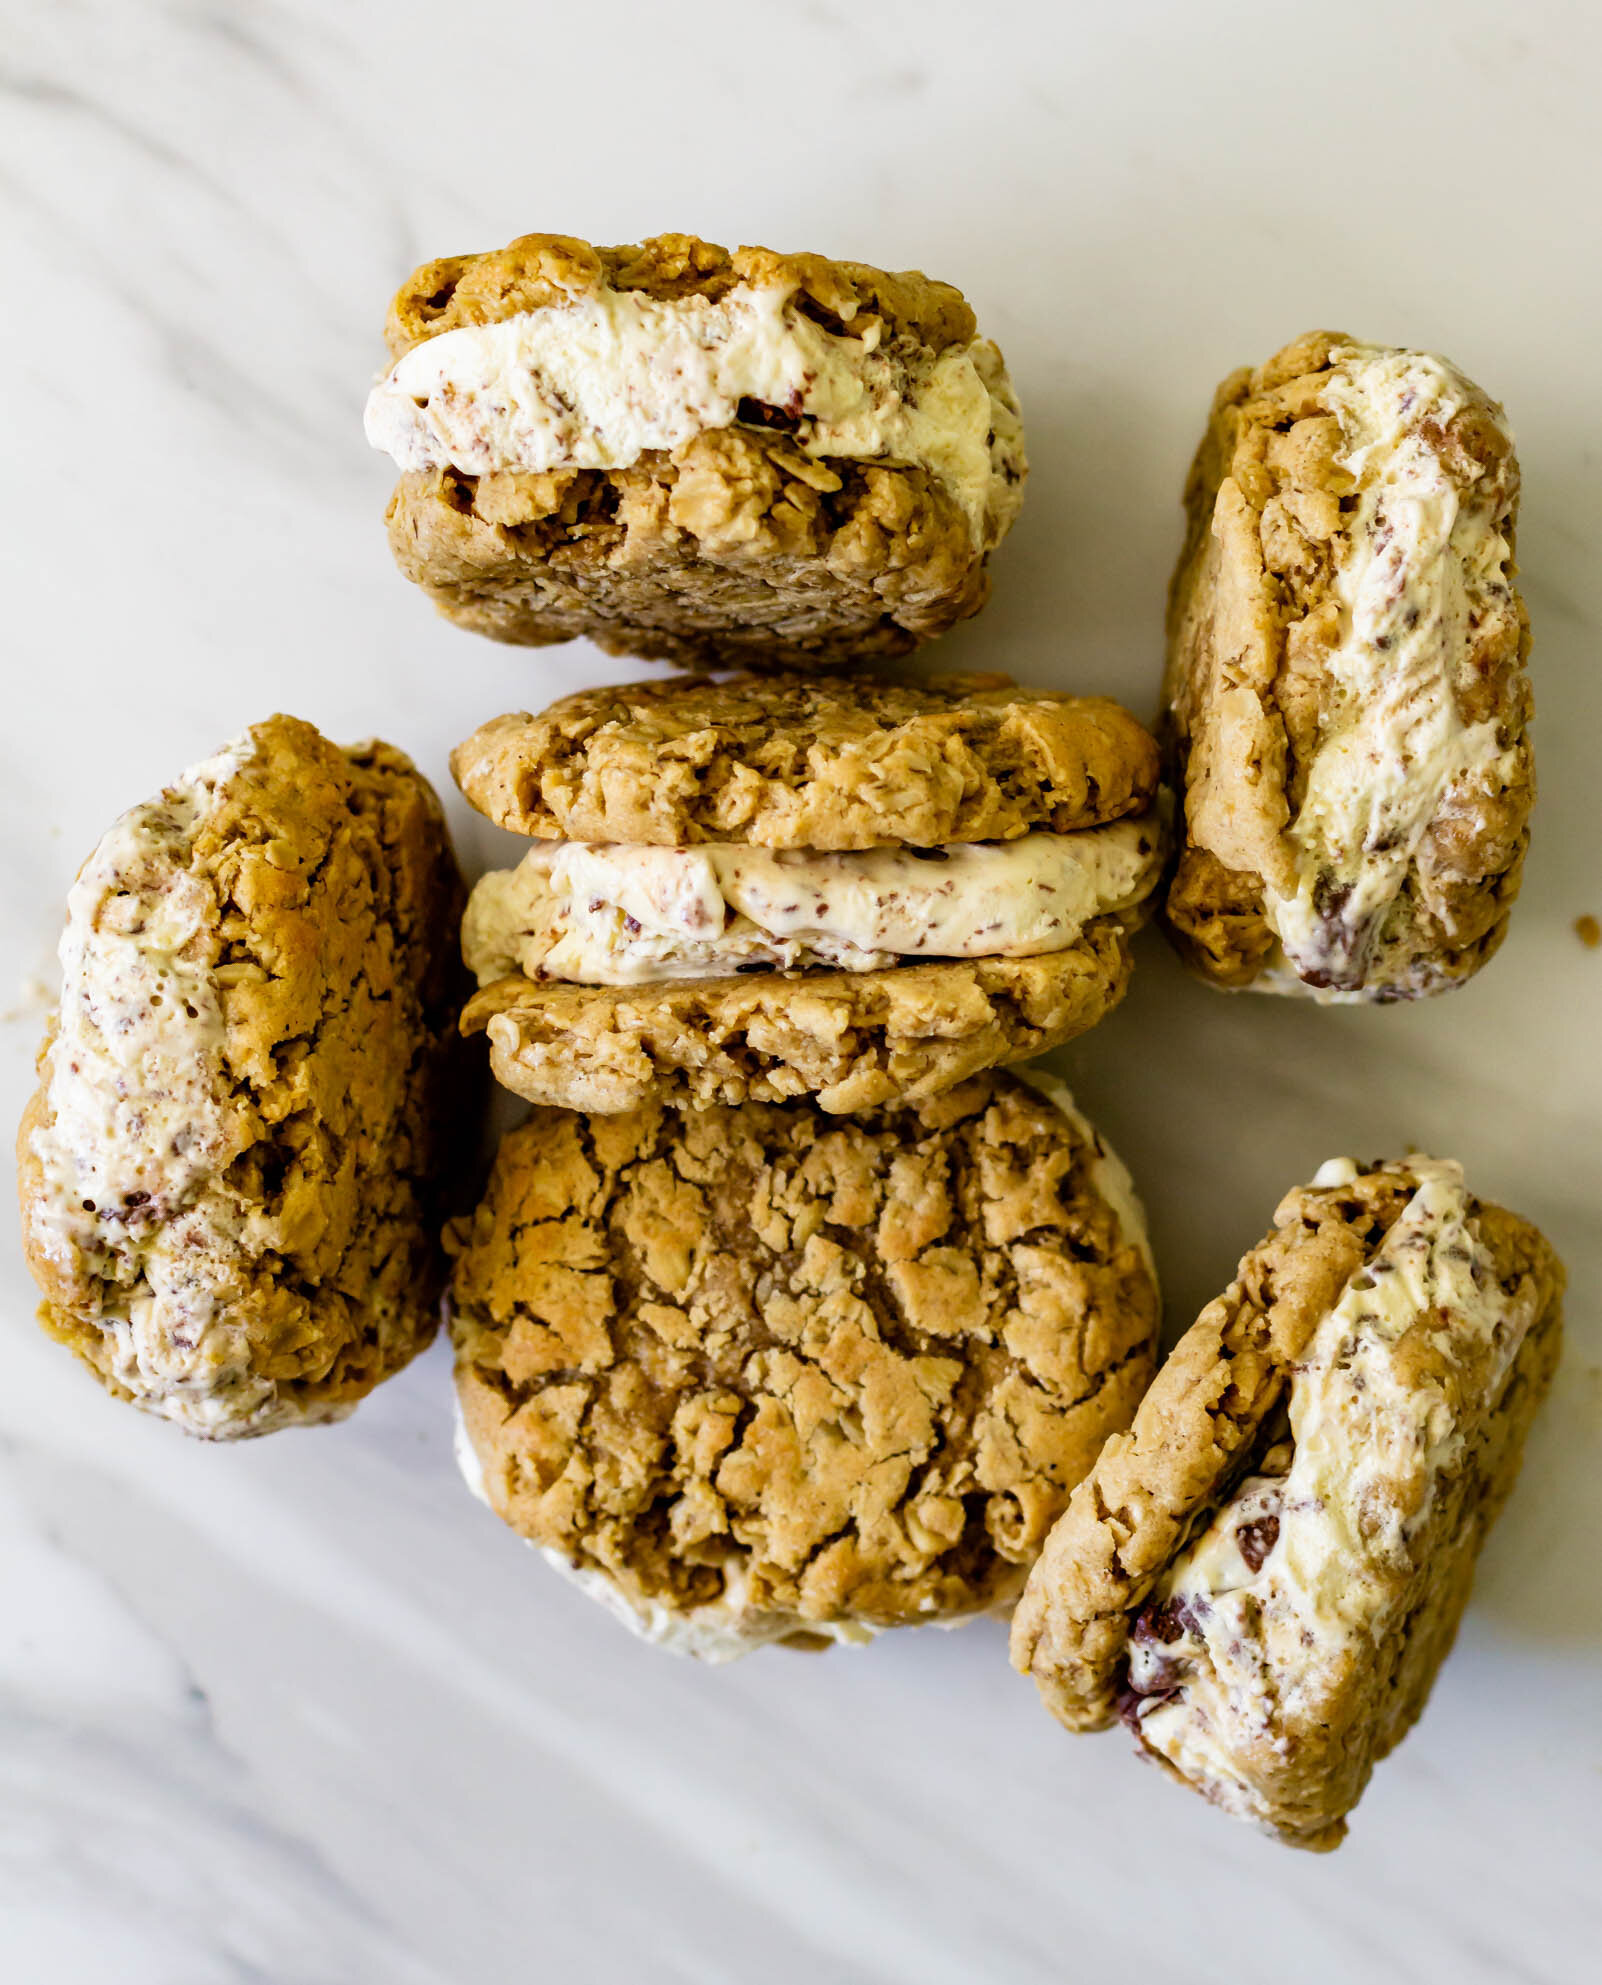
These ice cream sandwiches are an easy summer dessert recipe. A soft and chewy tahini oatmeal cookie filled with a simple, homemade no-churn coffee ice cream, rippled with fudge that can easily be made with or without an ice cream maker.

stacked6.jpg

This past weekend was my birthday and it was a perfect quarantine celebration. Instead of celebrating one day, I prolonged the festivities throughout the entire weekend, simply because I wanted to and what a great decision that was. Friday morning started with a bang when I released my very first e-book! (If you haven’t gotten your copy yet, what are you waiting for? Get it here!) I also finished up a little recipe testing and got some not-as-fun computer work out of the way in order to clear my weekend schedule. A friend and I picked up Shake Shack and picnicked in a pretty park, and Friday night, we threw a big blanket on our living room floor, stacked pillows around us, and transformed the room into the perfect picnic fort for the weekend. I made a bunch of random vegetables, we drank some funky natural wine, had a tiny dance party, and finished season 2 of Dead to Me. Perfect birthday evening.

Saturday morning, we made breakfast sandwiches with kale and focaccia and puttered around the house. I finished photographing a few things, we dropped cookies off to some nurse friends, picked up tacos and made a giant bowl of guacamole and snacked all afternoon. Also, all day long, I walked Martin through the whole sourdough making process, so we took little breaks to fold dough throughout the day. We made pizzas and drank a great bottle of Tempranillo and watched Center Stage. Sunday morning started with a breakfast frittata filled with all of the weekend’s leftover veggies, the baking off of our sourdough loaves, church online, and big lattes. Then we packed leftover pizza into aluminum foil satchels, tucked them in a backpack and went for a hike. We explored a little nature preserve about 45 minutes from our house, found five ripe blackberries, a bunch of wild fennel, and caught a couple of glimpses of gopher tortoises. We ate our picnic looking out over the water and it was just magical and really so perfect to be out of the house and somewhere that wasn’t a grocery store. Sunday afternoon, I drank pink wine in a bathrobe and took a nap and if that’s not living your birthday to the fullest, I really don’t know what is. We made easy pantry pasta for dinner and wistfully cleaned up our living room fort and I’m already counting down until next year. (I also realized that this entire birthday weekend recollection is essentially a diary of what I ate all weekend, but this is a food blog so I guess that’s allowed.)

how to make homemade ice cream sandwiches

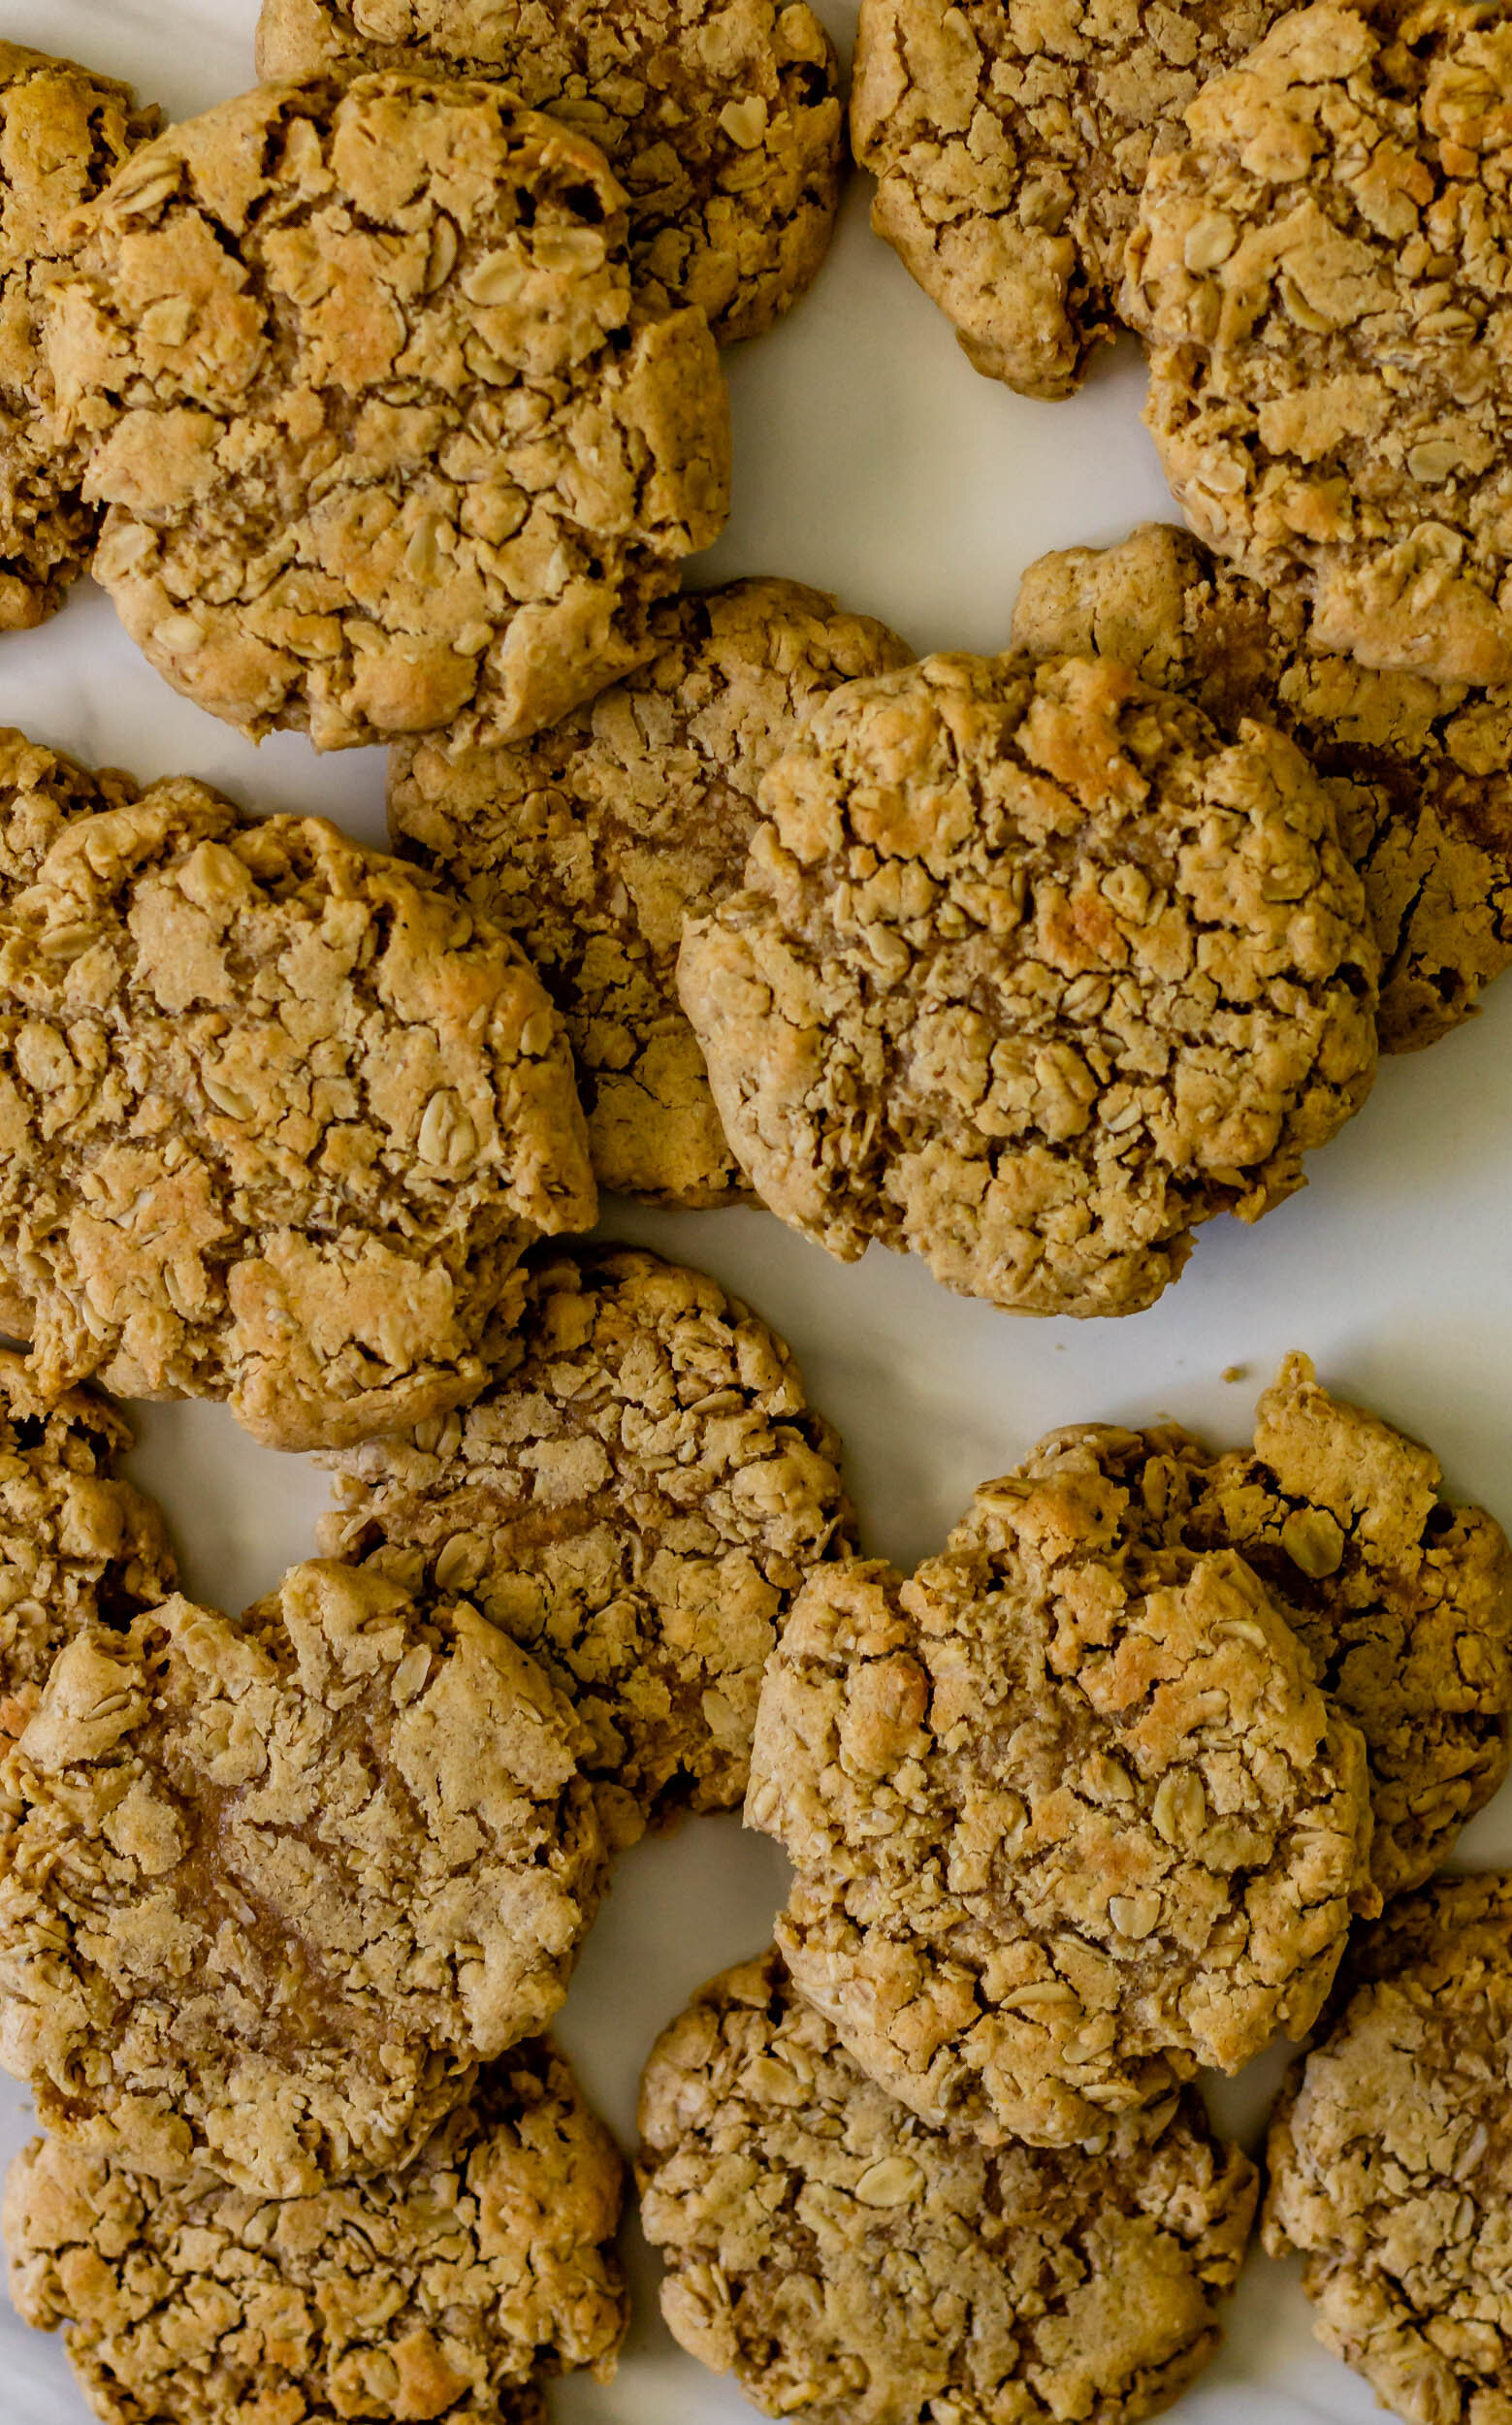
So let’s talk about ice cream sandwiches. It’s Memorial Day weekend, which is the unofficial start of summer and even if we aren’t partaking in giant backyard BBQs right now, it would be wrong for us to keep ourselves from ice cream sandwiches. Often, homemade ice cream sandwiches made with cookies get so hard in the freezer that you almost break your jaw when trying to bite into them and that’s really not a fun way to eat ice cream. So for these sandwiches, I wanted to keep our jaws intact and I made a tahini oatmeal cookie that would resemble the soft cookie of an oatmeal cream pie. These hold up really nicely, just watch how long you bake them. I would recommend under-baking them slightly in order to keep them on the softer side.

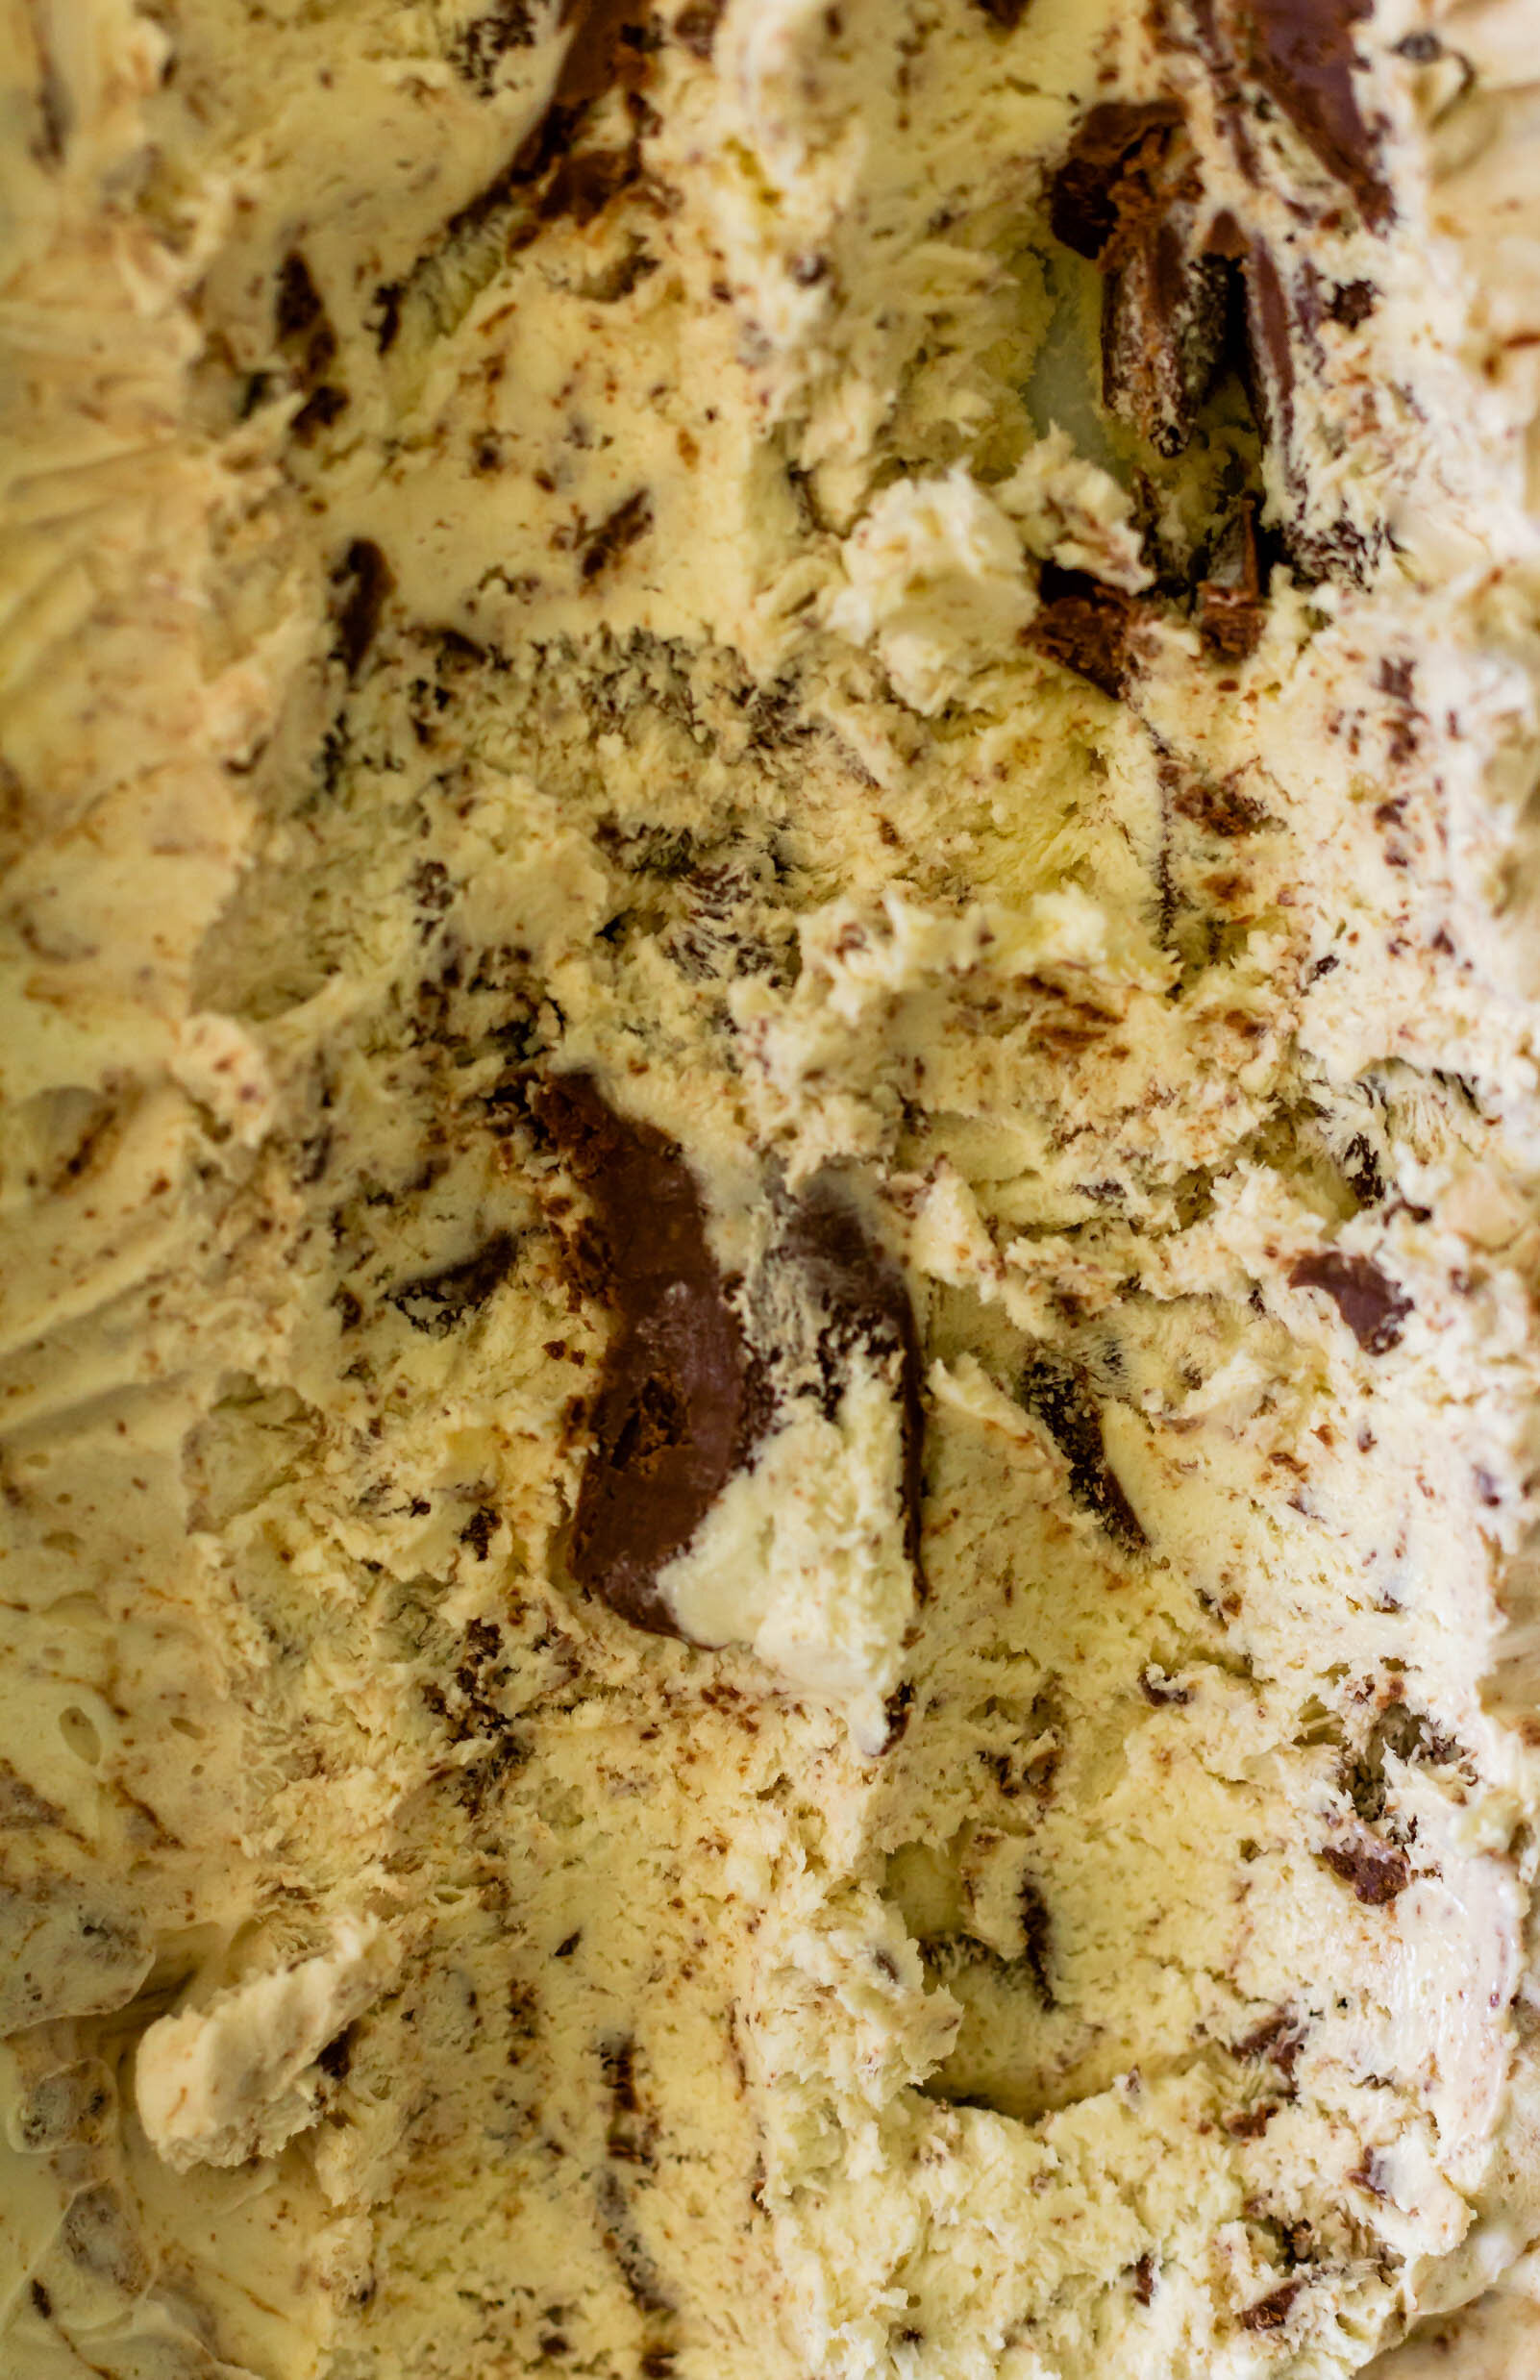
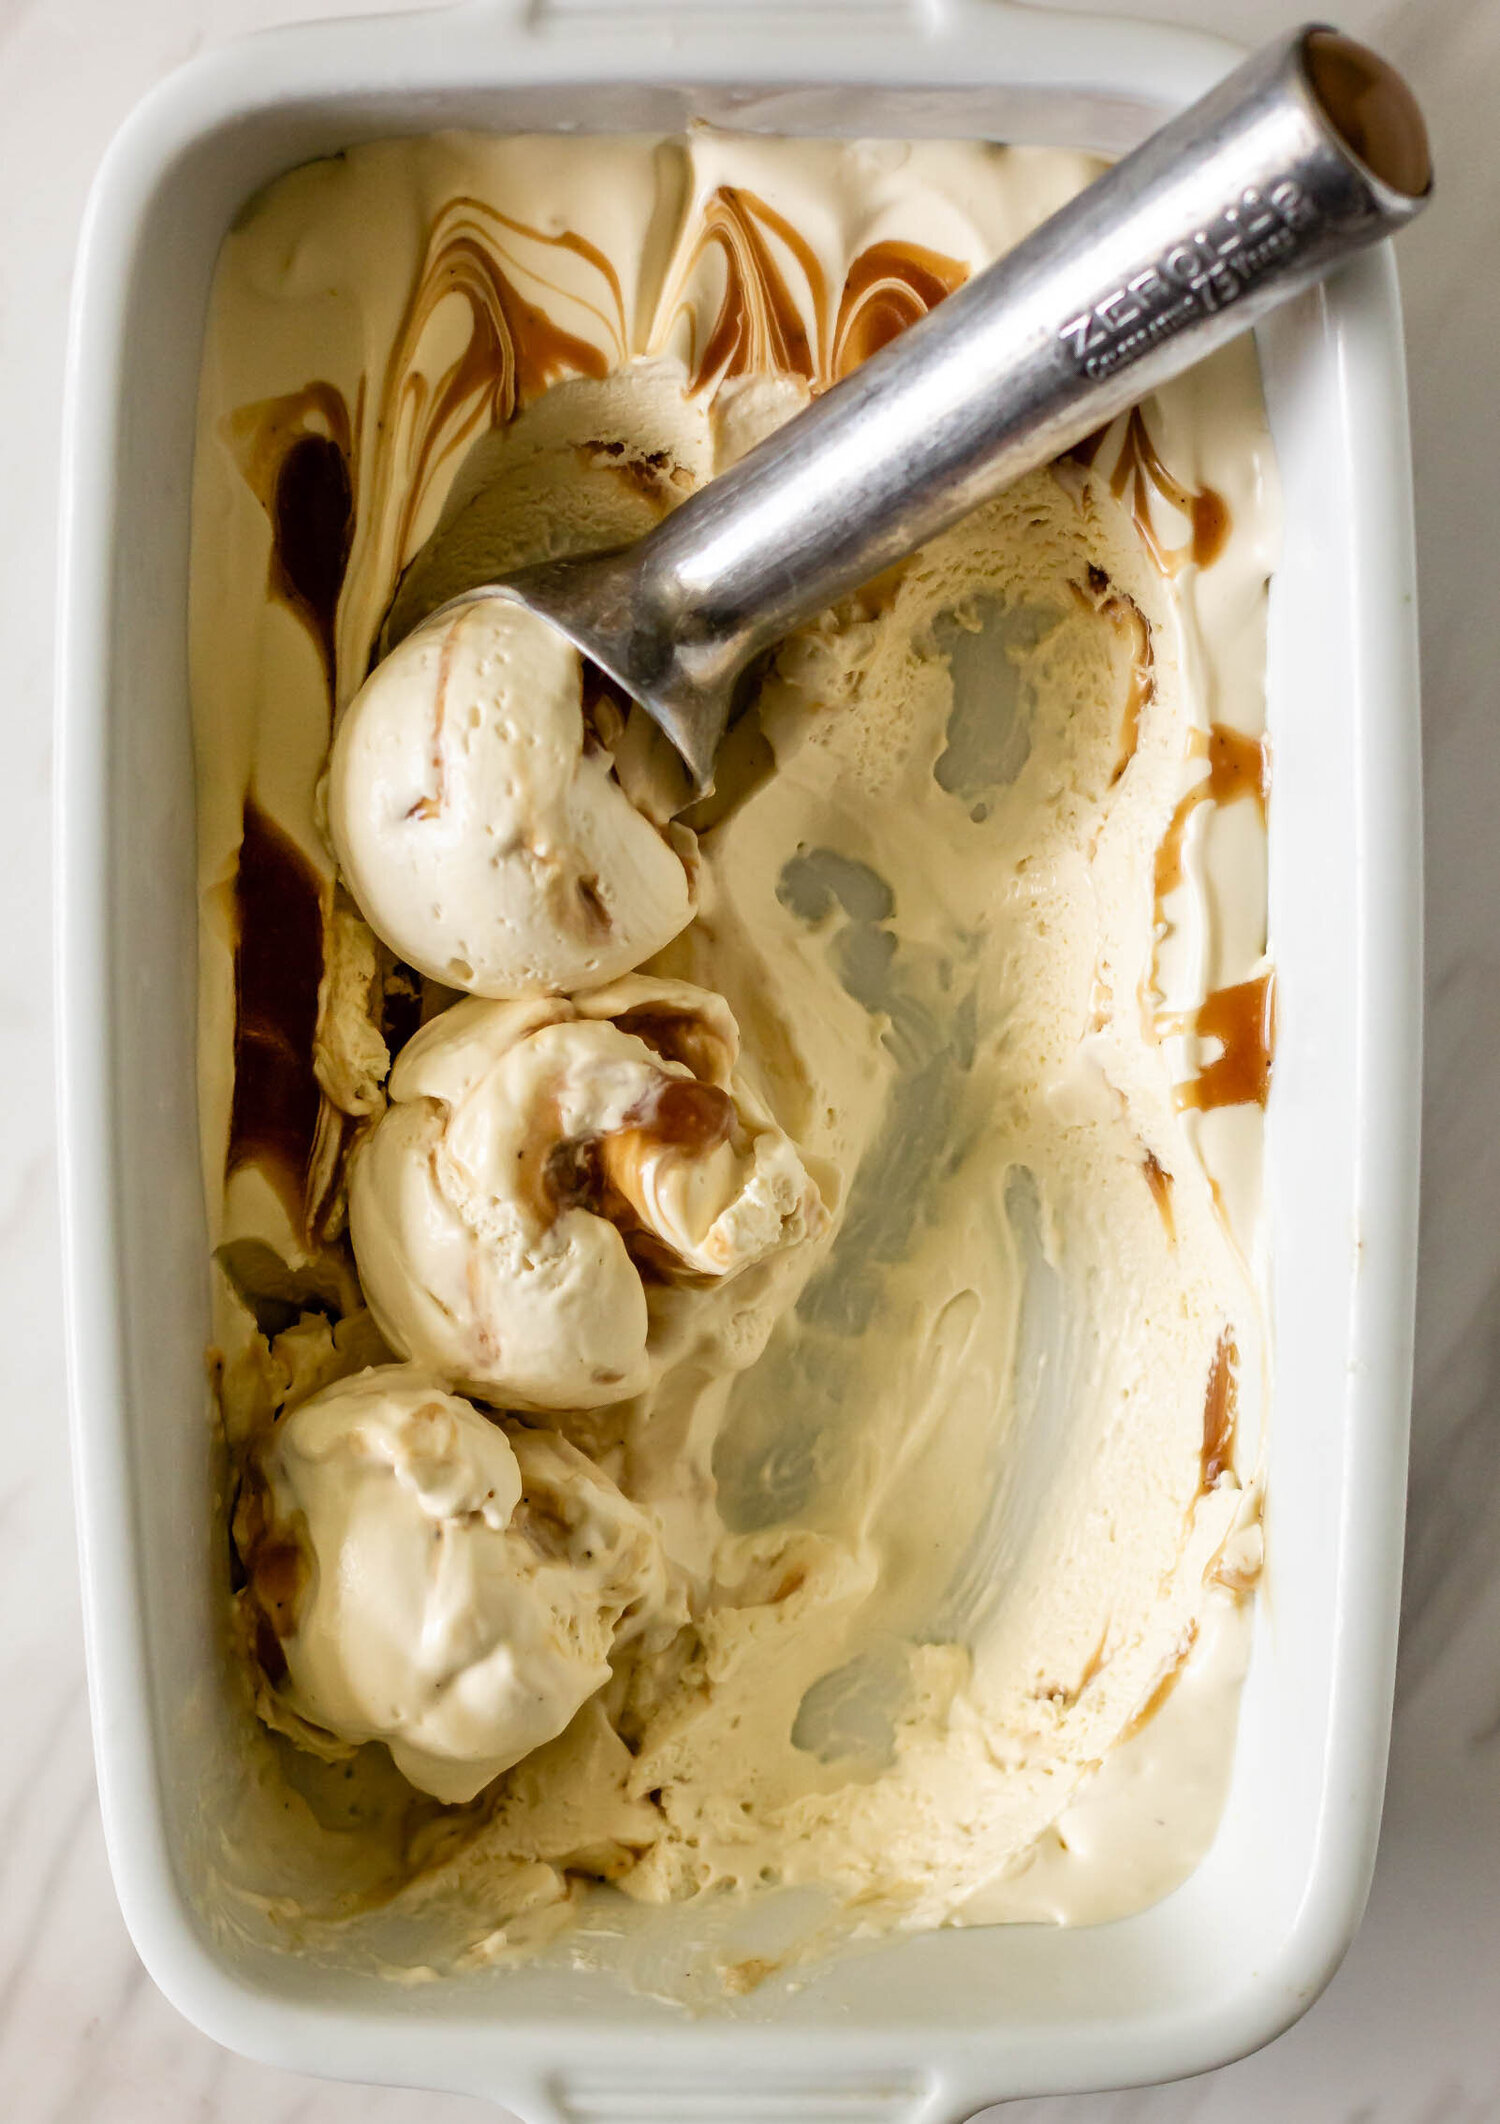
I’m very much on an ice cream kick. Just prepare yourself because there are quite a few ice cream recipes coming at ya this summer, I just can’t help myself. This ice cream doesn’t need an ice cream maker. You just steep coffee beans into heavy cream, strain them out, and use your cream to make a creme anglaise. The fudge ripple is a simple chocolate ganache folded in after your anglaise is chilled and whipped and then the whole thing is frozen. If you’re not into making your own ice cream (I implore you to give it a try), you can definitely just buy your favorite from the store for these ice cream sandwiches too.
stacked11.jpg
Yield: makes 9 large ice cream sandwiches
Author: Anna Ramiz
Tahini Oatmeal Ice Cream Sandwiches with Java Fudge Ice Cream

Tahini Oatmeal Ice Cream Sandwiches with Java Fudge Ice Cream

Prep time: 1 HourCook time: 30 MinInactive time: 30 HourTotal time: 31 H & 30 M
These ice cream sandwiches are an easy summer dessert recipe. A soft and chewy tahini oatmeal cookie filled with a simple, homemade, no-churn coffee ice cream, rippled with fudge, that can easily be made with or without an ice cream maker.

Ingredients

for the java fudge ice cream base
  • 1 3/4 cup (400 g) heavy cream
  • 2 tbsp (10 g) whole coffee beans
  • 3/4 cup (170 g) granulated sugar
  • 4 egg yolks
  • pinch of salt
  • 2 tsp vanilla extract
for the fudge ripple
  • 2.5 oz (70 g) dark chocolate, chopped
  • 2.5 oz (70 g) unsalted butter
  • 2 oz (57 g) heavy cream
  • 2 tsp kaluha, optional
for the tahini oatmeal cookies
  • 1 stick (4 oz, 113 g) unsalted butter, at room temperature
  • 1/2 cup (125 g) tahini, well-stirred
  • 1 cup (220 g) brown sugar
  • 1/2 cup (110 g) granulated sugar
  • 1 tbsp vanilla extract
  • 1 egg
  • 1 egg yolk
  • 1 3/4 cup (240 g) all purpose flour
  • 1 tsp baking powder
  • 1 tsp baking soda
  • 1 tsp ground cinnamon
  • 1/2 tsp ground cardamom
  • 1 tsp kosher salt
  • 3 cups (300 g) rolled oats

Instructions

to make the ice cream
  1. Make the fudge ripple: Combine chocolate, butter, and heavy cream in a bowl set over a double boiler. Cook, stirring frequently, until everything is melted. Remove from heat and whisk vigorously until smooth, glossy, and completely emulsified and then whisk one minute longer. Whisk in the Kaluha if using. Place a piece of plastic wrap directly on the surface of the chocolate to prevent a skin and let rest at room temperature for 3-6 hours, until cooled and thickened. The chocolate should be thick and scoop-able, but not hard.
  2. Make the ice cream base: Combine heavy cream and coffee beans in a medium saucepan and heat over medium-low heat until cream is beginning to bubble around the edges of the pan and is hot to the touch. Remove from heat, cover tightly and let steep for 10 minutes. Strain out coffee beans, return cream to saucepan, and bring back to a simmer.
  3. While the cream is heating, whisk together salt, vanilla, egg yolks, and sugar in a large bowl. When the cream is hot, slowly stream it into the egg mixture, whisking continually the whole time. Transfer the entire mixture back into the saucepan and return to heat.
  4. Cook, stirring continually with a wooden spoon, over low-medium heat until anglaise sauce is thickened, but do not bring to a boil. You can test if the sauce is ready by wiping your finger through the sauce along the back of the wooden spoon. If the line your finger creates holds, the sauce is ready. If it drips, continue cooking.
  5. When the sauce is sufficiently thickened, strain into a large mixing bowl, cover, and refrigerate.
  6. Whipping and chilling: When the anglaise sauce is cold, transfer to a mixer and begin whipping. Whip until soft peaks form.
  7. Assembly: Gently fold chocolate ganache into the whipped anglaise until just combined. There should be some thick streaks of chocolate, as well as small flakes throughout. Transfer the entire mixture to an 8x8 pan or loaf pan. Press plastic wrap directly on the surface of the ice cream and then wrap the entire pan tightly. Freeze overnight, or for 12-18 hours.
to make the cookies
  1. In a large bowl, combine flour, baking powder, baking soda, cinnamon, cardamom, and salt. Whisk together and set aside.
  2. In the bowl of a stand mixer fitted with the paddle attachment, combine butter and tahini. Beat for 30 seconds, until combined and scrape down the sides of the bowl.
  3. Add sugar and brown sugar, and cream until thick and sandy, about 1-2 minutes.
  4. Add the egg, egg yolk, and vanilla extract and mix on medium speed until combined, scraping down the sides of the bowl as needed.
  5. With the mixer on low speed, gradually add the flour mixture, mixing just until no flour streaks remain, followed by the oats.
  6. Remove the bowl from the stand mixer and fold with a rubber spatula a few times to ensure that everything is well mixed. Cover and chill for 30 minutes.
  7. Scoop dough into 2 tablespoon sized balls and place on a parchment lined cookie sheet. Cover with plastic wrap and return to the refrigerator for at least another 30 minutes, and up to 24 hours.
  8. When you’re ready to bake, preheat the oven to 350°F. Bake cookies for 8 minutes and then flatten them with a spatula. Return to oven for 2-4 more minutes, until edges are golden brown and the centers are set. Let cool completely on the pan.
to assemble the ice cream sandwiches
  1. Sandwich one scoop of ice cream between two cookies, and wrap each sandwich tightly in plastic wrap. Return to the freezer for at least 6 hours, to allow the ice cream to refreeze before eating.
  2. You can store the wrapped ice cream sandwiches in a zipper bag in the freezer for about two weeks. Martin has found that if you take the ice cream sandwich out of the freezer and let it sit in the refrigerator for 20-30 minutes before you eat it, it’s the perfect and softness for eating.

Notes:

I recommend slightly under-baking the cookies to ensure that they stay soft and chewy after freezing.

Did you make this recipe?
Tag @gatheredatmytable on instagram and hashtag it #gatheredatmytable
Created using The Recipes Generator

Chocolate Tahini Brioche Babka

You’ve probably heard about Marie Antoinette and her infamous “let them eat cake” phrase. As the story goes, Marie Antoinette, who was the Queen of France during the French Revolution, was informed that her poorer subjects were starving and had no bread to eat and she callously replied with the French phrase “Qu’ils mangent de la brioche!” which is more correctly translated to “Let them eat brioche!” This response didn’t work out so well for Marie, as it was used to illustrate her lack of understanding of the plight of the everyday man and she wasn’t very well-liked by her constituents. Turns out, historians haven’t actually been able to confirm that Marie Antoinette actually spoke those words (you can read more here if you’re a history nerd like me), but regardless, the phrase stuck.

But what exactly is brioche and how does it differ from other types of breads? Brioche falls into the “enriched dough” category because in addition to the basics (flour, water, yeast, salt) it contains a much higher fat content through the use of eggs, milk, and lots of butter (traditionally about 60 percent of the weight of the flour). Brioche is typically baked in loaves or cute little rolls, but it’s also a great base dough and can be filled or twirled any way that you like. There are two important things to remember when making brioche. First, the temperature of the butter matters. Butter should be soft and pliable, and around the same temperature as the dough. When you add it piece by piece, it will work into the dough and if the butter is too cold you will be left with chunks flaked throughout your brioche. If the butter is too warm, though, it will begin to melt and seep out of the dough. Neither of these are great for your final product. Second, the high fat content gets in the way of gluten development and it will need to mix or knead for much longer than a dough lower in fat. The word “brioche” actually comes from the old Norman verb “broyer”, which means “to pound” and it refers to the exceptionally long kneading process. After you have added your butter, the dough will mix for a good long time. Since every mixer and baker is different, the exact mixing time will vary so it’s easier and more accurate to look for specific signs that the dough is ready. Once you add the butter, the dough will look very soft, more like a thick cake batter, and it will kind of stick to the bottom of the bowl. As you continue to knead it, the dough will eventually become more elastic and it will start to pull away from the sides of the bowl-this is what we want. When it’s done mixing, it will be smooth and almost velvety in texture. To test the gluten structure, you can pull off a small piece of dough, pinch it in your fingers and gently stretch it to make a small square. If the dough doesn’t break in the center, it means that the gluten is developed and you are good to go. If it rips immediately when you try to stretch it, it needs some more kneading time. (This is called the windowpane test and you can see pictures of what it should look like here.)

When you have your finished dough, it will proof for two hours, turning it a couple of times throughout, until it’s doubled in size. After proofing, you can either continue to shape and build your babka, or you can cover the dough and chill it overnight. This particular brioche recipe is from Tartine Bread and it uses a sourdough starter to create the overnight pre-ferment or leaven. If you don’t already have your own starter and you would like to try your hand at making one, you can find step by step instructions here. If you don’t have your own starter and have zero interest in making one, I have a brioche recipe that doesn’t use a sourdough starter here.

*Note: If you choose to follow the Tartine brioche recipe below, you will have enough dough for two babka loaves (or a babka and something else; spoiler: there’s a fall inspired recipe using more brioche coming in a few weeks). If you use my brioche recipe from the Cinnamon Swirl Brioche, you will only have enough for one babka.


Tartine Brioche

Babka1.jpg

Yield: 1600 g of dough, or 2 babka loaves


Ingredients: 

poolish: 

100 g water

100 g flour

Pinch of yeast


leaven: 

1 1/2 tsp starter

110 g flour

110 g water


for the dough: 

500 g bread flour

13 g salt

60 g sugar

5 g active dry yeast

250 g eggs (about 5), at room temperature 

120 g milk, at room temperature

150 g leaven 

200 g poolish

225 g butter, at room temperature


Procedure: 

  1. The night before baking, stir together poolish ingredients and place in a plastic container with lid. Store in the refrigerator overnight. Mix together the leaven ingredients and store in another plastic container. Leave on the countertop overnight.

  2. In the bowl of a stand mixer fitted with the dough hook, combine wet ingredients (milk, eggs, leaven, poolish). I like to stir these together with a rubber spatula to break up the leaven and poolish. On top of the wet ingredients, add the flour, salt, sugar, and yeast. Mix on low speed for 3-5 minutes until everything is combined and a dough begins to form. Cover the mixer with a kitchen towel and let the dough rest for 15-20 minutes.

  3. Scrape down the sides of the bowl and increase speed to medium-high. Mix for 6-8 minutes, adding the softened butter 1 tablespoon at a time, until all the butter is incorporated. Continue to mixing for about 15-20 more minutes. It is much easier to determine sufficient mixing by looking for specific qualities in the dough, rather than by using a mixing time. The dough is ready when it is smooth and elastic and pulls away from the sides of the bowl. When you pull a piece of the dough out, it will be soft, but you should be able to stretch the dough into a small square without it tearing. This is called the window pane test.

  4. Cover the bowl with a kitchen towel, place in a warm space in your kitchen, and proof for two hours. You will turn the dough three times during this time, at the 30-minute mark, the one hour mark, and the one and half hour mark. To complete a turn: grab the bottom of one side of the dough and stretch it up and over to the other side of the rest of the dough. Turn the dough 90 degrees and repeat until you have folded all four sides of the dough. This is considered one turn. Cover and continue to proof, repeating the turn every 30 minutes.

  5. After the bulk fermentation, cover the bowl with plastic wrap and place in the refrigerator for 30 minutes to an hour. This will make the dough much easier to shape and will prevent the butter from melting out while you are working. If you are not ready to shape right away, you can store dough in the refrigerator overnight.


Babka4.jpg

Chocolate Tahini Babka 

Ingredients: 

750 g brioche dough

1 stick (113g) unsalted butter, melted and cooled

110 g brown sugar

50 g dark chocolate cocoa powder

Pinch of salt 

1/3 cup tahini

for the egg wash: 

1 egg yolk

1 egg

1-2 T water

Procedure: 

  1. Stir together butter, brown sugar, cocoa powder and salt. You should have a thick, but spreadable paste. Set aside.

  2. Spray a 9x5 loaf pan with cooking spray and line with parchment paper. Set aside.

  3. On a floured surface, roll dough out to a 10x18” rectangle. If the dough is sticky, make sure that your are lifting it up and moving it around often in order to prevent it from adhering to your work surface.

  4. Use a small offset spatula to spread chocolate mixture in an even layer over the dough, leaving about 1/4” border on all four sides. Drizzle tahini over chocolate.

  5. Starting from a short end of the dough, roll dough tightly into a log and pinch the ends to seal. Starting about 1/2” from the top, use a sharp knife to slice the log lengthwise. You should have two strands, connected by a small dough portion at the top. Flip the strands so that the layers are facing up. Begin to braid the dough strands, crossing one over the the other, and pinch the bottoms to seal. Place your dough braid into your prepared loaf pan, cover with a kitchen towel, and let proof until almost doubled in size. This should take 1-1/2 hours, depending on the temperature of your dough.

  6. When you are ready to bake, preheat the oven to 350 degrees. Combine egg, egg yolk, and water in a small bowl to make egg wash.

  7. When the babka has risen, use a pastry brush to lightly coat with egg was. Bake for 30-35 minutes, until golden brown and a skewer or knife comes out clean when inserted. Remove from oven and let cool in the pan for about 20 minutes. Turn out onto a wire cooling rack and let cool completely before slicing and serving.

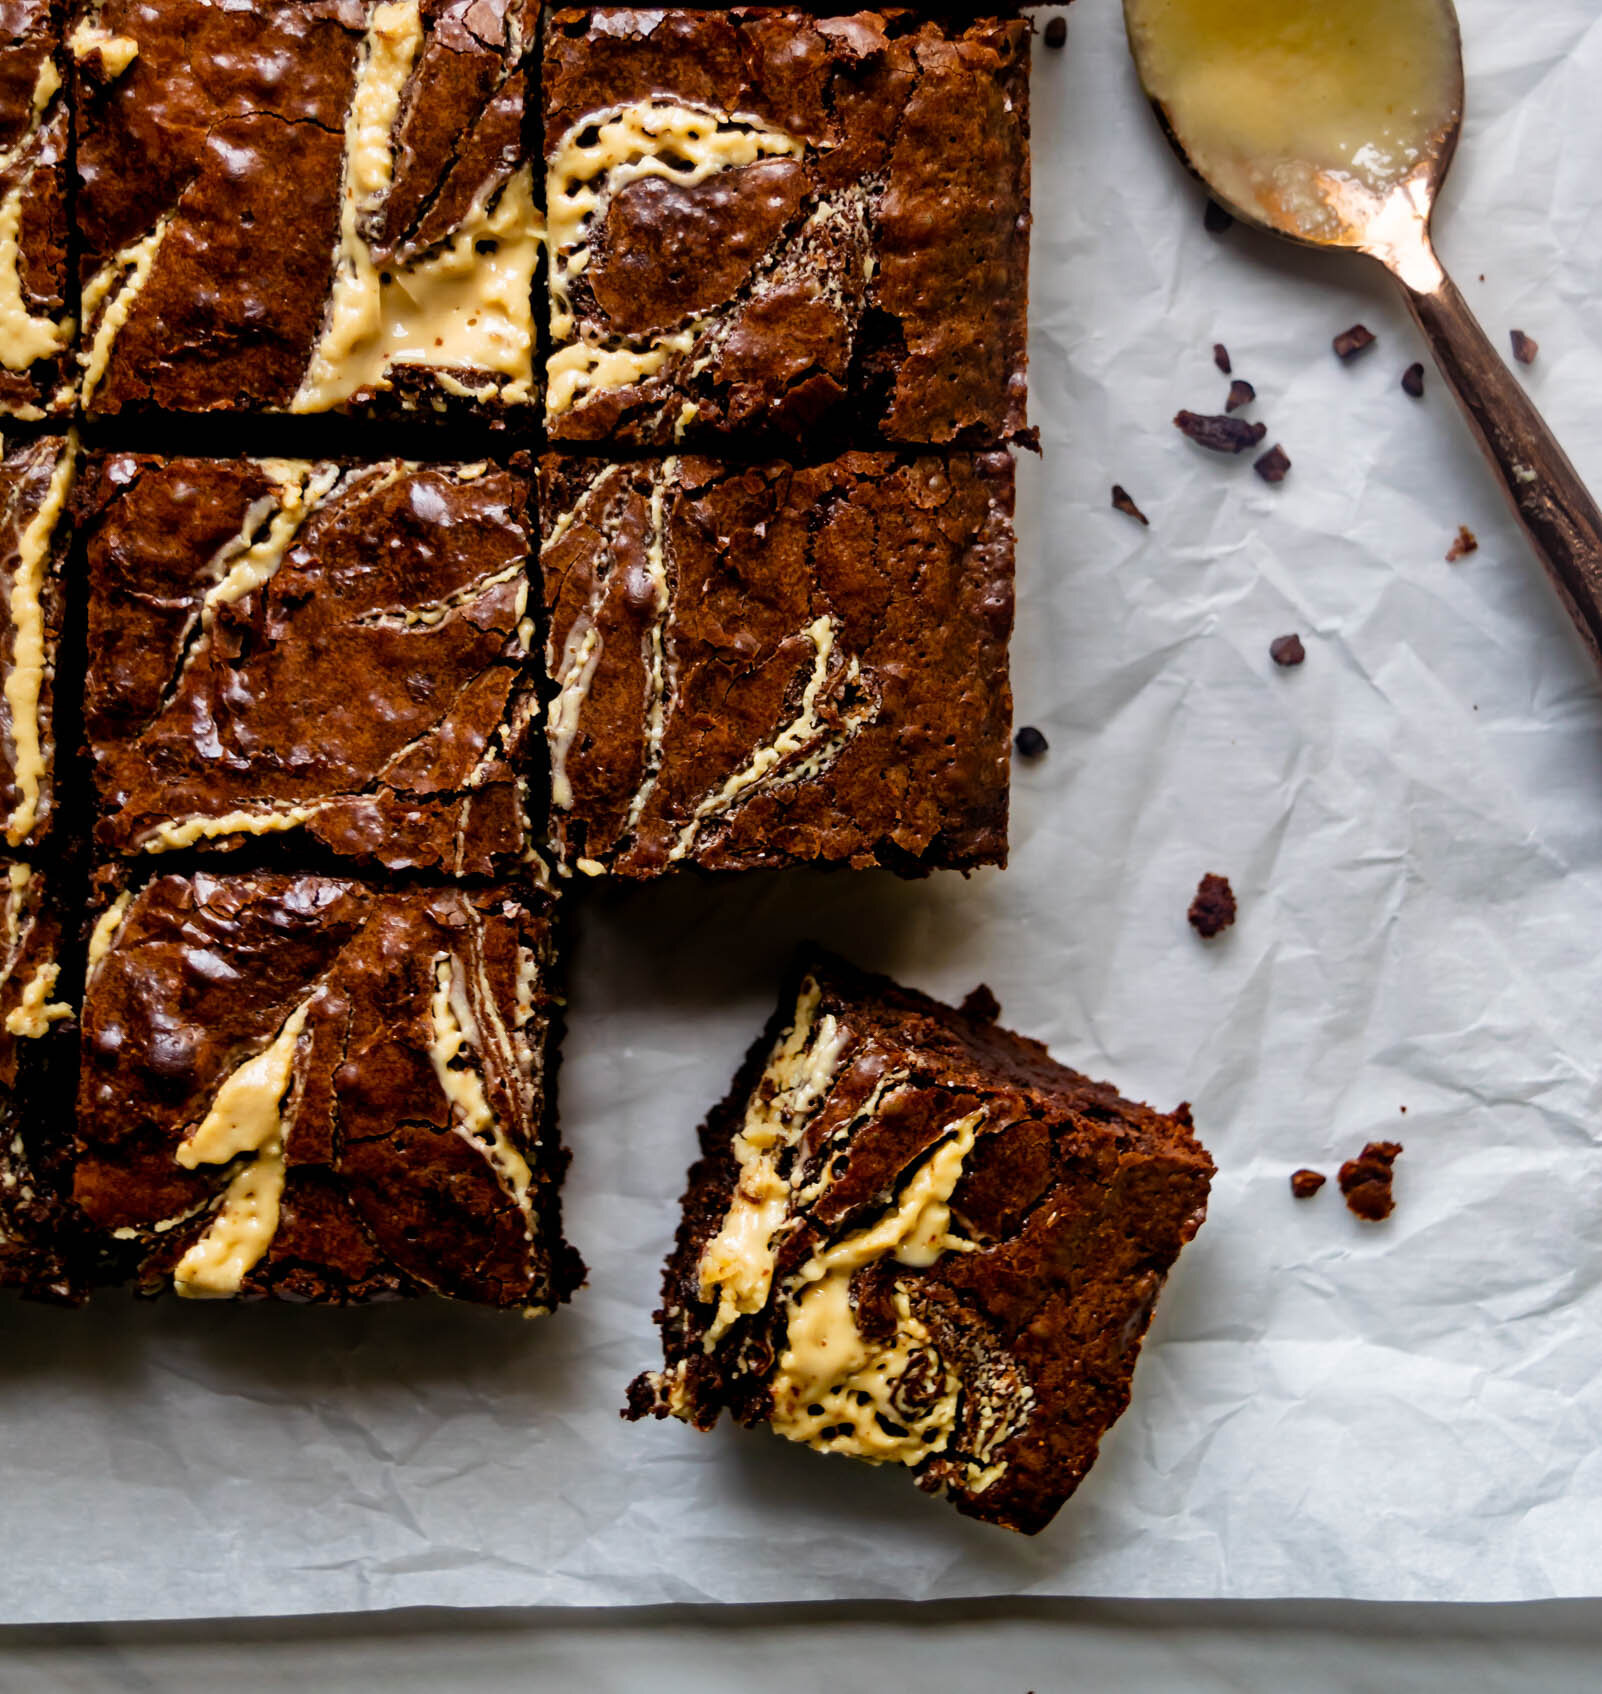
Espresso Tahini Brownies

My favorite fudgy brownie recipe. A thick, chewy chocolate espresso brownie, swirled with nutty tahini because there is nothing better than a good, homemade brownie.

tahinibrowniesnew3.jpeg

Today, we’re getting a little controversial. I know that what I am about to say is not the overall opinion of the masses and I also know that I am getting ready to step into what could be a very heated discussion. Nonetheless, I press on. I am one of those people who never read Harry Potter…until now. Though I was a voracious childhood reader back when the first book was released, my mom wasn’t a big fan and I had little to no interest in fantasy literature so it just wasn’t on my radar. I am smack in the middle of the Harry Potter generation and as I got older, everyone I knew had read ALL of the books, seen ALL of the movies, knew ALL of the backstories, plot twists, etc, etc, and so I just kept quiet about the fact that I never read them. Sometime last year, my husband and one of our friends decided that I was still missing out so we started watching the movies. I made it through one and a half. So now, my book club (which by the way is comprised of my best friends from high school and devout Potter fans) have decided to remedy my situation by reading through the series month by month. For me, it’s been a slow month. It’s not that I don’t enjoy the story or see the draw, I just feel like I missed the boat back in elementary school and have been doing okay without Harry Potter in my life. I will, however, promise to keep an open mind and will report back as we move through the series.

Though it may not be my cup of butter beer (I think that is an appropriate HP reference), I get it. There are some books that draw you in again and again. Books with dog-eared pages and crinkled covers, in which you discover something new every time you pick it up. In my overstuffed shelf of cookbooks, I have one like that. Sweet by Yotam Ottolenghi and Helen Goh is the HP of my cookbook collection. All 363 pages are pure gold and I am drawn to something new each time I flip through. Their approach to dessert challenges me to use new ingredients and introduces me to slightly unorthodox, but always delicious flavors, but Ottolenghi’s writing walks me through each step in such a way that makes me feel like he is in my kitchen with me, folding egg whites into chocolate and chatting about yoghurt. These espresso tahini brownies are my riff on the ones from Sweet. These are my favorite way to make brownies and I now I continually find myself trying to swirl tahini into any baked good I can.

how to make espresso tahini brownies

I am a big fan of thick, fudgy brownies, which means I tend to incorporate a lot of eggs and not a lot of flour in my brownie recipes. For this one, we start with a base of melted dark chocolate, butter, and espresso powder. Sugar and brown sugar are whisked into the warm chocolate, followed by the eggs until everything is smooth and homogenized. A bit of flour and some dark cocoa powder is folded in until just incorporated and then the batter is swirled with dollops of tahini before baking.

tahinibrowniesnew3.jpg
Yield: 16 brownies
Author: Anna Ramiz
Espresso Tahini Brownies

Espresso Tahini Brownies

Prep time: 15 MinCook time: 40 MinTotal time: 55 Min
My favorite fudgy brownie recipe. A thick, chewy chocolate espresso brownie, swirled with nutty tahini because there is nothing better than a good, homemade brownie.

Ingredients

  • 1 cup all purpose flour
  • 1 tsp salt
  • 6 Tbsp dutch process cocoa powder
  • 11 oz dark chocolate, chopped
  • 1 cup (2 sticks) butter, cubed
  • 2 tsp ground espresso
  • 1 cup sugar
  • 1 cup brown sugar
  • 5 eggs
  • 2 tsp vanilla extract
  • 1/4 cup tahini

    Instructions

    1. Grease a 9x13 pan and line with parchment paper. Preheat oven to 350 degrees.
    2. Place chocolate, butter, and espresso in a large, heat proof bowl. In a separate bowl, sift together flour, cocoa powder, and salt. Set aside.
    3. In a medium saucepan, heat sugar, brown sugar and 6 T water (or coffee). Cook over medium heat until syrupy and simmering at the edges. The sugars should be mostly dissolved. Immediately pour the syrup over the chocolate/butter mixture and gently shake the bowl to make sure everything is coated. Let sit for 3-4 minutes. Whisk until everything is combined and smooth.
    4. Add 2 eggs to the chocolate mixture and whisk until combined. Whisk in the remaining 3 eggs and vanilla extract. Sprinkle dry ingredients over the top of the chocolate mixture and use a rubber spatula to fold in gently until no flour streaks remain.
    5. Pour batter into the prepared pan and smooth the top with a spatula.
    6. Dollop tahini evenly over the top of the batter and swirl with a toothpick or a knife.
    7. Bake for 35-40 minutes, rotating the pan halfway through, until a skewer inserted into the center comes out clean.
    Did you make this recipe?
    Tag @gatheredatmytable on instagram and hashtag it #gatheredatmytable