Guava and Cheese Pastelitos

This simple Latin guava pastry recipe uses store-bought guava paste, sweetened cream cheese, and includes a recipe and step-by-step instructions for making puff pastry at home.

messystyle3.jpg

In the eyes of my Hispanic husband, there is no greater treat in this world than guava and cheese pastelitos. And most of the time, I’m inclined to agree with him. Growing up outside of Miami, Latin pastries were everywhere. In my little community alone, there was a Colombian bakery, a Venezuelan bakery, a Peruvian bakery, and at least two Cuban bakeries. (Honestly, there were probably more but these are just the ones I can remember off the top of my head at this moment.) Many mornings, on the way to school, we would make a detour to Panna, a Latin bakery/cafe tucked inside of a gas station, where we would load up cafe con leches, empanadas, ham and cheese cachitos, and of course guava pastelitos.

Imagine my surprise my freshman year of college, when I moved only a few hours north to Orlando and discovered that I had relocated to a Latin pastry desert. The first weekend of classes, my roommate and I drove to four different Publix Supermarkets looking for ham croquettes and returned empty-handed to our dorm on the verge of tears. I’m happy to say that in the years since I first arrived in Orlando, the Latin pastry options have grown, but I have yet to find pastelitos as perfect as those from our South Florida gas station.

styled5.jpg

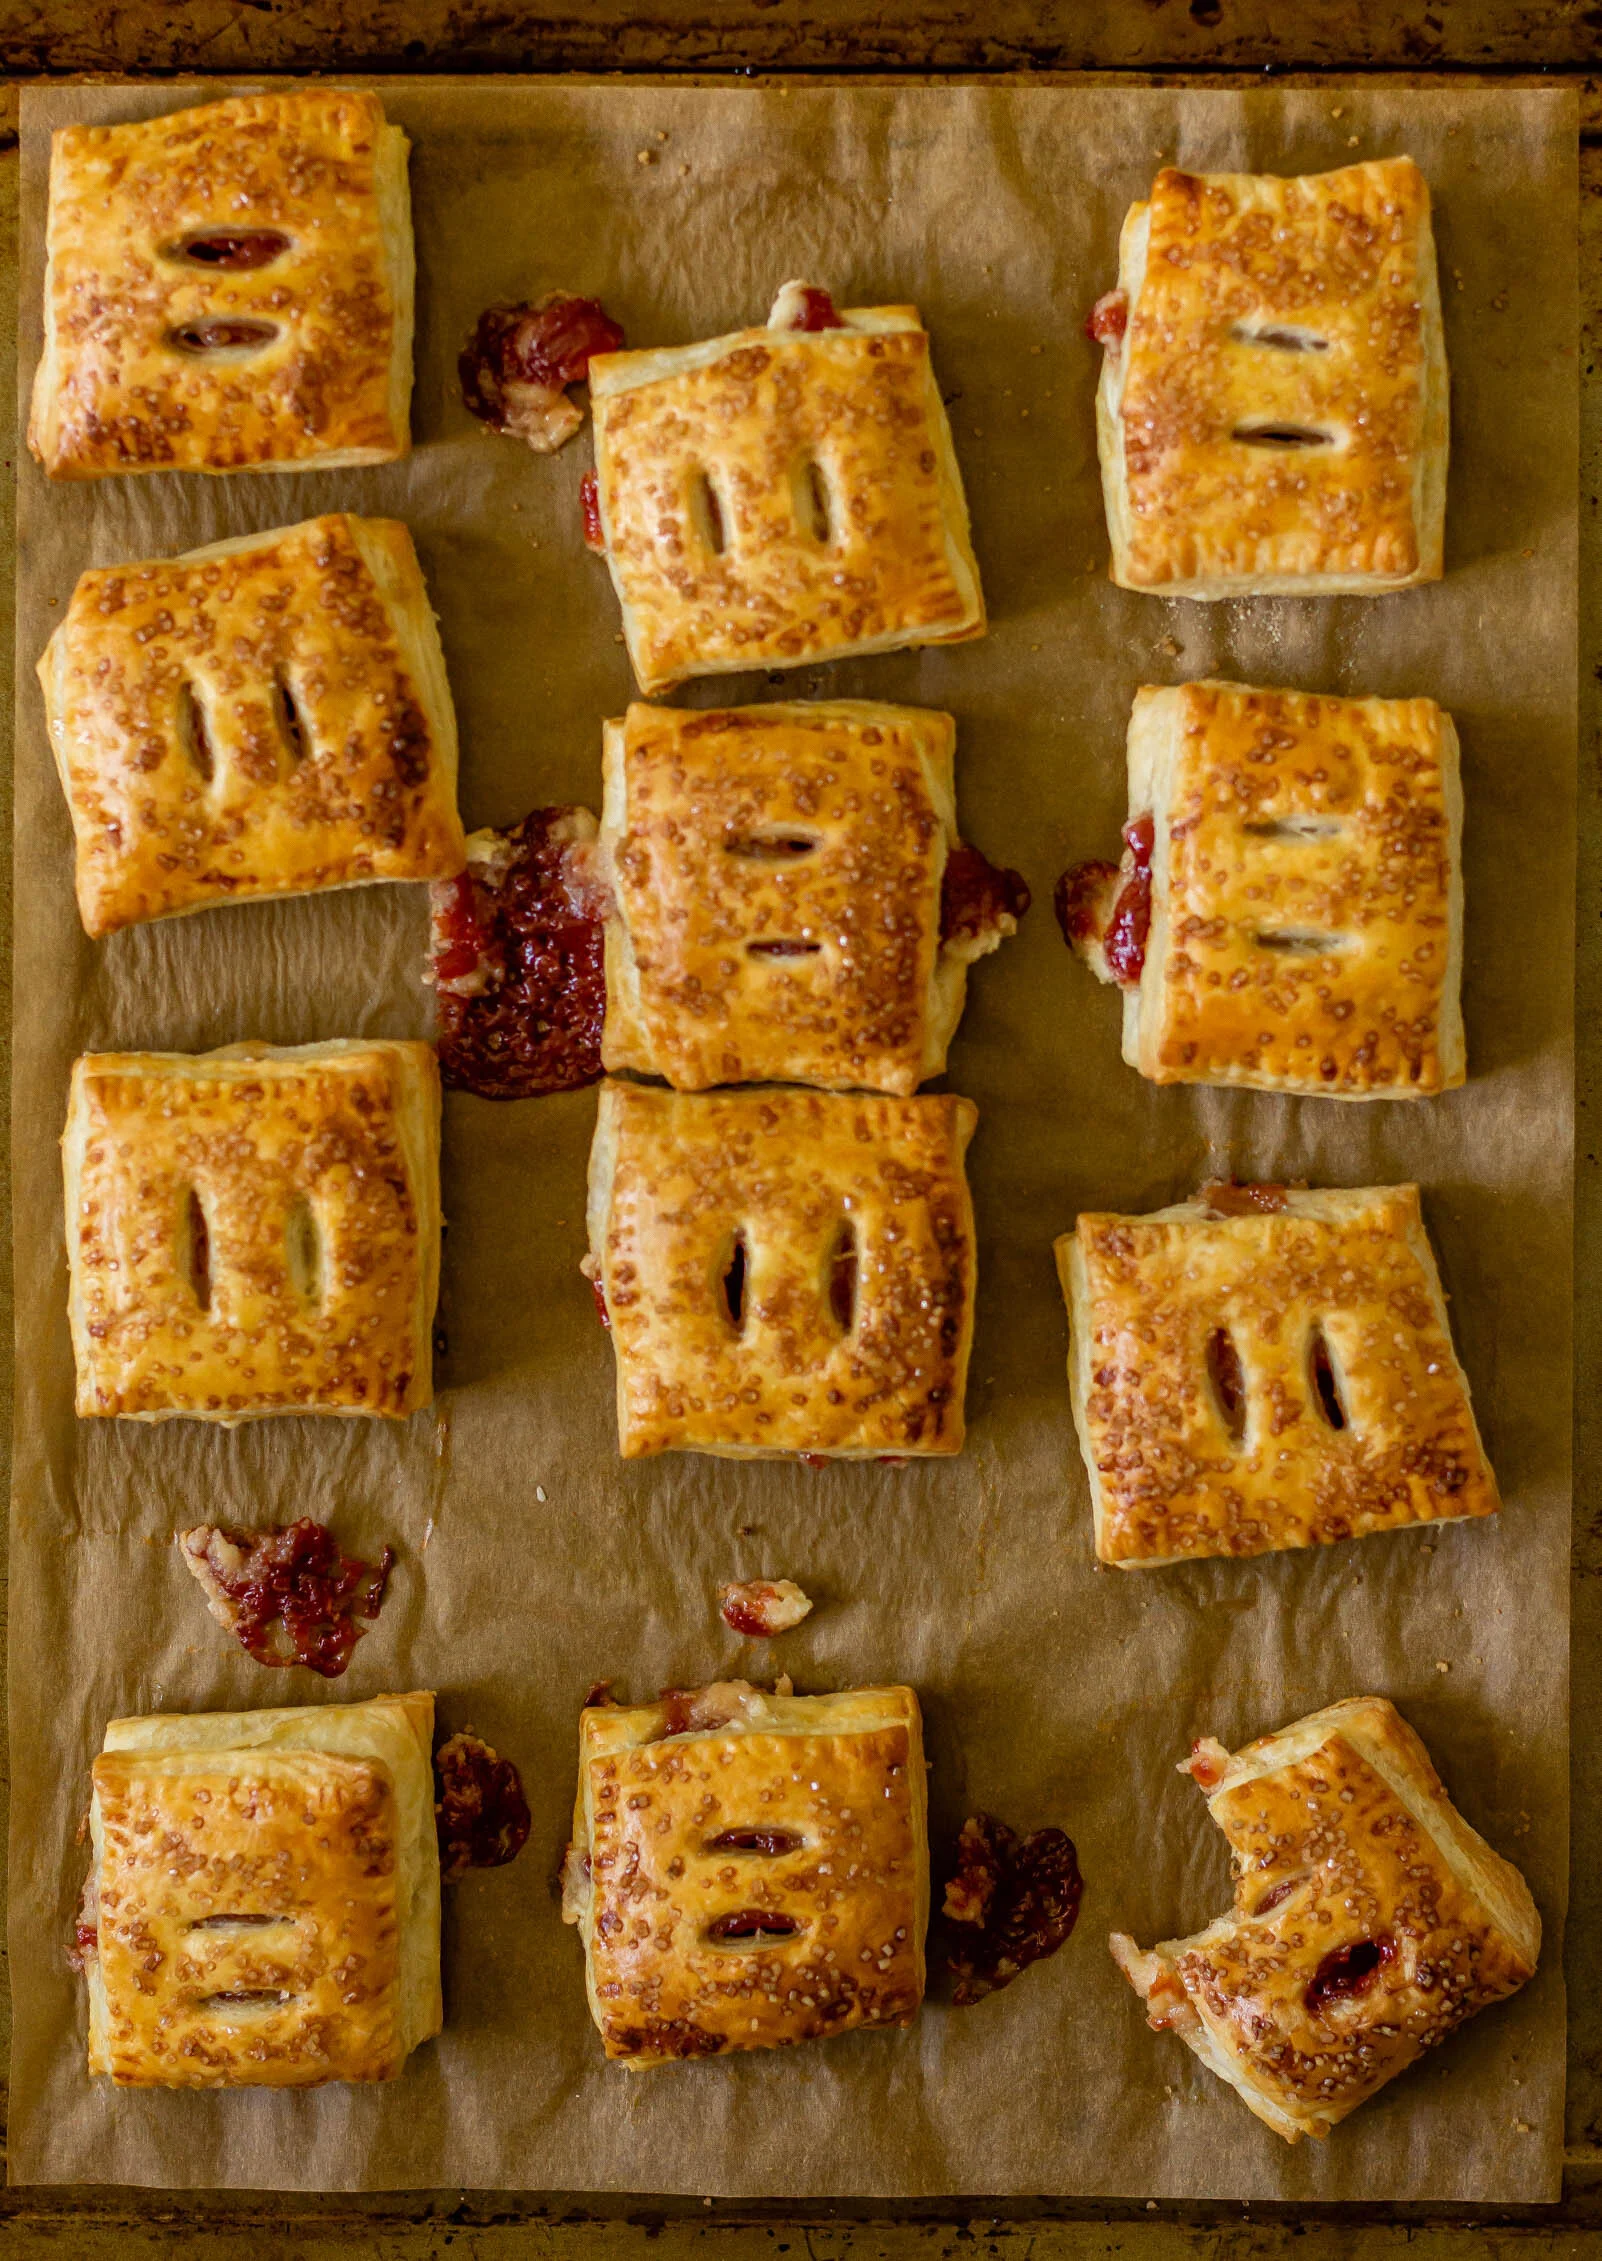
homemade guava pastries

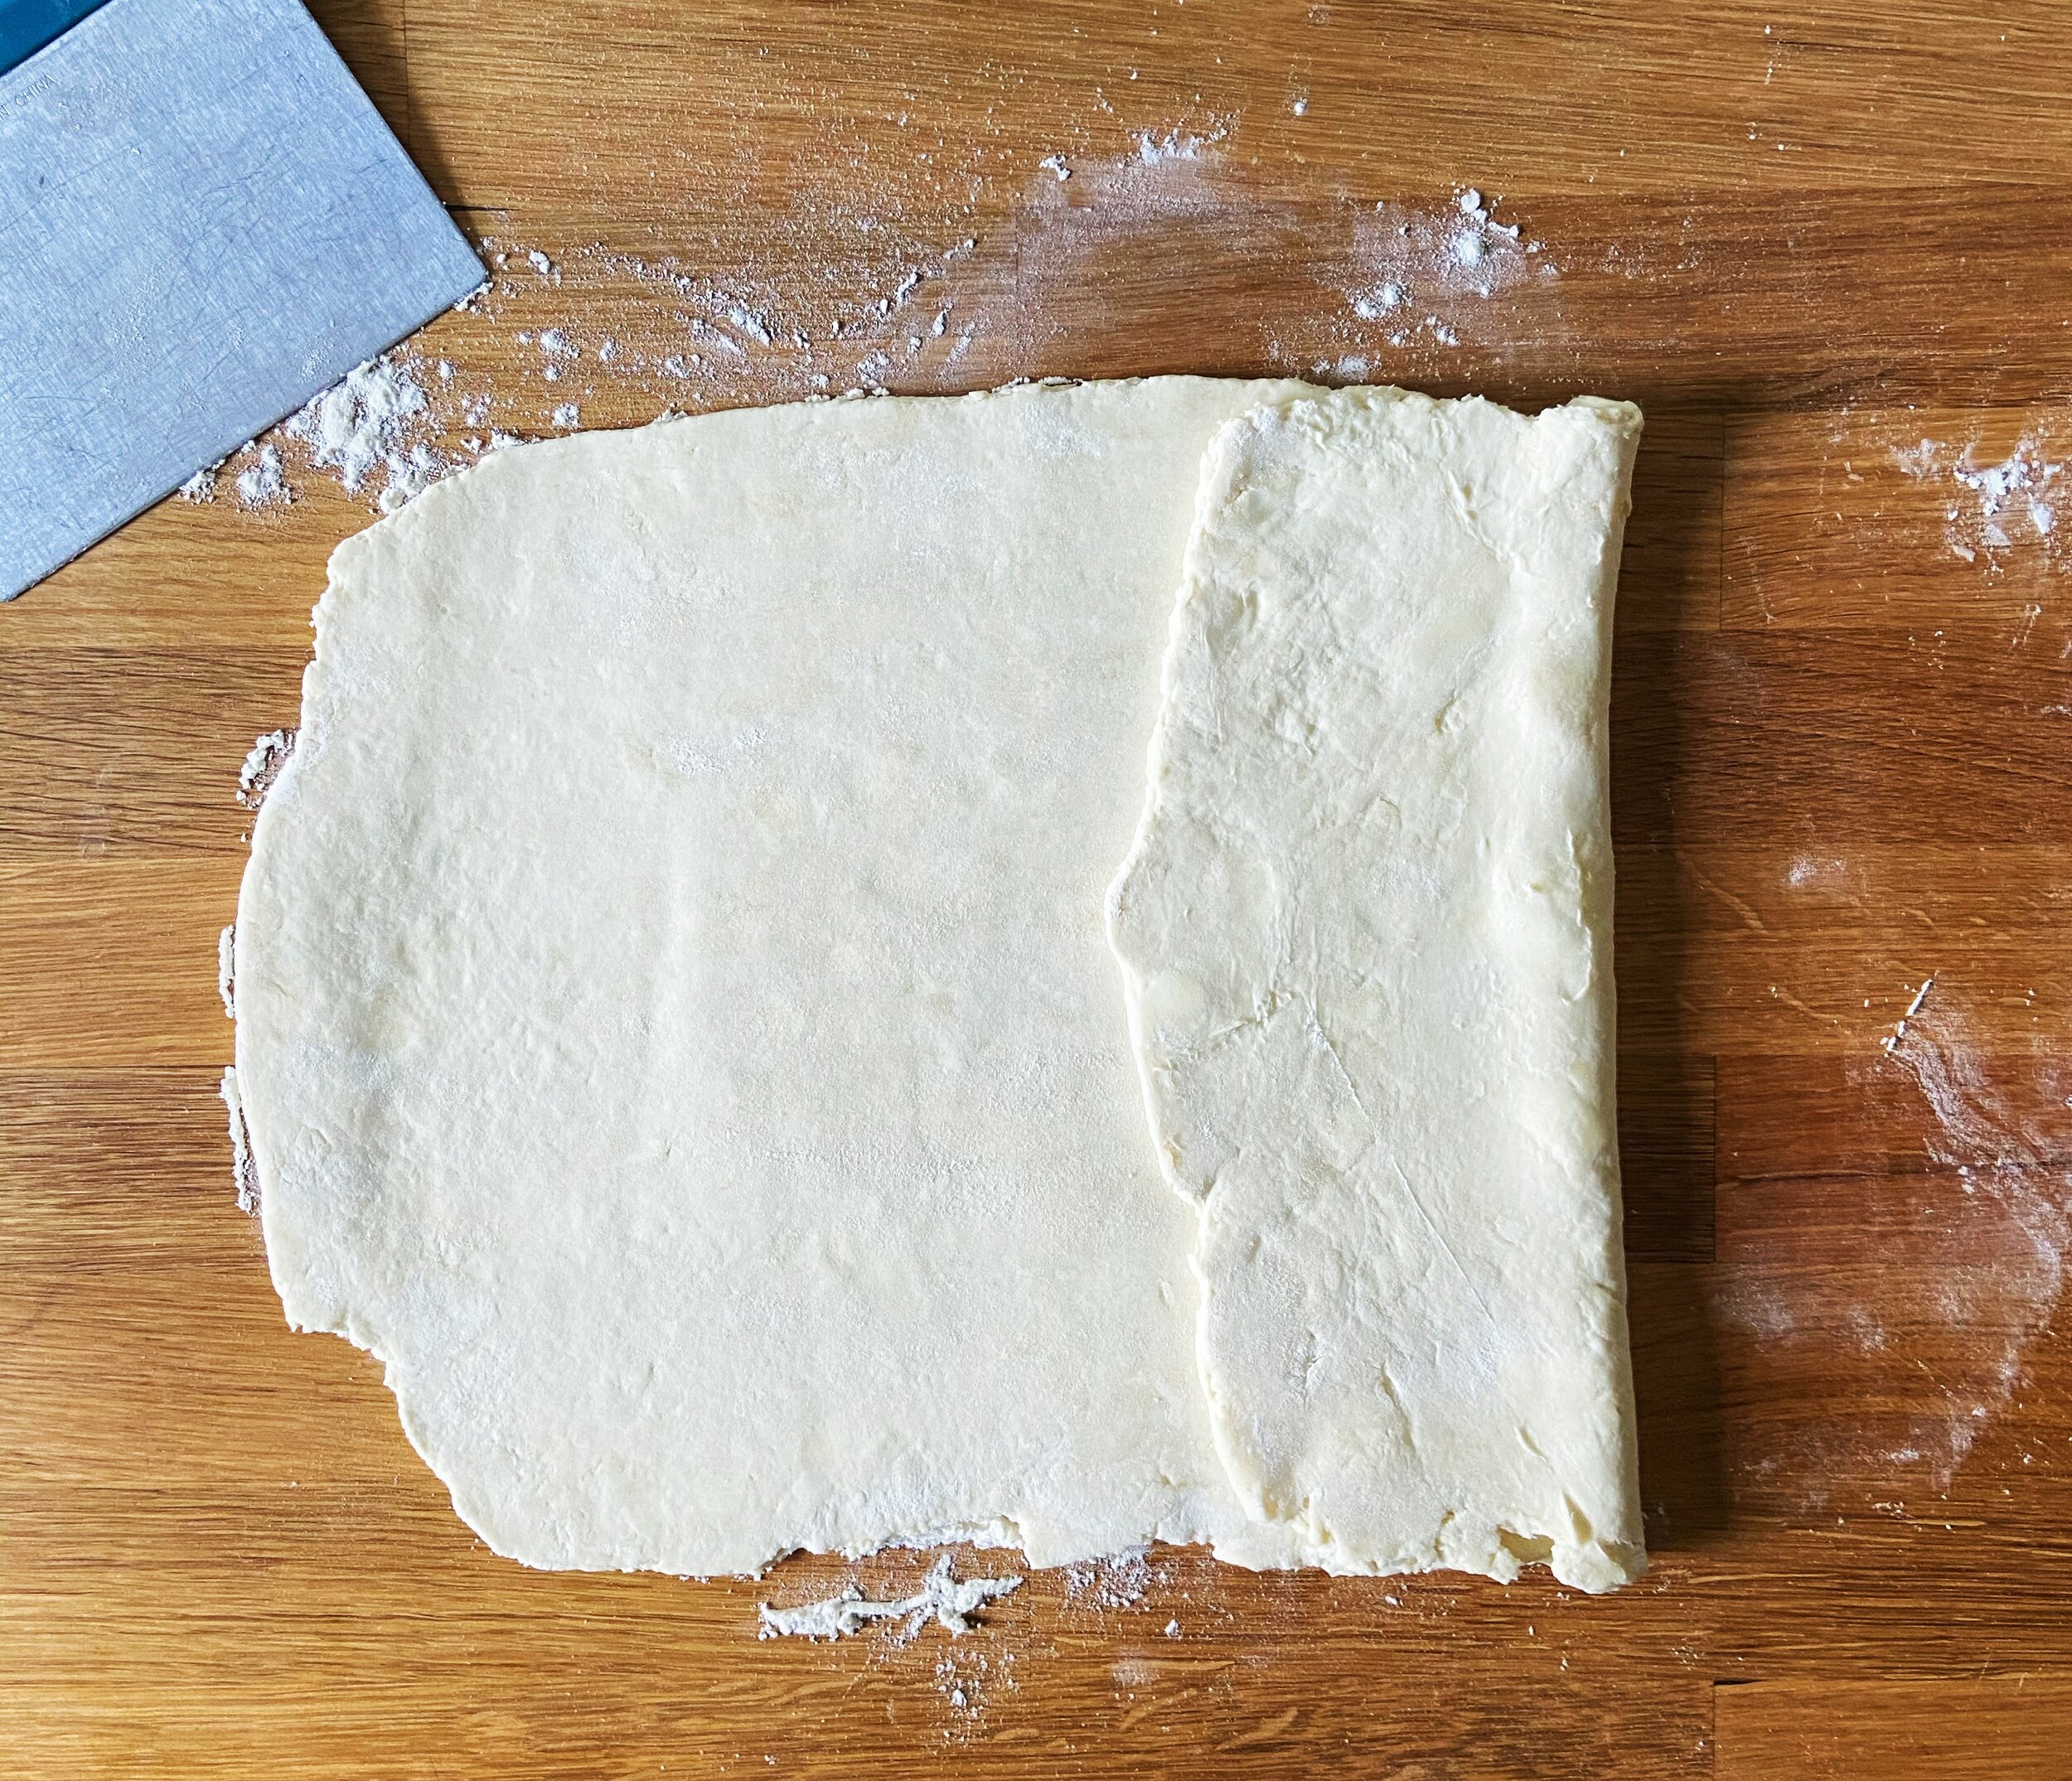
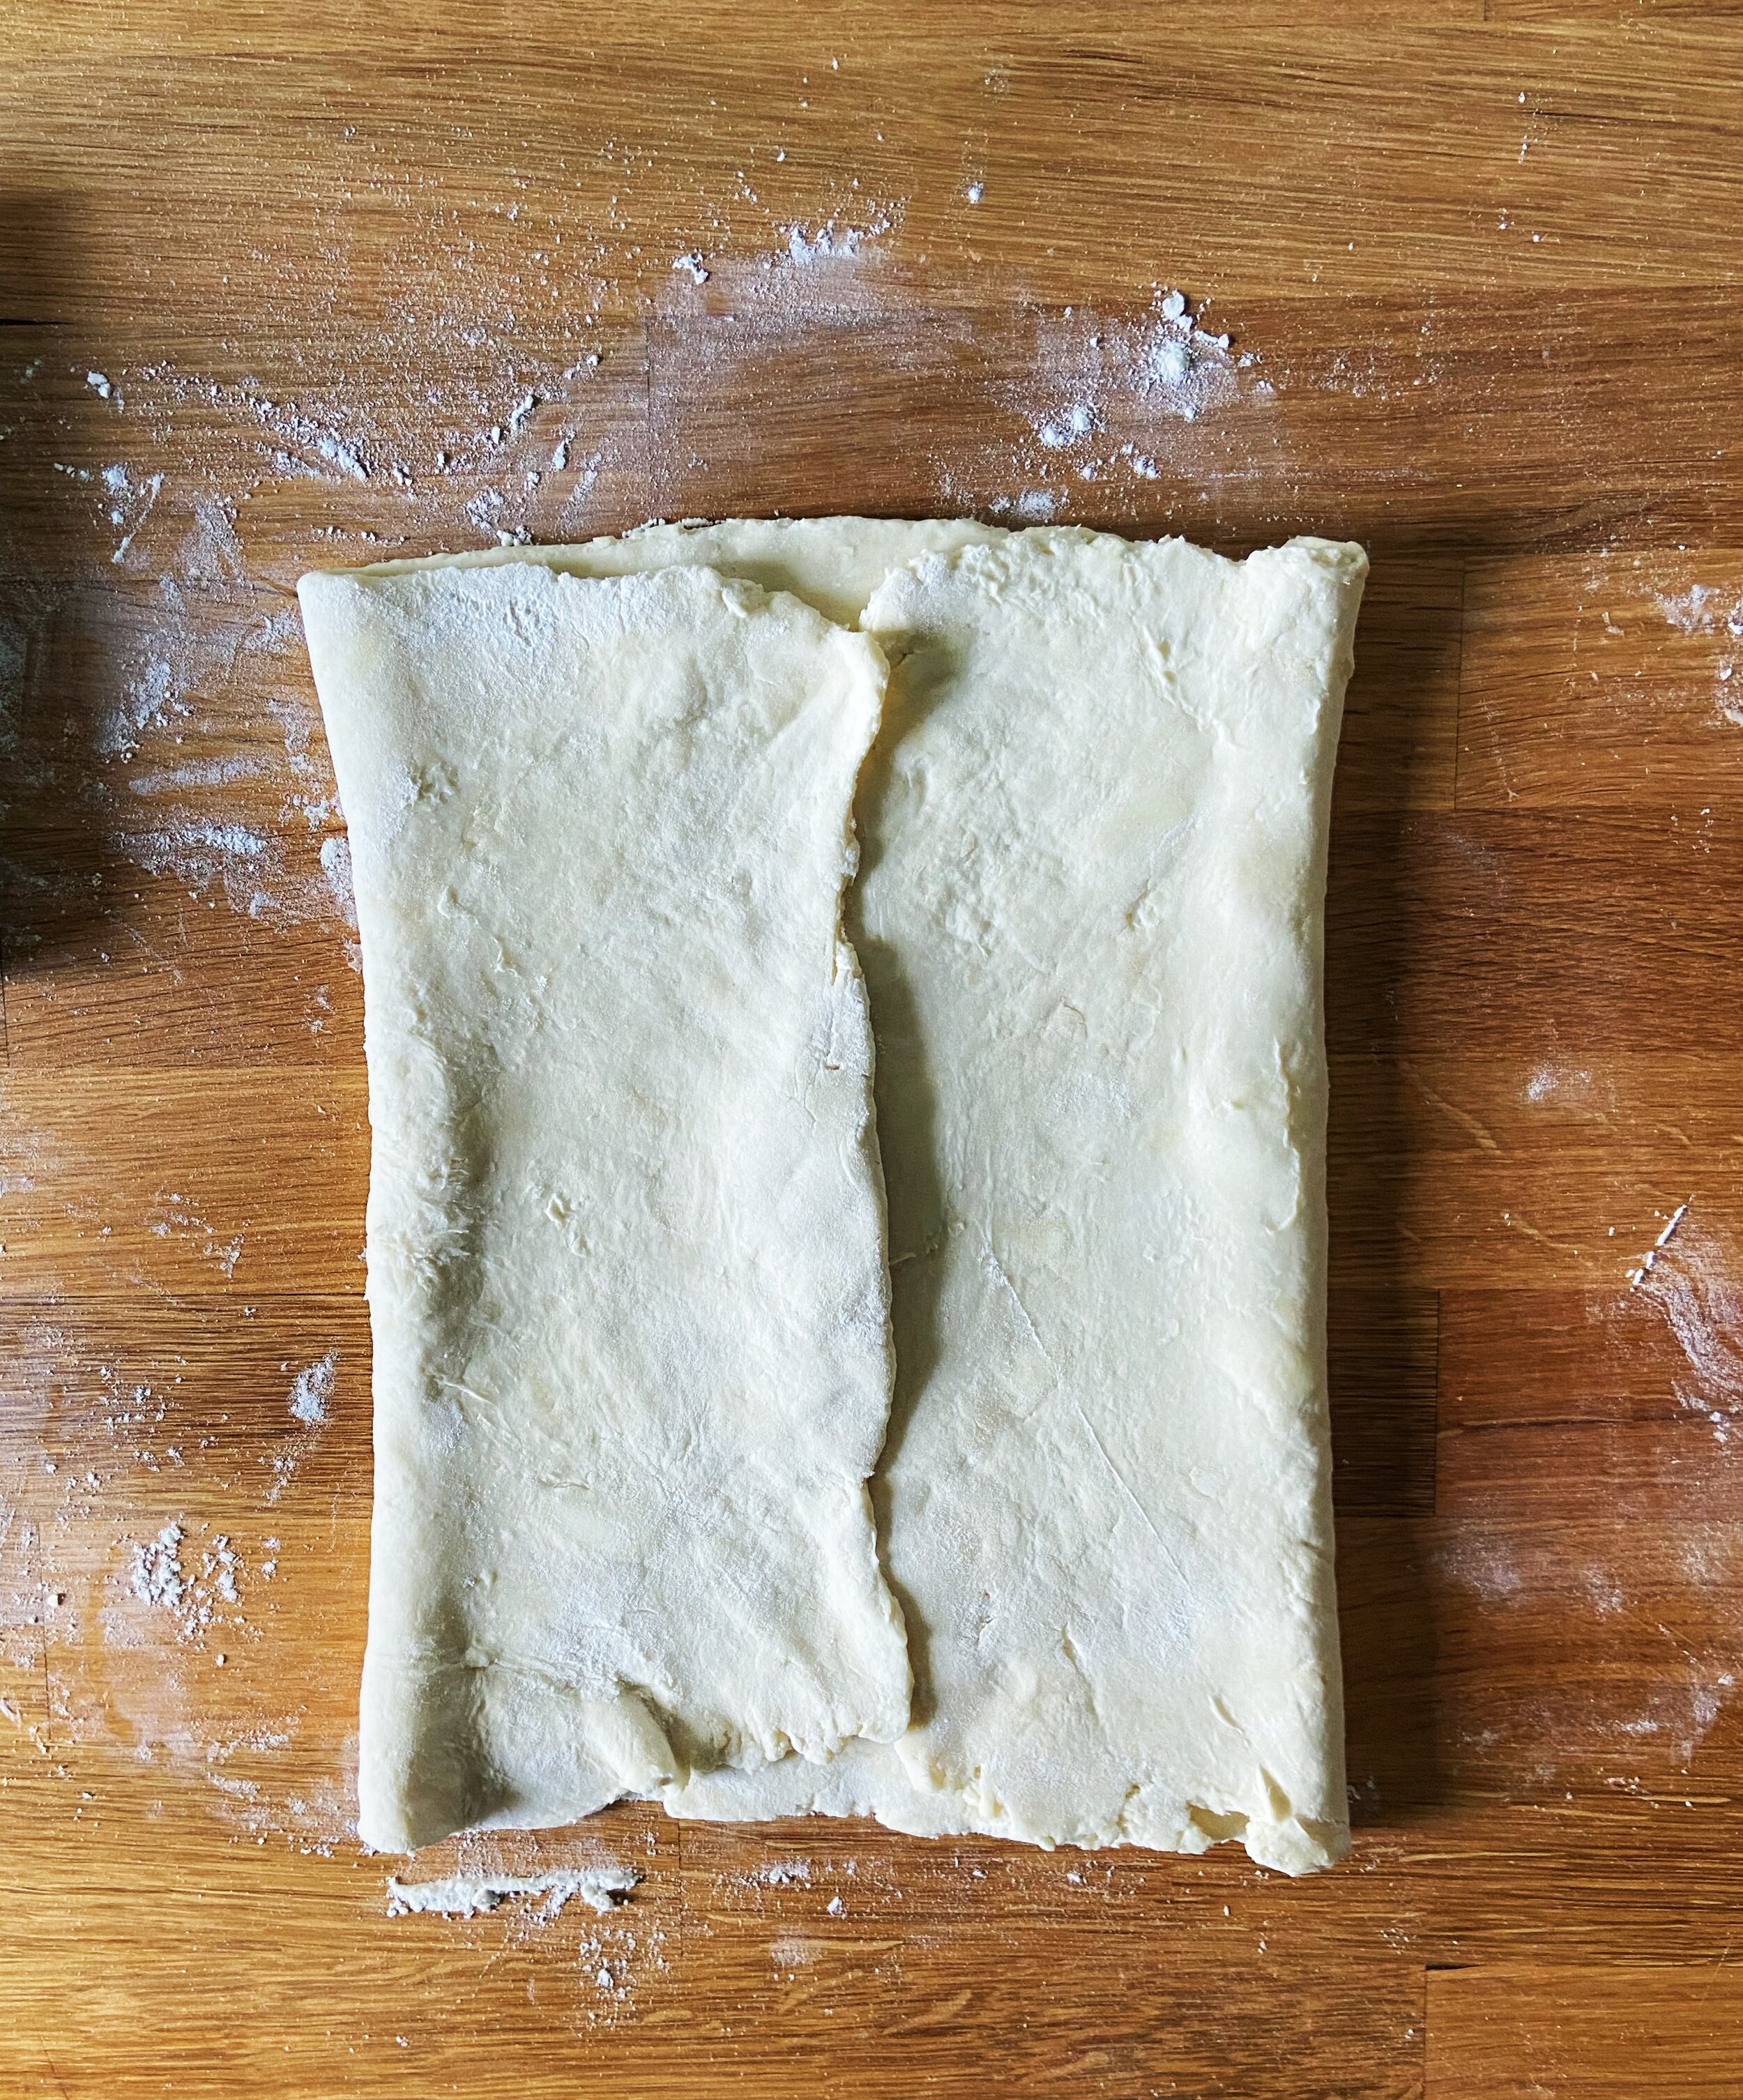
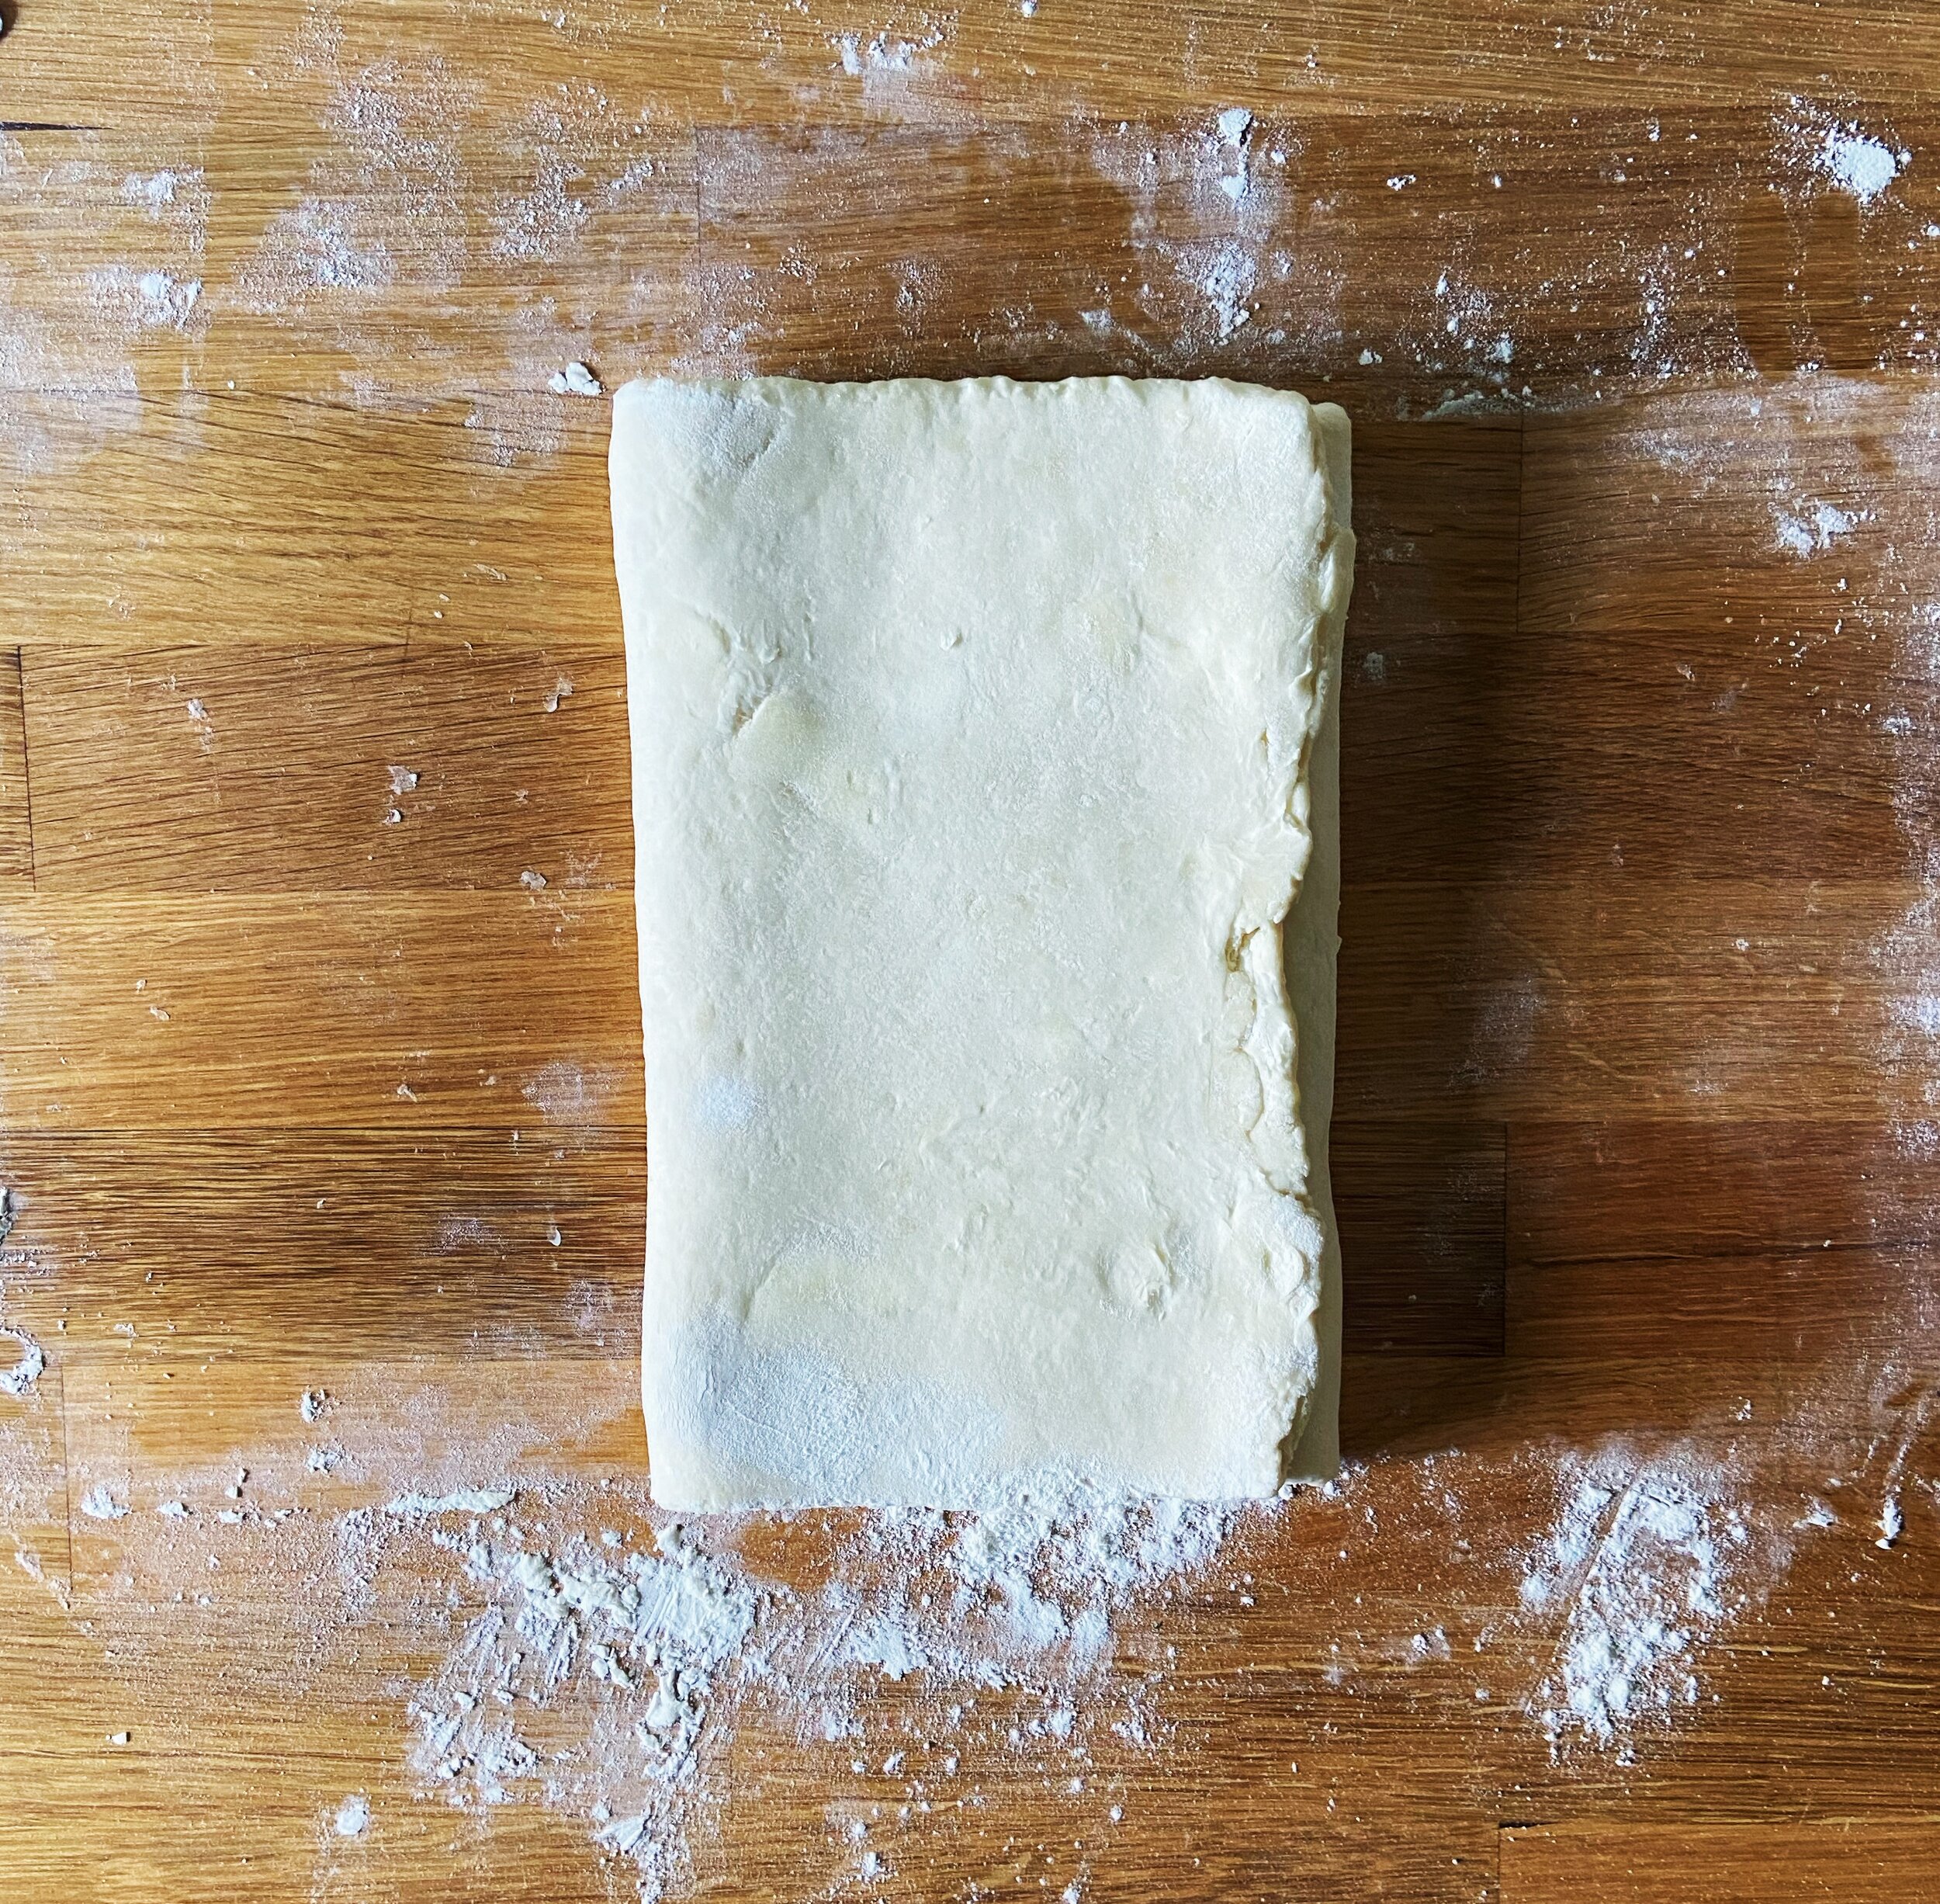
So I made my own. The other day, I wrote about making puff pastry at home and though these pastelitos are best with homemade puff pastry, you can definitely use store bought if that’s more your style. They’re fairly simple to put together, filled with equal parts jazzed up guava paste and sweetened cream cheese. If you live in a place where guava paste is hard to get your hands out, I recommend seeking out a local Latin market if possible and supporting minority-owned businesses in your community (especially in the current situation). You can, however find it on Amazon and I will link a brand I use often at the bottom of the recipe.

Guava and Cheese Pastelitos
Yield
12 pastries
Author
Prep time
20 Min
Cook time
30 Min
Total time
50 Min

Guava and Cheese Pastelitos

These light, flaky Latin pastries are filled with guava paste and sweetened cream cheese.

Ingredients

for the guava filling
  • 7 oz guava paste
  • 1 1/2 T hot water
  • 1/4 tsp vanilla extract
  • 1/8 tsp ground cinnamon
  • 1/8 tsp ground cardamom
for the sweetened cream cheese
  • 4 oz cream cheese, softened
  • 1 1/2 T sugar
  • 1/4 tsp vanilla extract

Instructions

to make the guava filling
  1. Place guava paste and hot water in a microwave safe bowl. Heat in 30 second intervals, stirring after each one, until the paste has loosened and is spoonable, adding more water if needed.
  2. Remove from microwave and whisk in vanilla extract, cinnamon, and cardamom. Set aside.
to make the cream cheese filling
  1. Combine cream cheese, sugar, and vanilla in a bowl and beat using a stand mixer or a handheld mixer until completely combined and fluffy. Scrape down the sides of the bowl and set aside.
to make the pastelitos
  1. Preheat oven to 350° F and line a sheet pan with parchment paper.
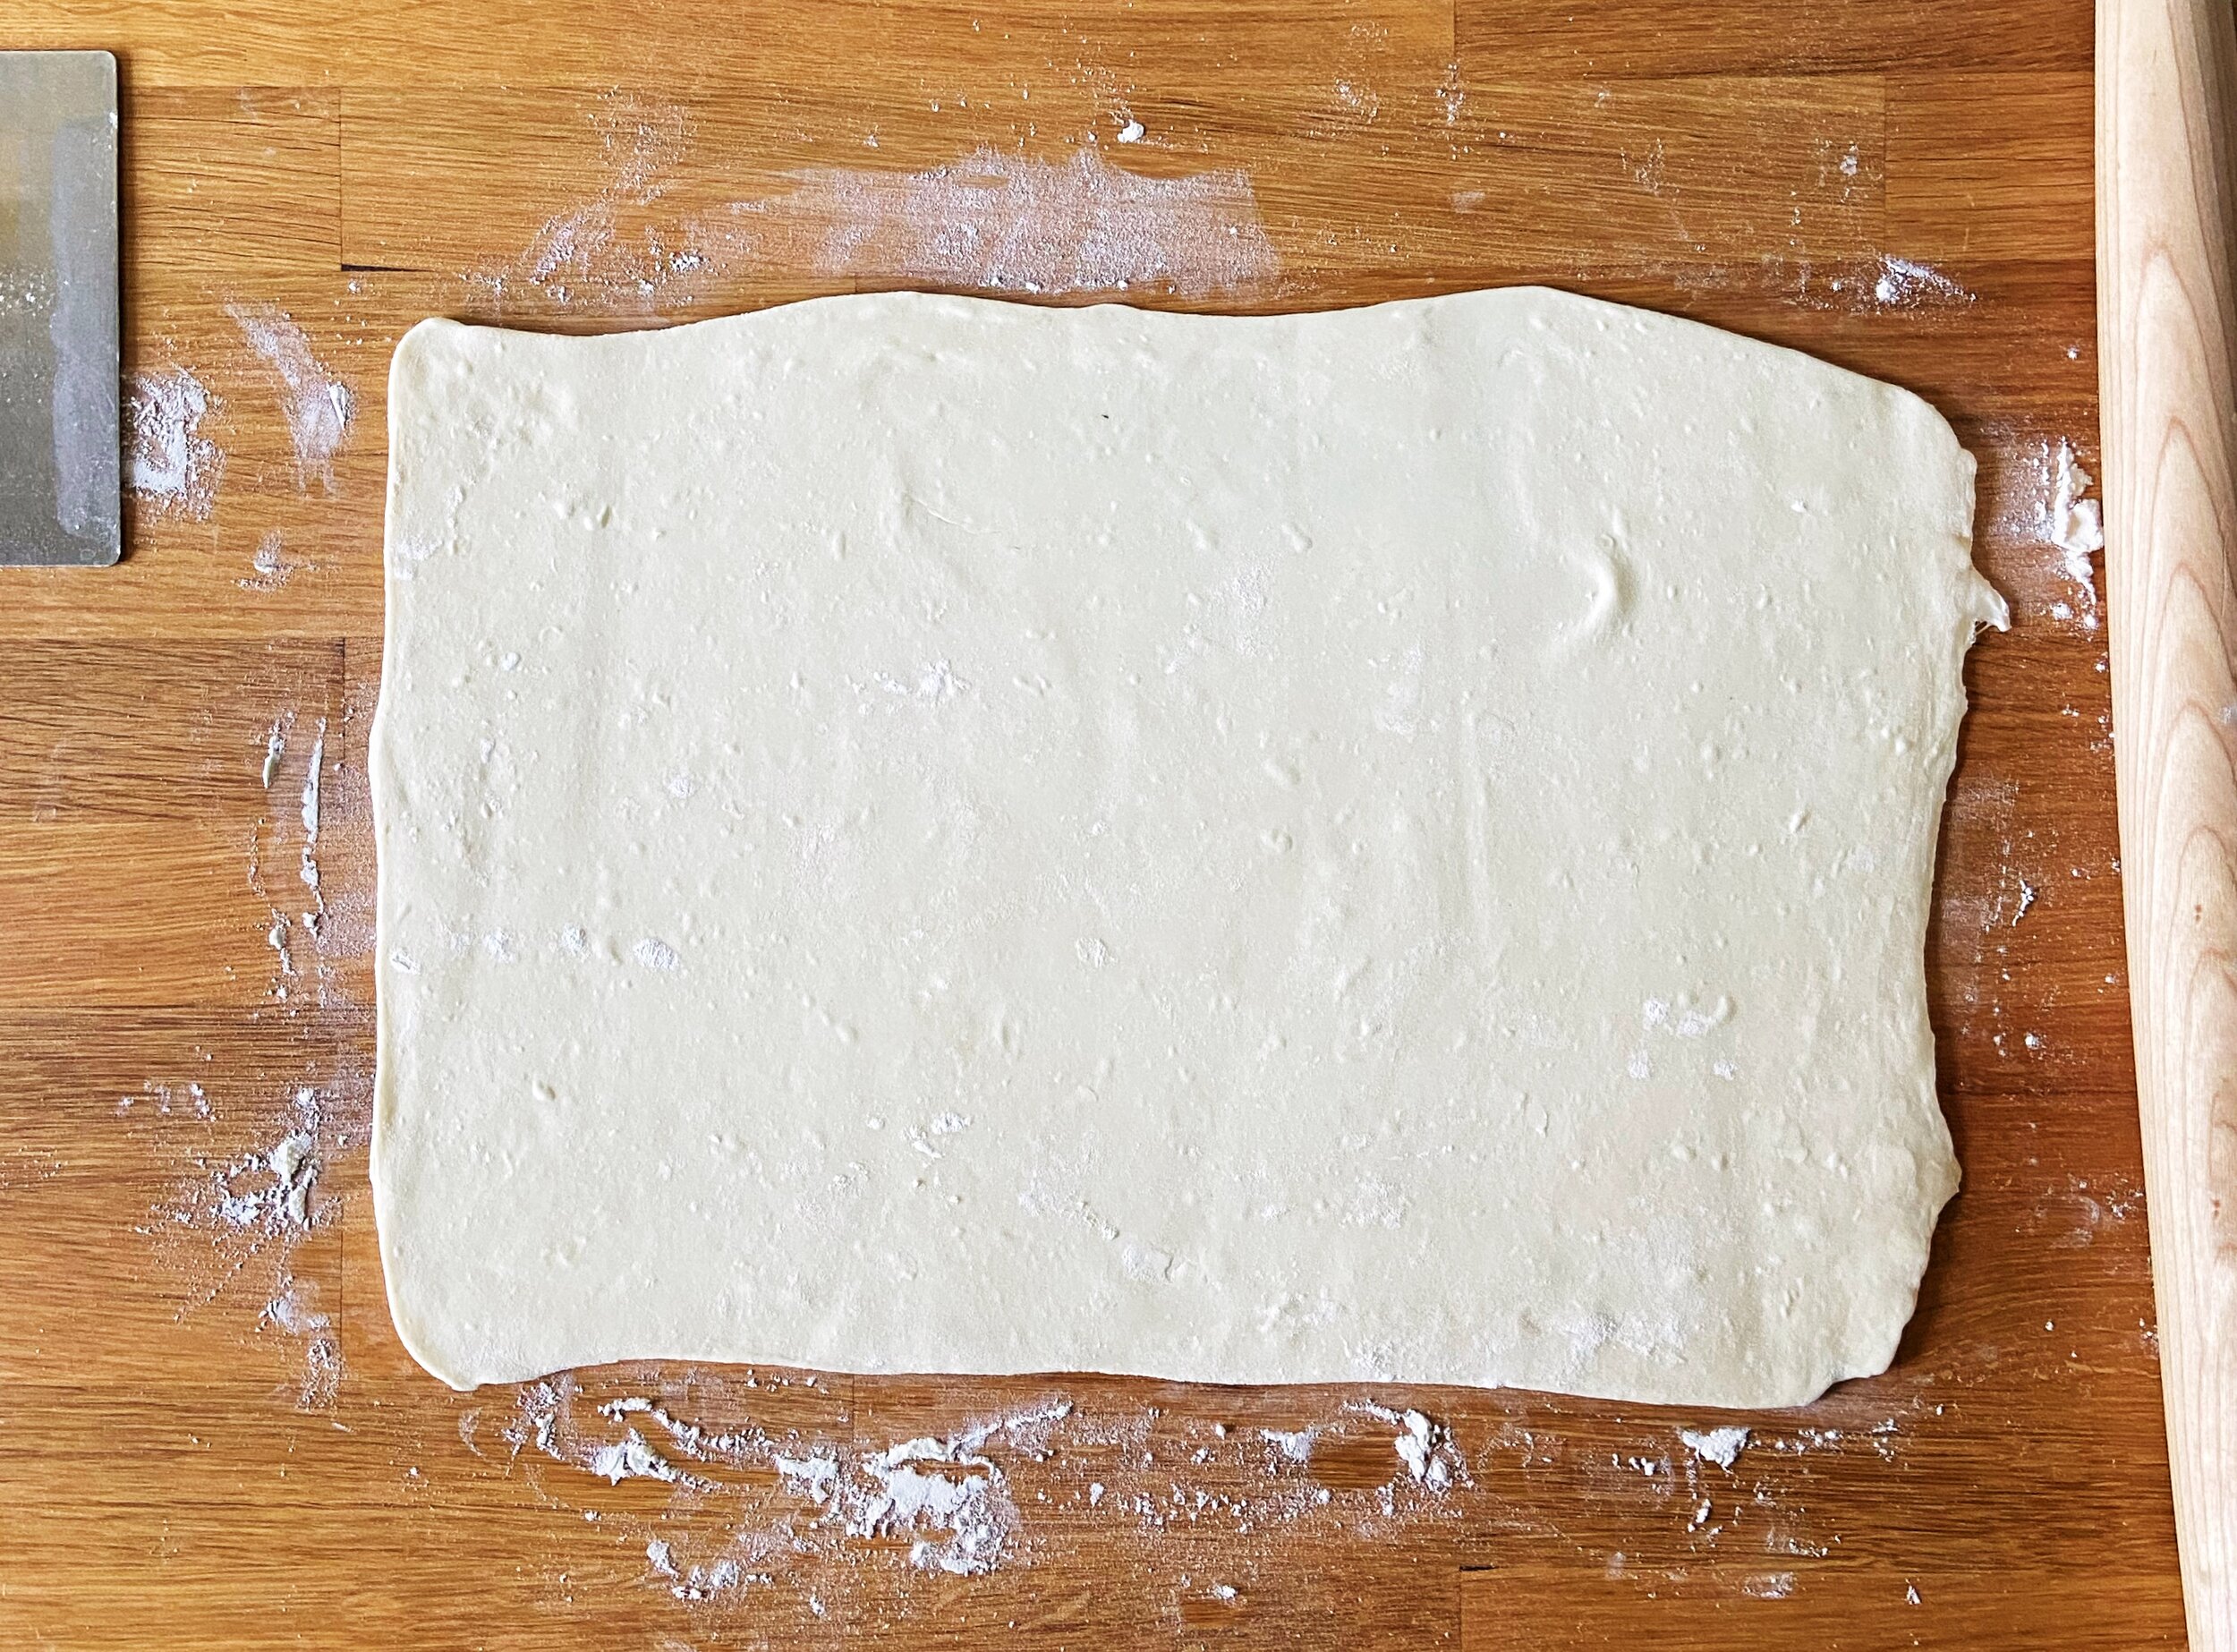
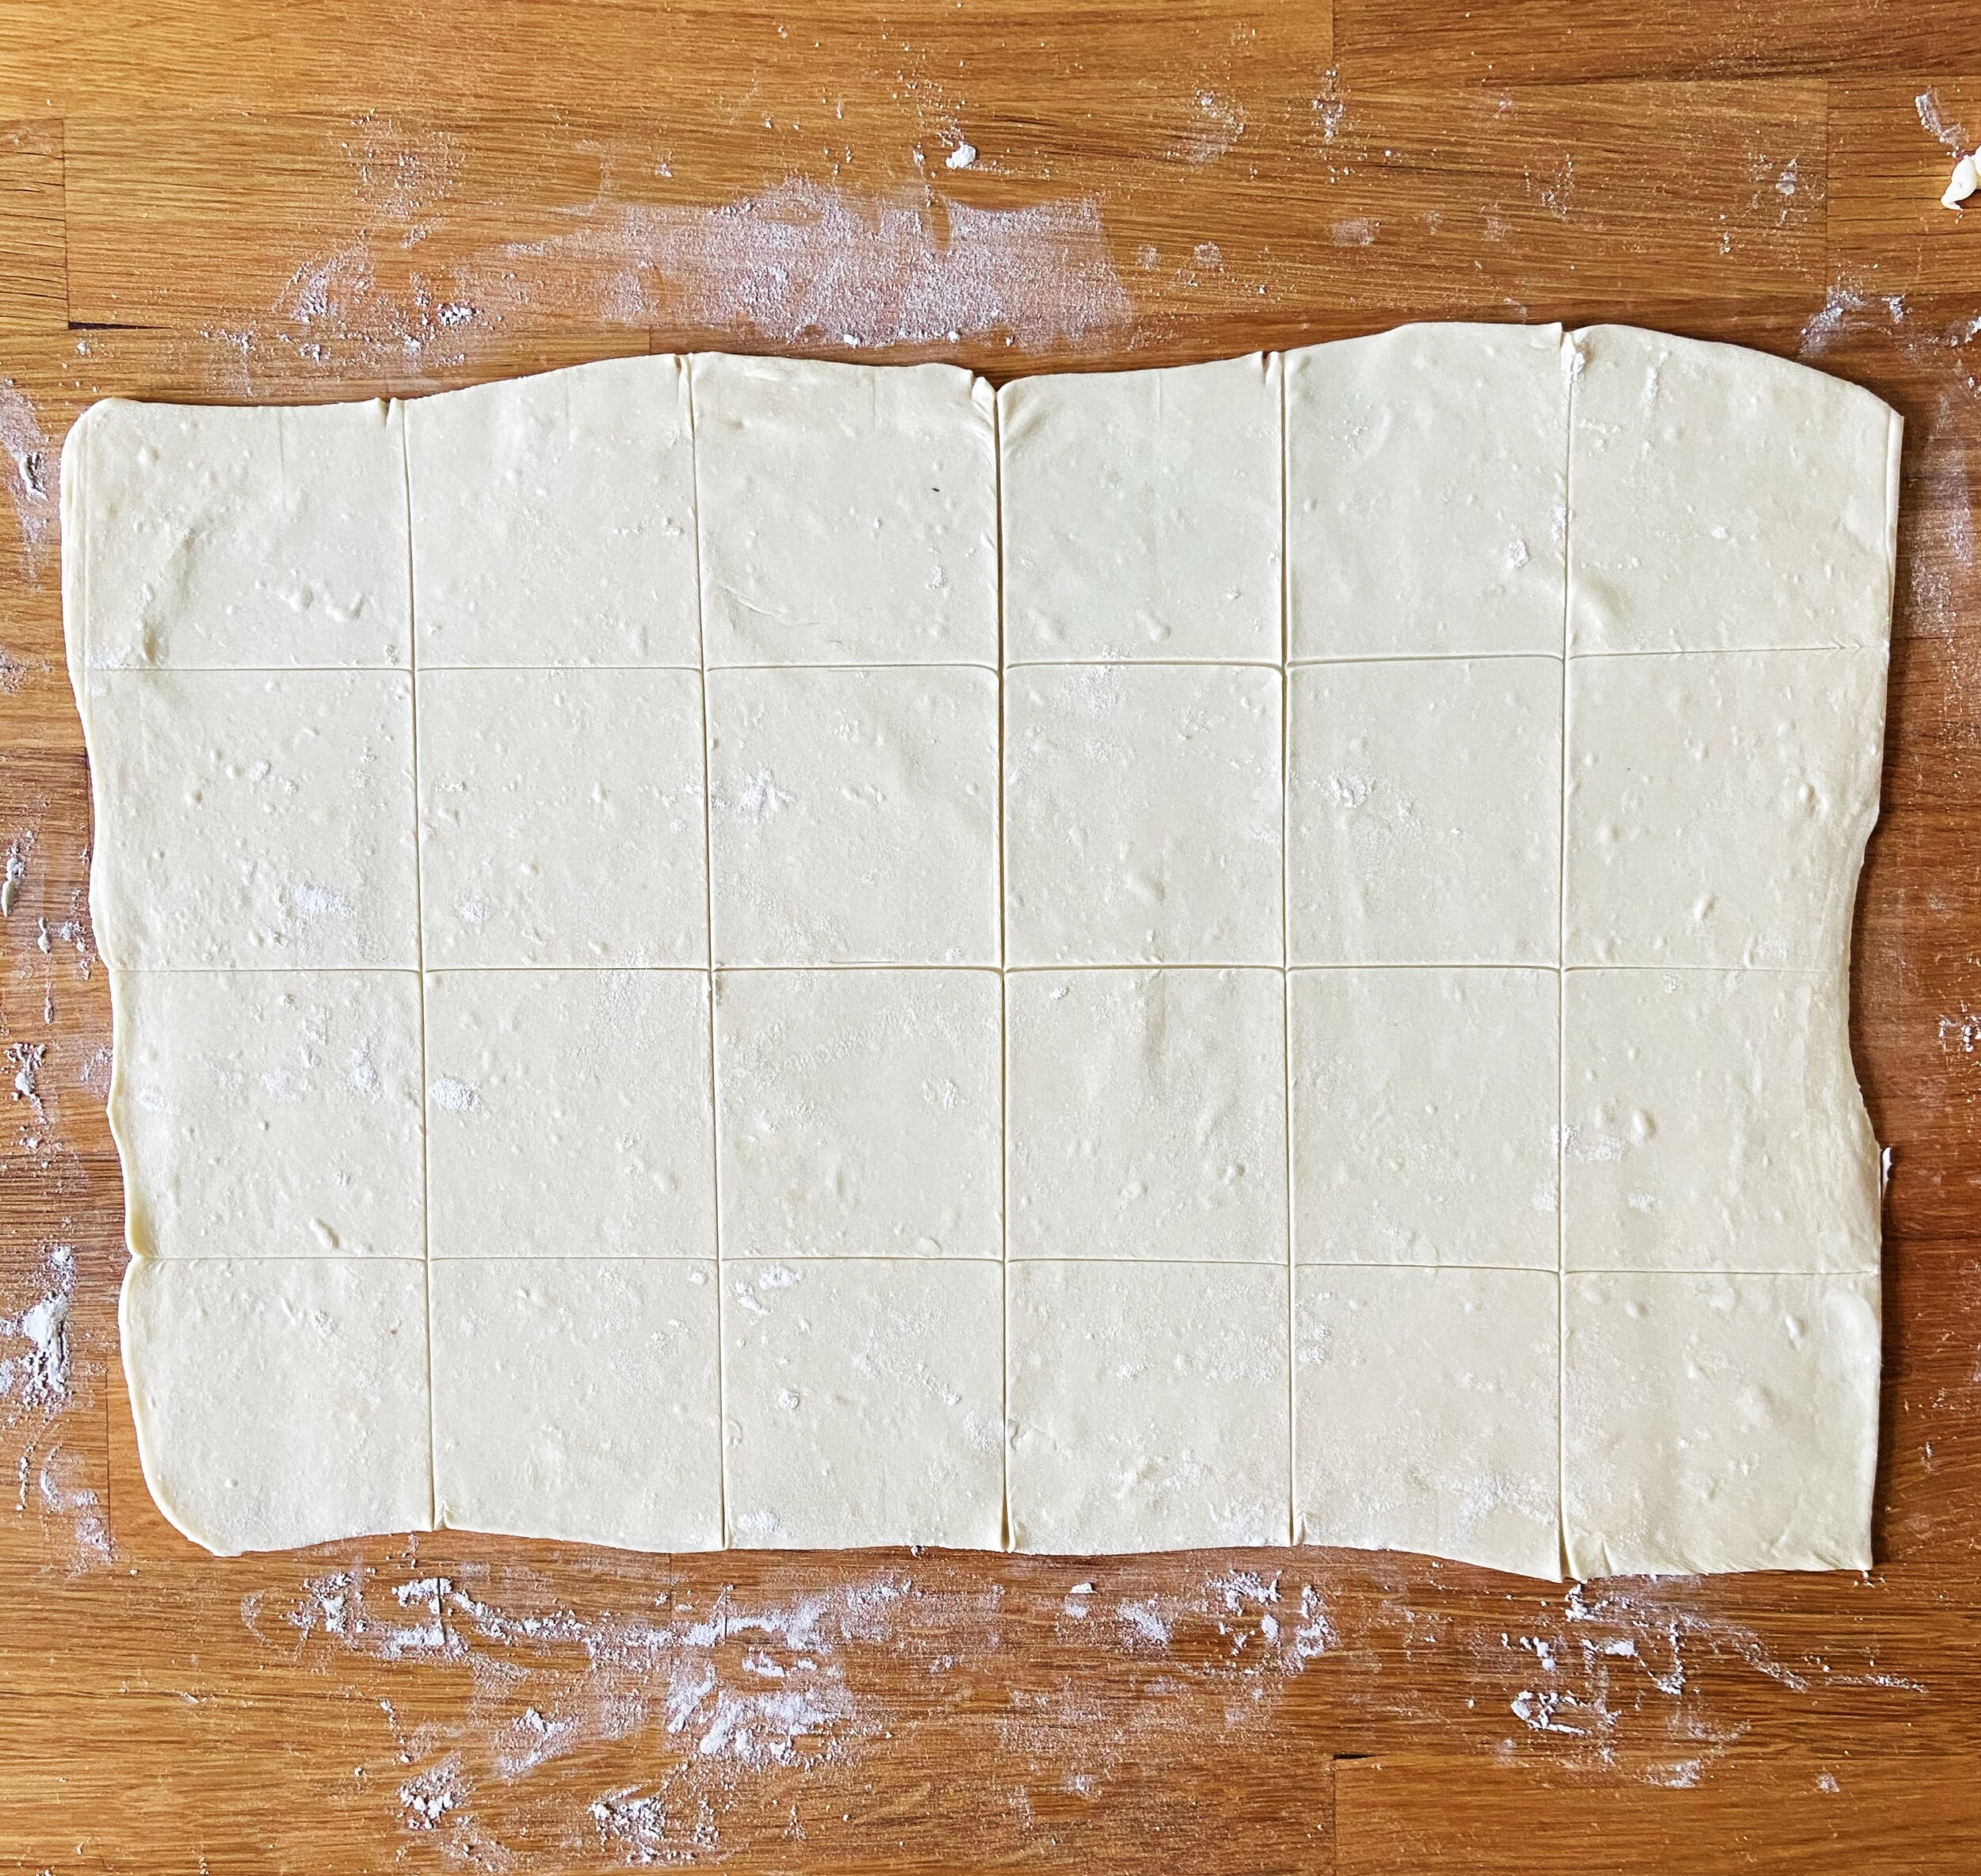
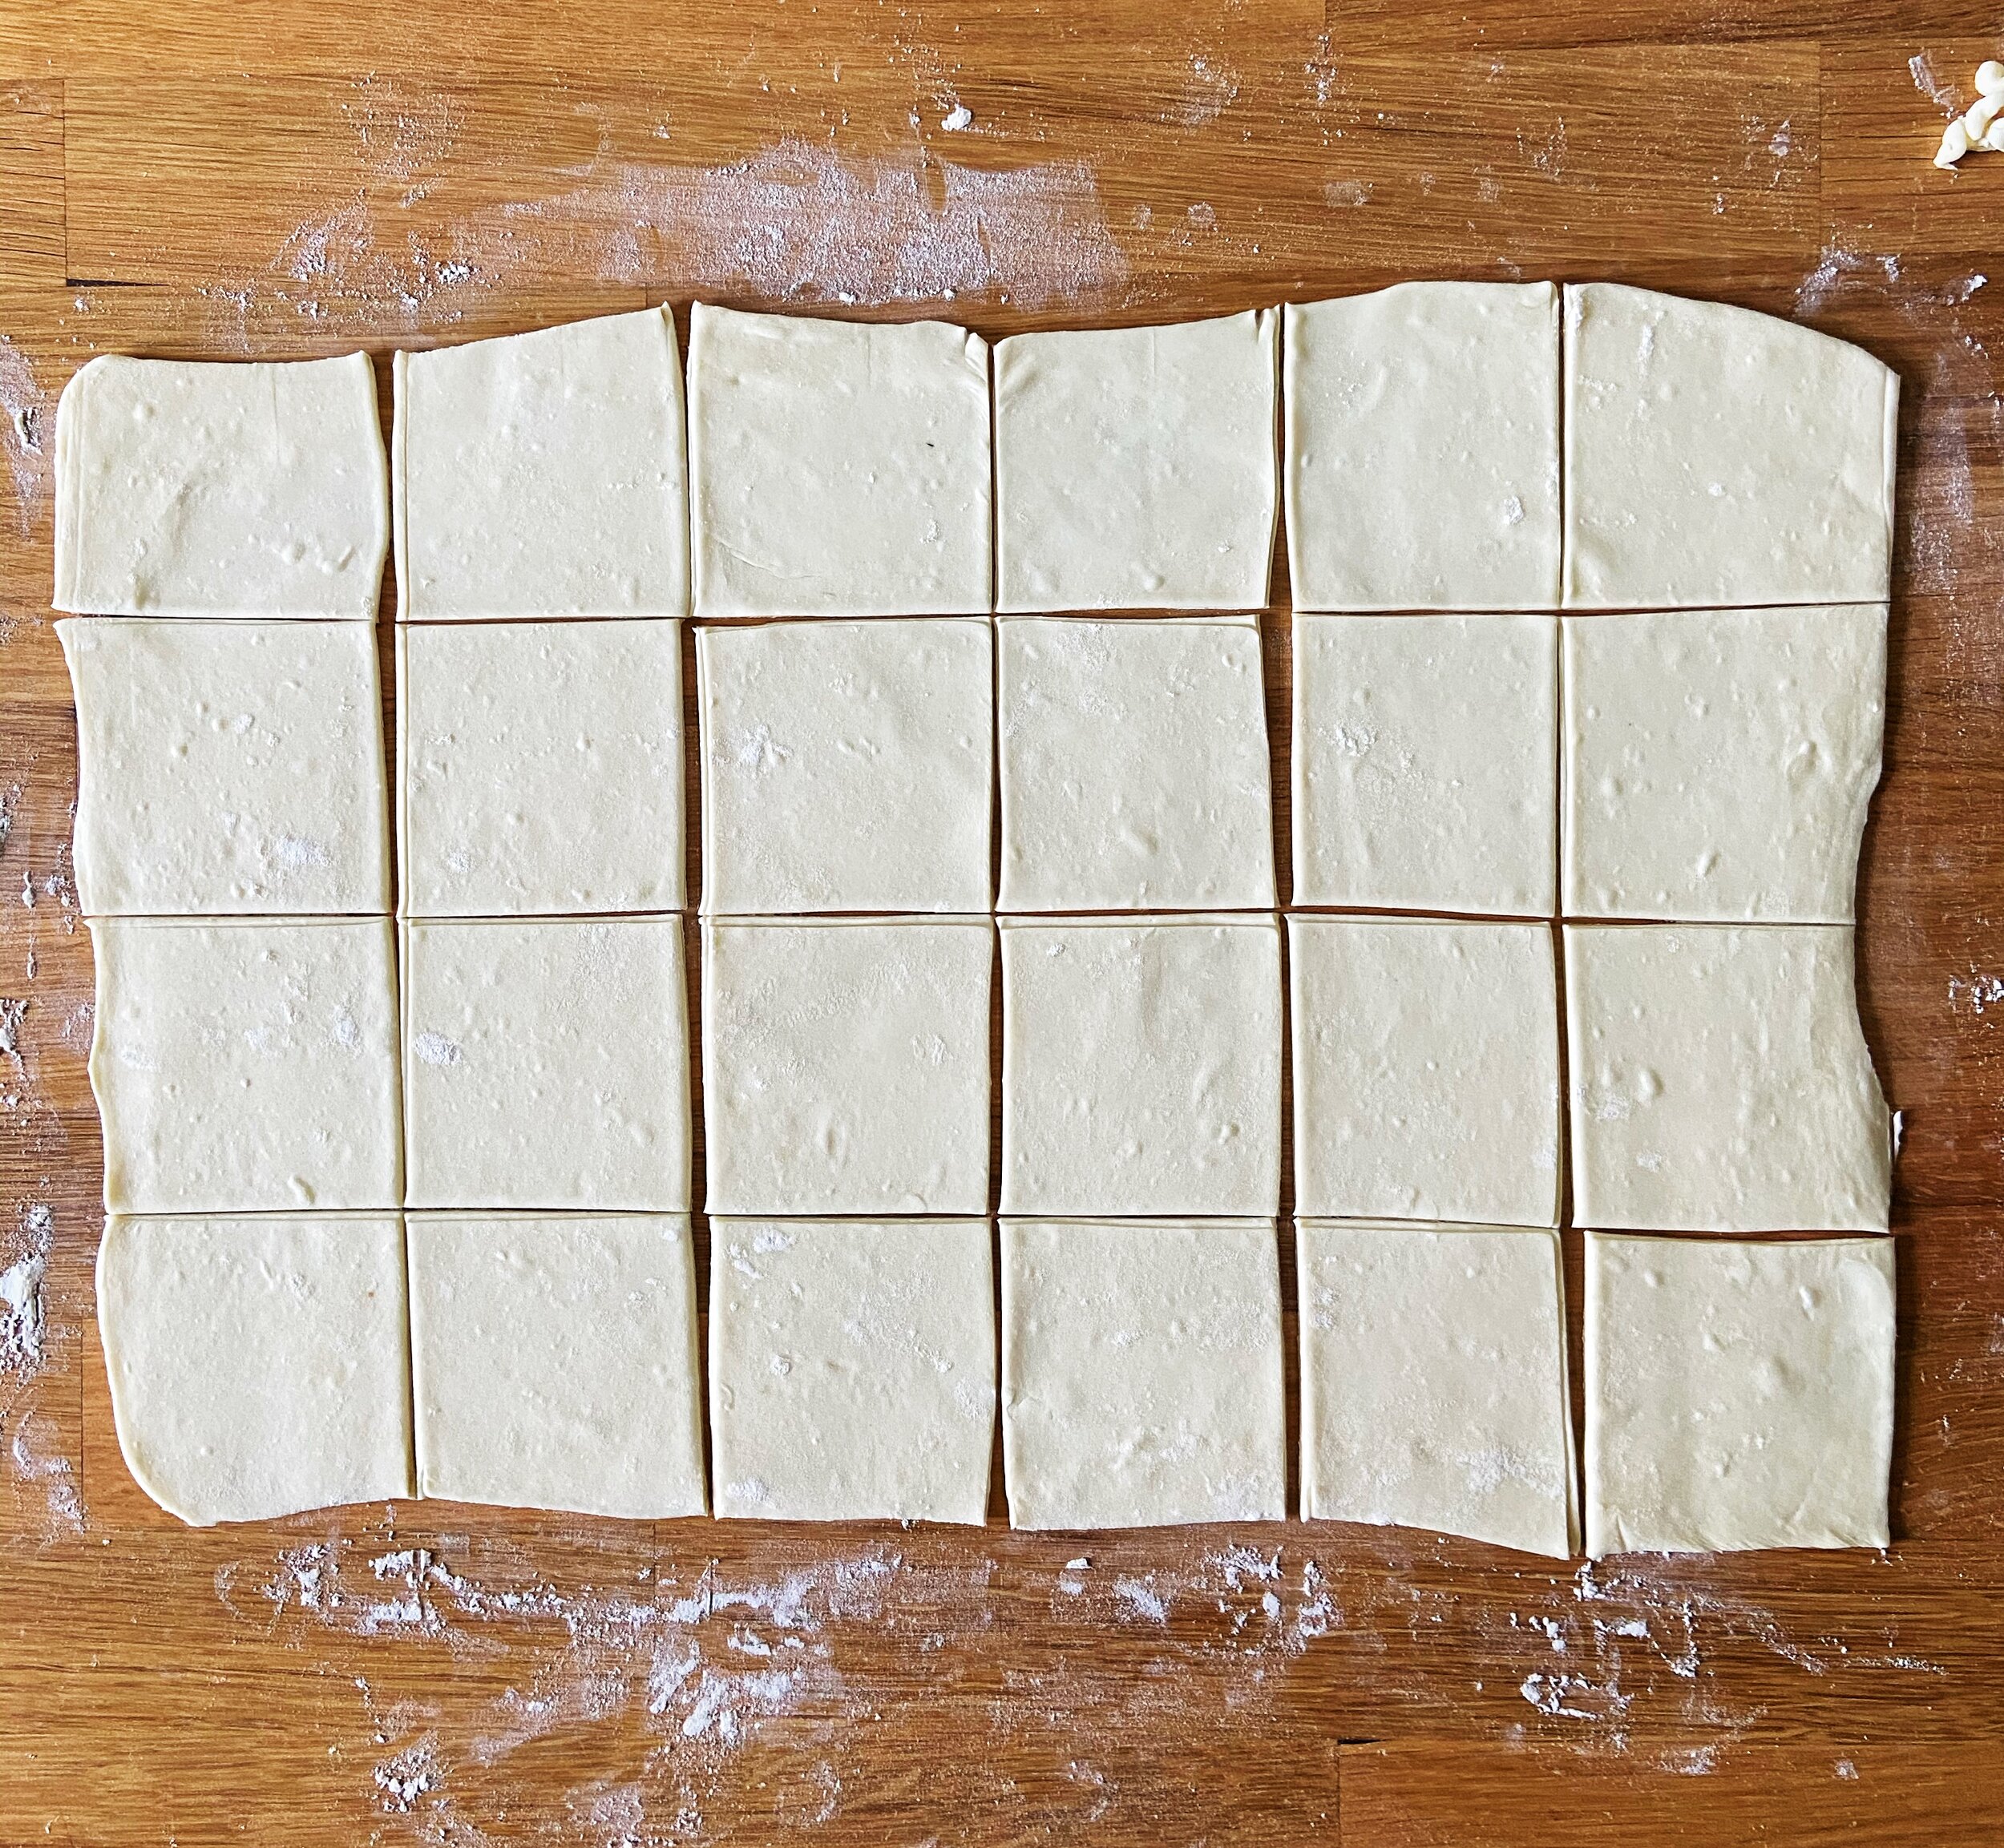
  2. On a lightly floured work surface, roll puff pastry dough into a 12x18” rectangle. Use a ruler and a sharp knife to cut 24 3x3” squares out of the pastry dough.
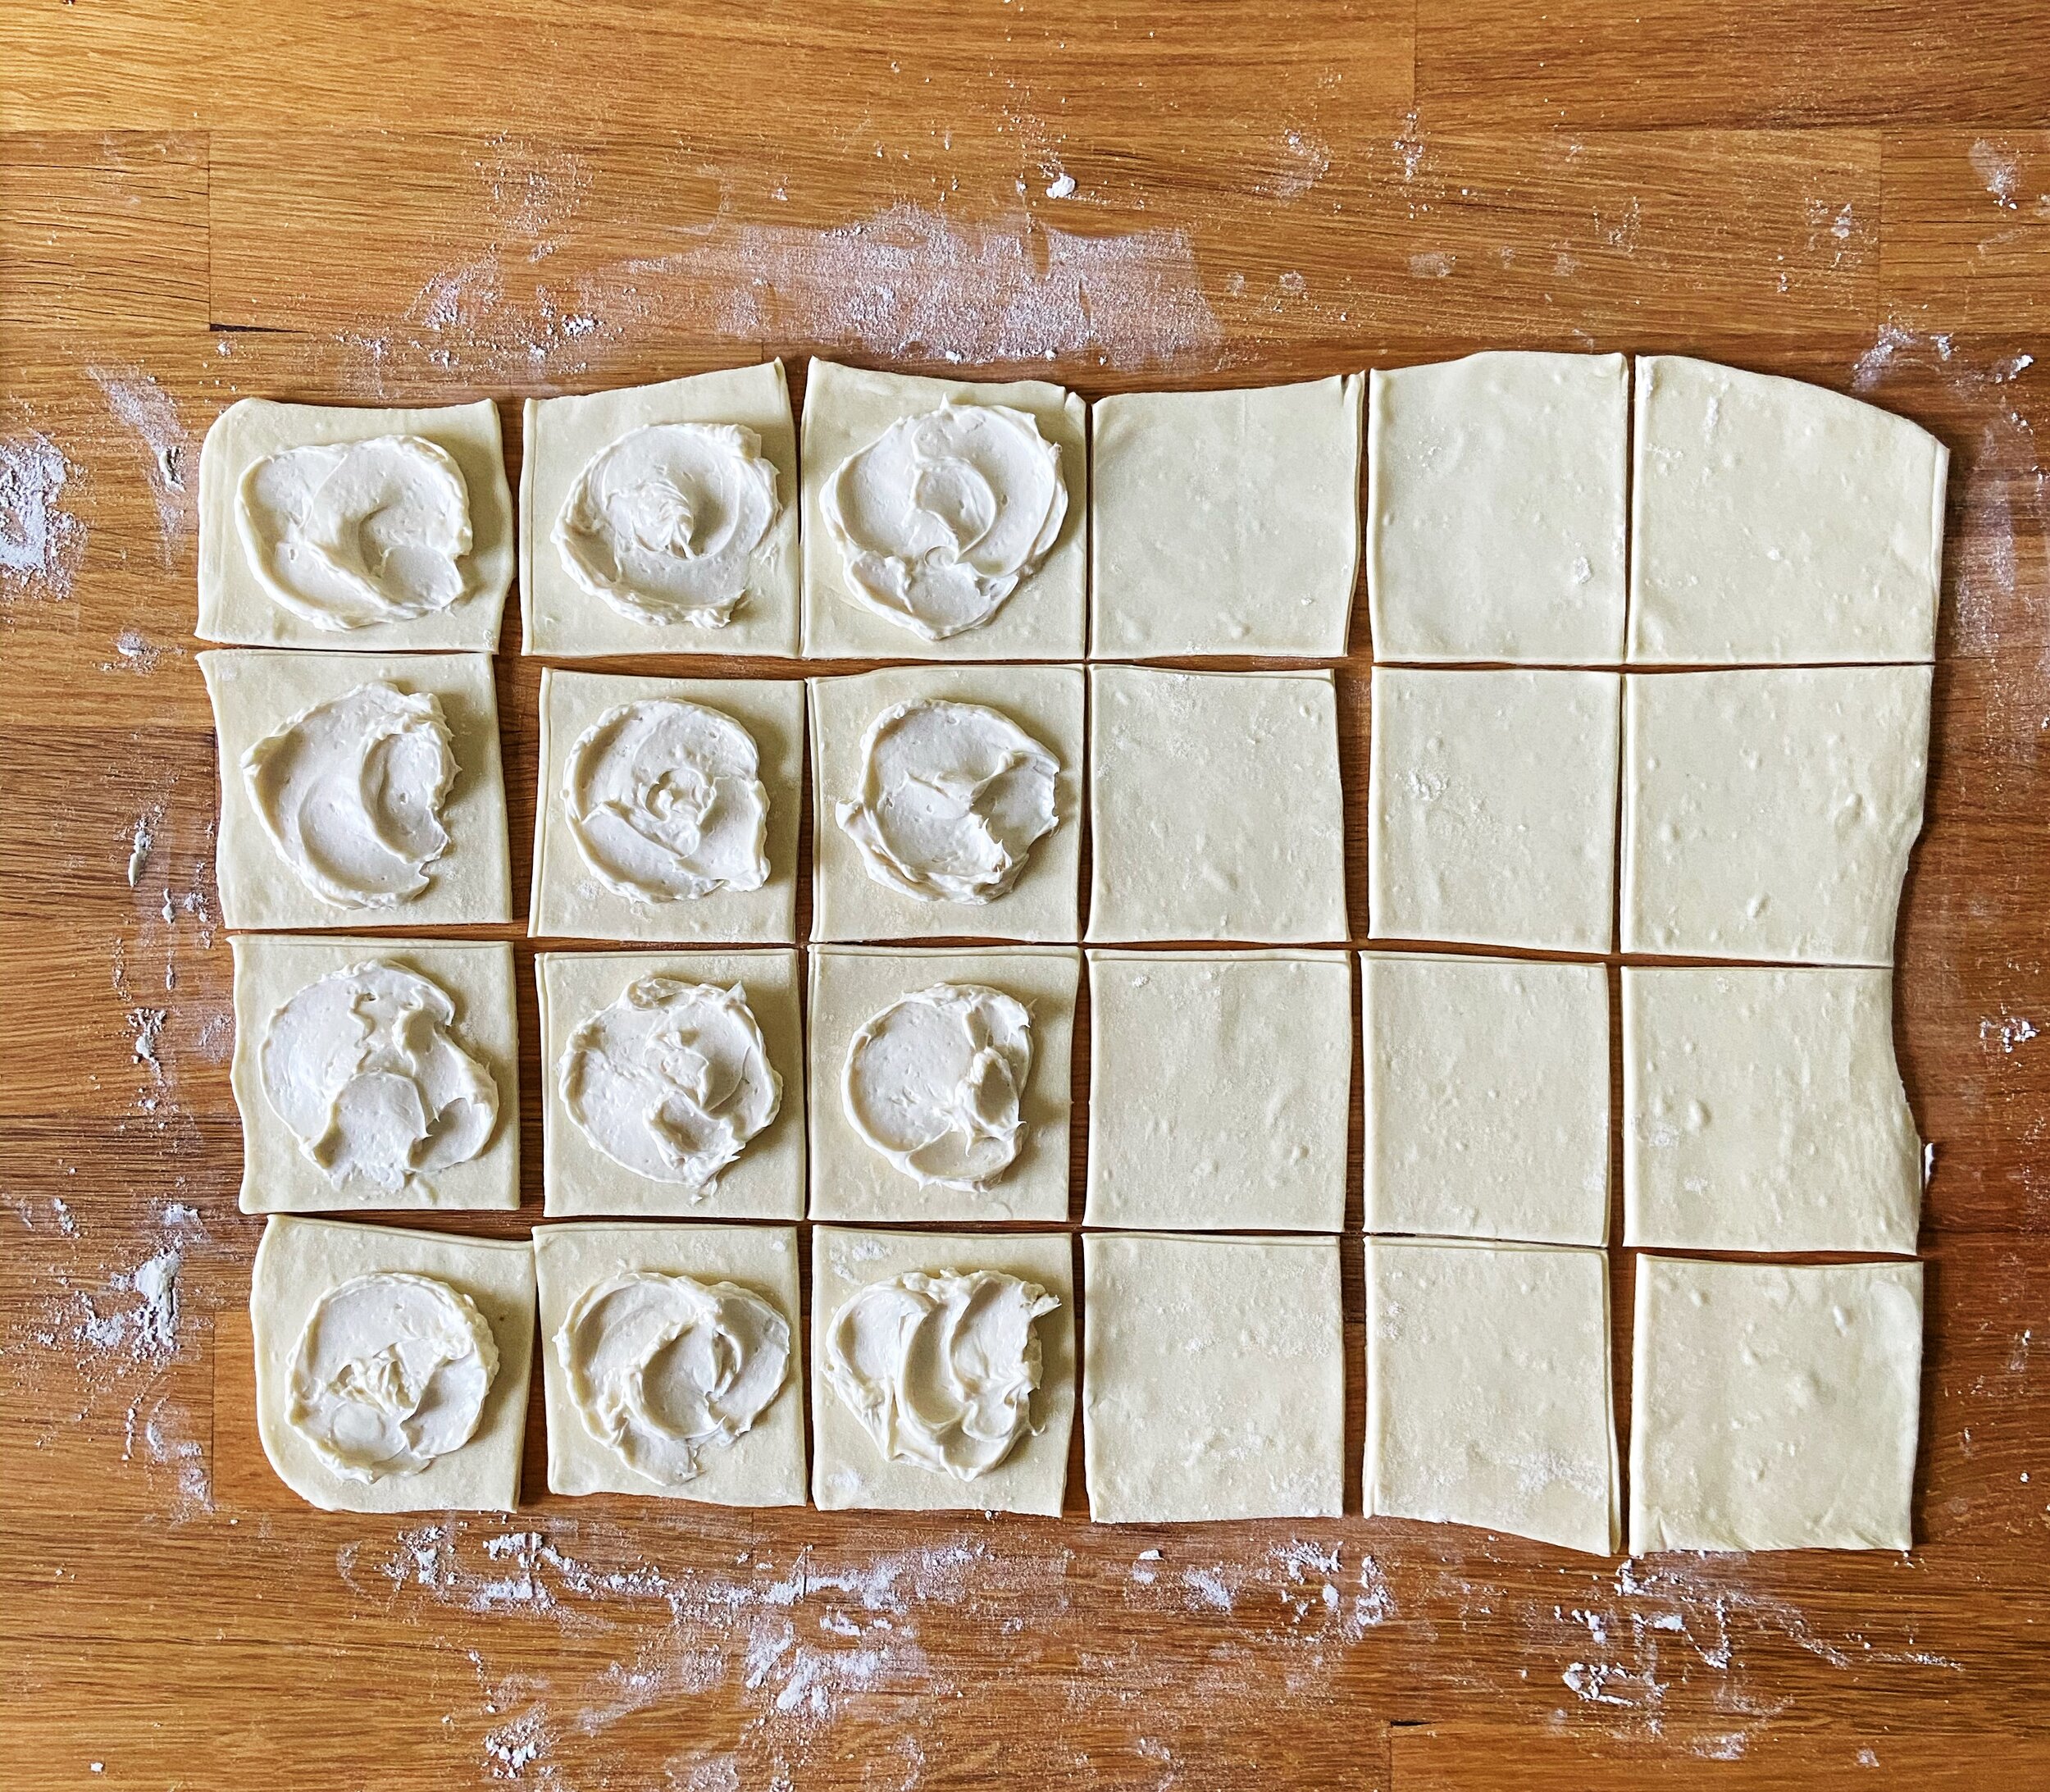
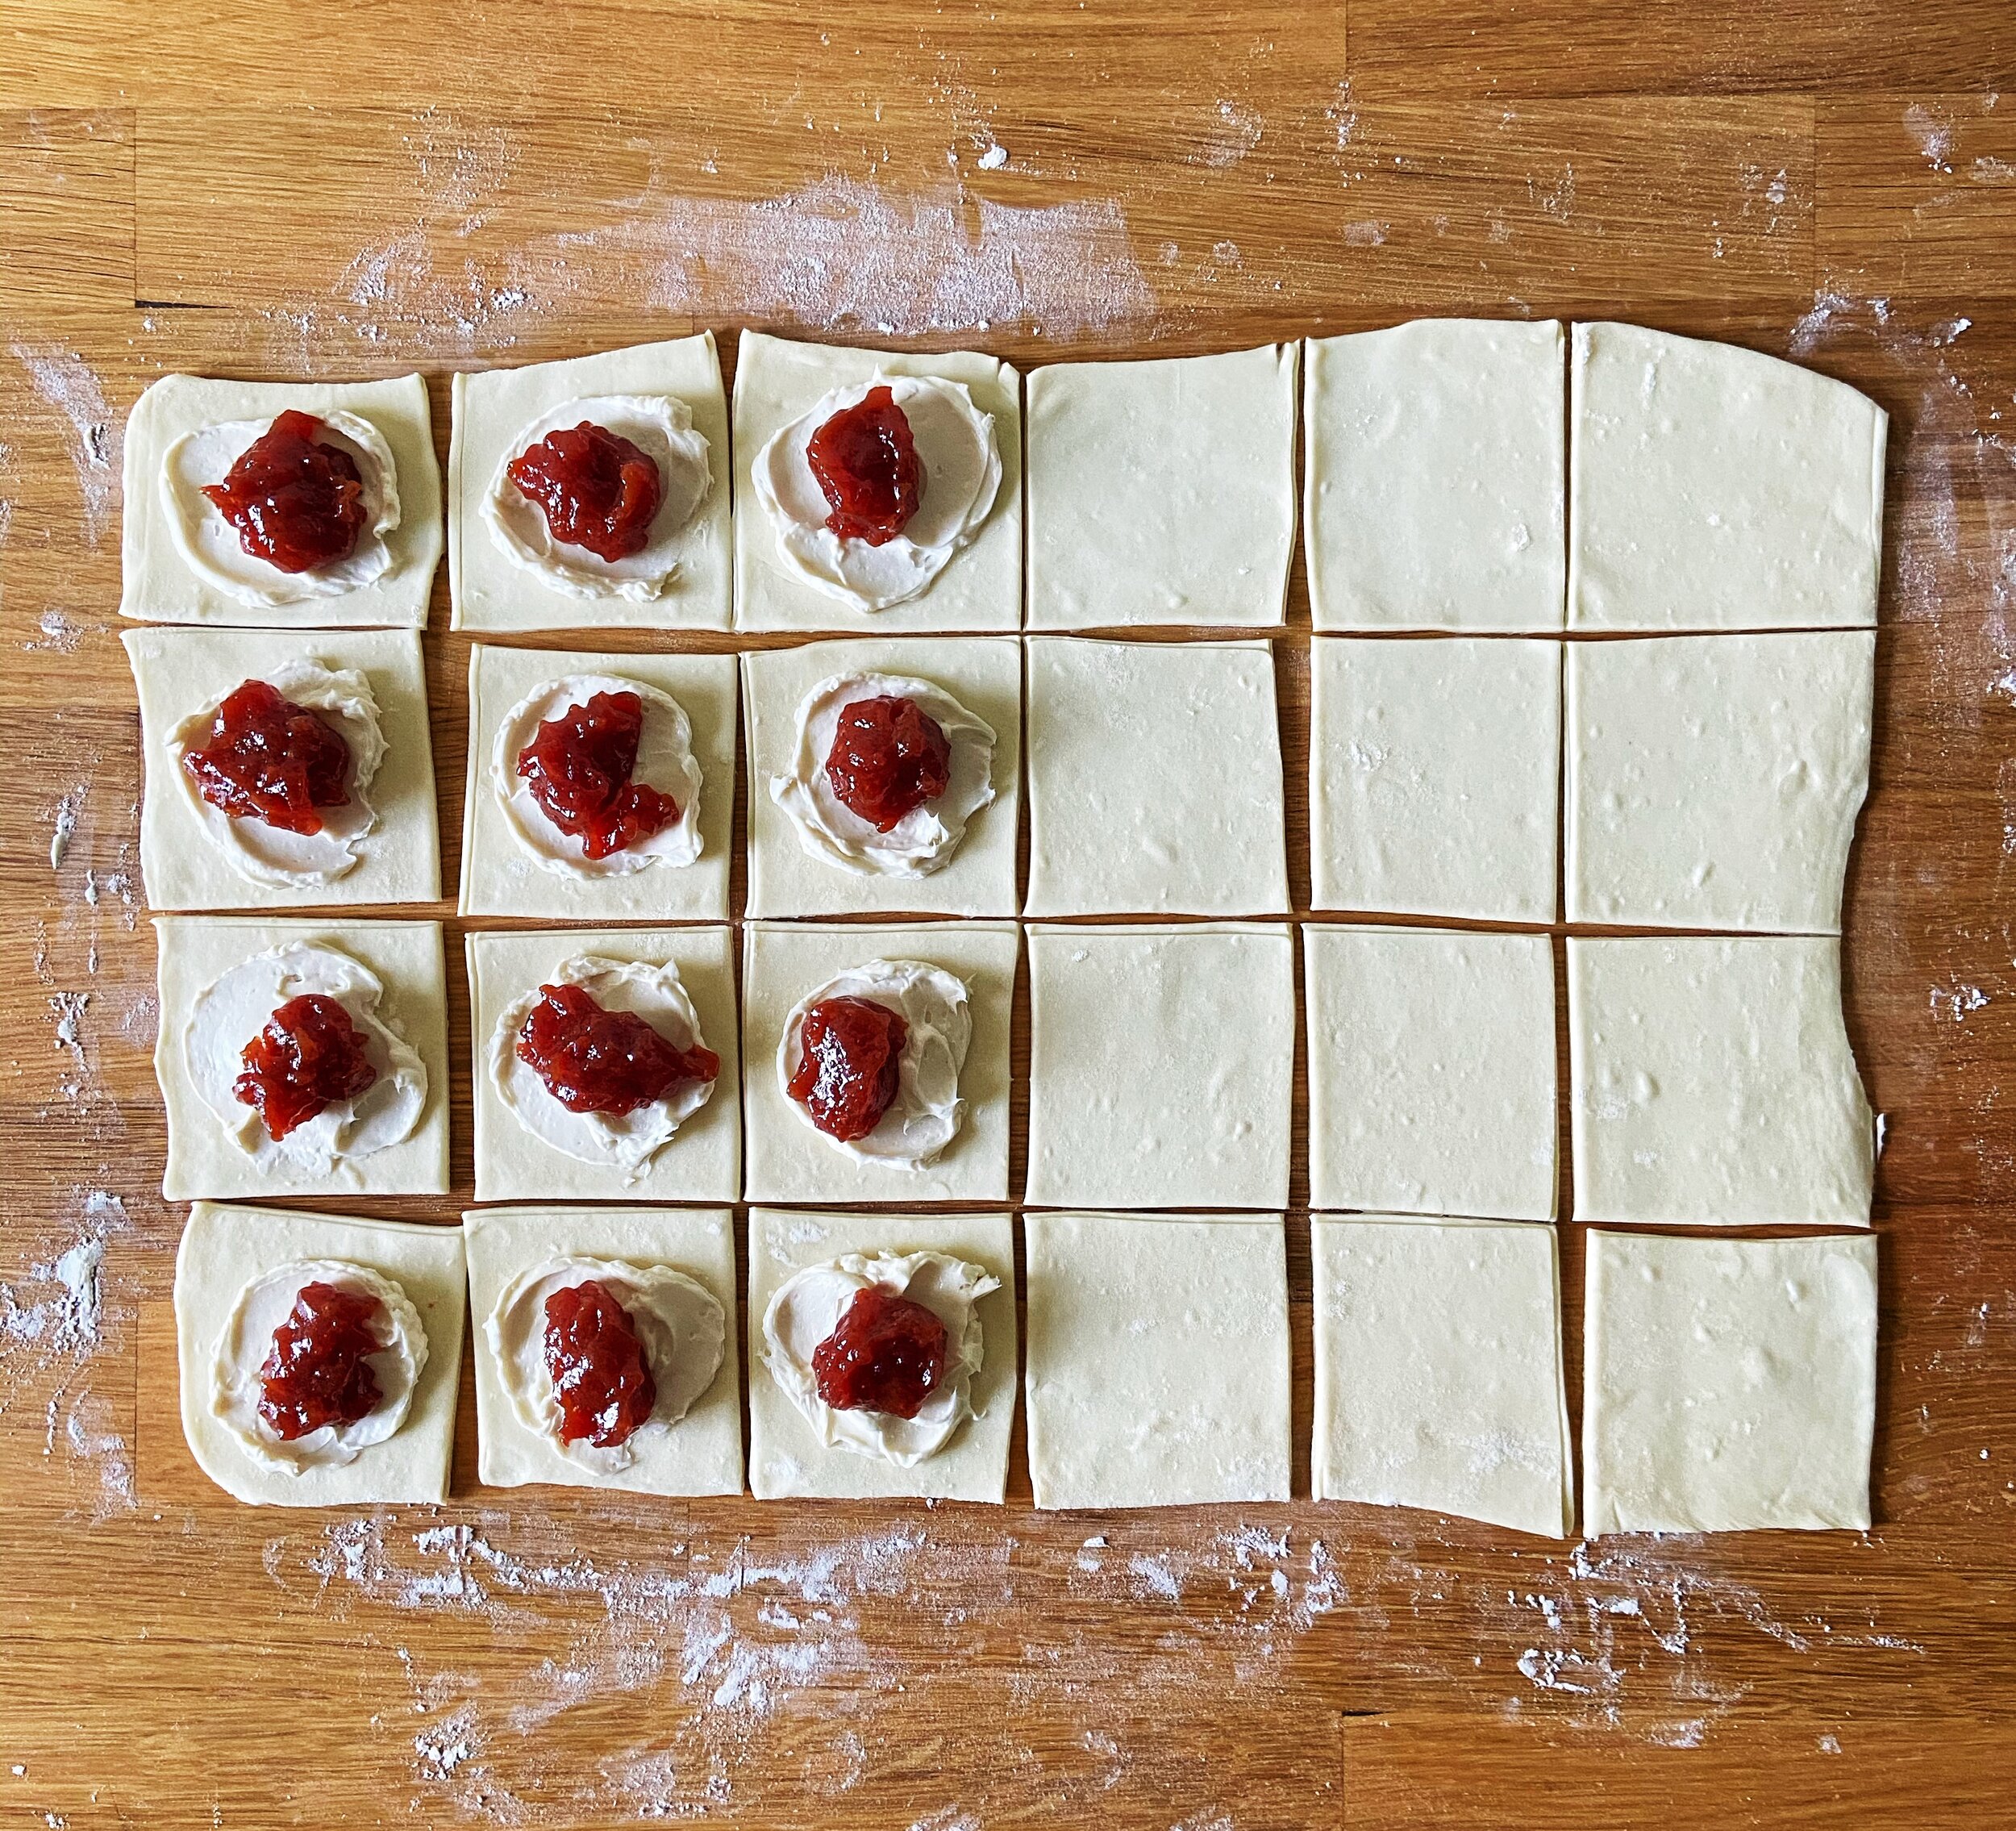
  3. Place 1 tablespoon of cream cheese filling in the center of 12 of the squares. Gently flatten and spread towards the edges using a spoon or offset spatula. Place a tablespoon of the guava filling in the center of each of the cream cheese dollops.
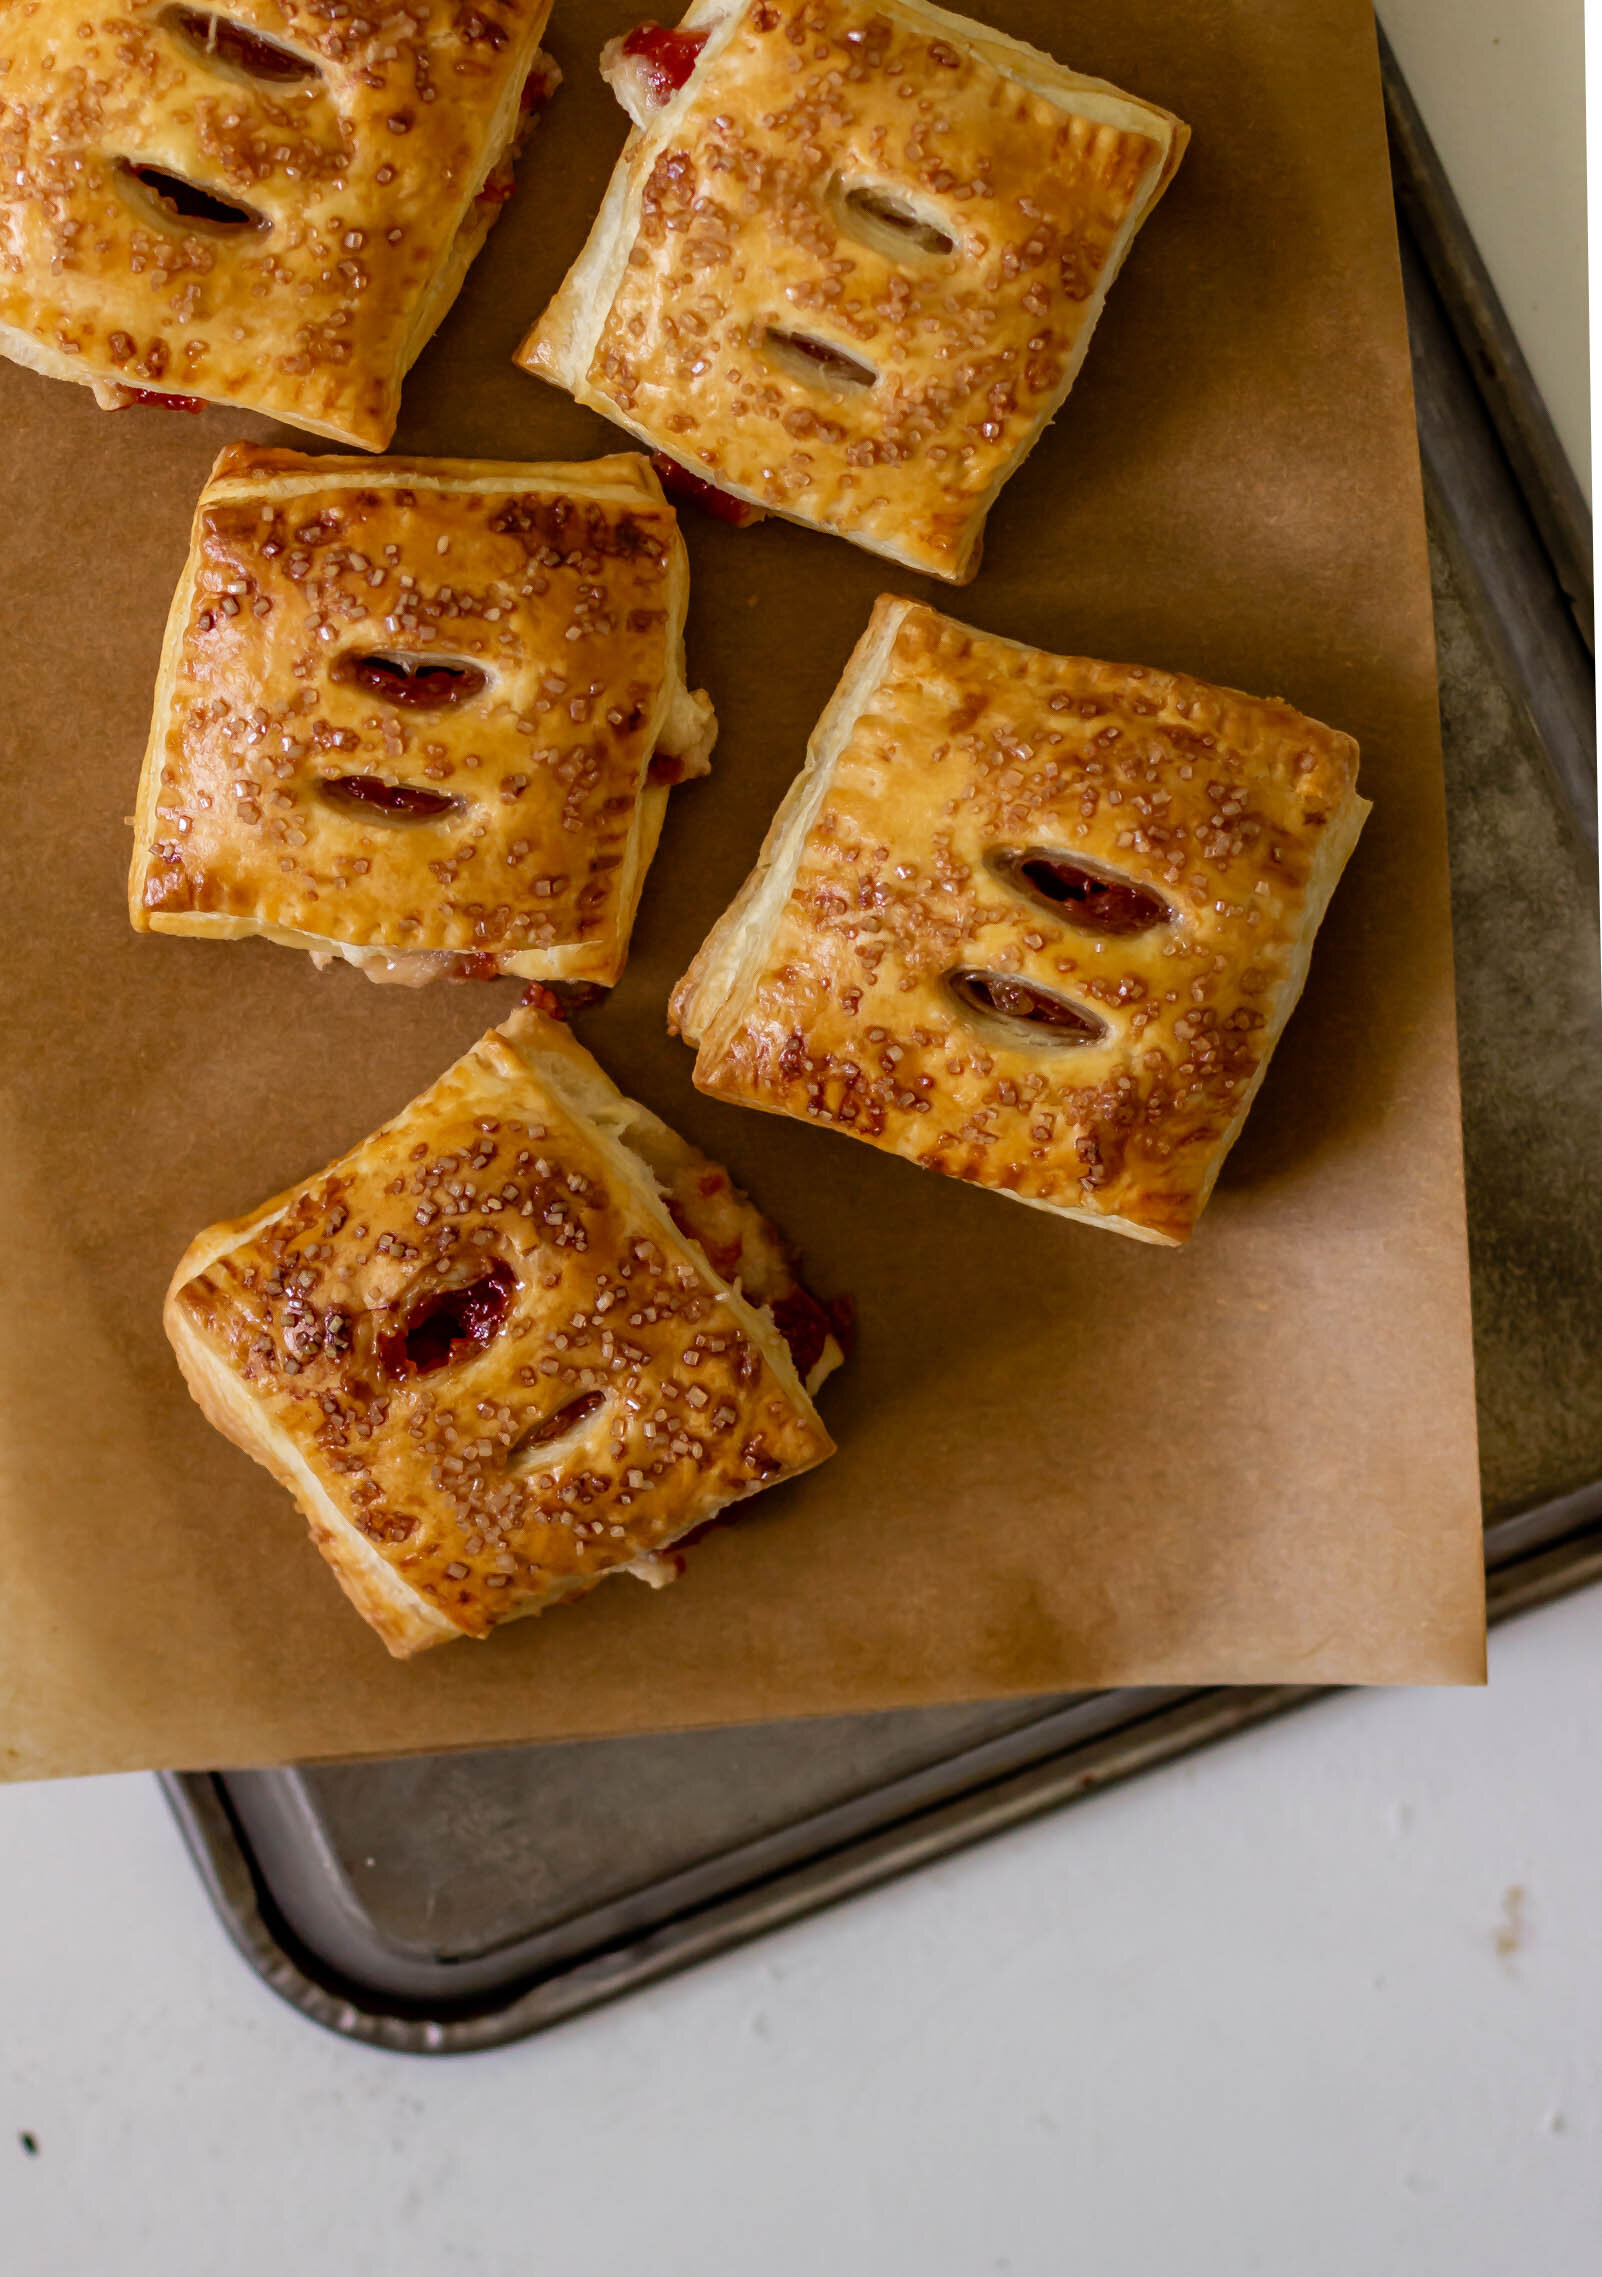
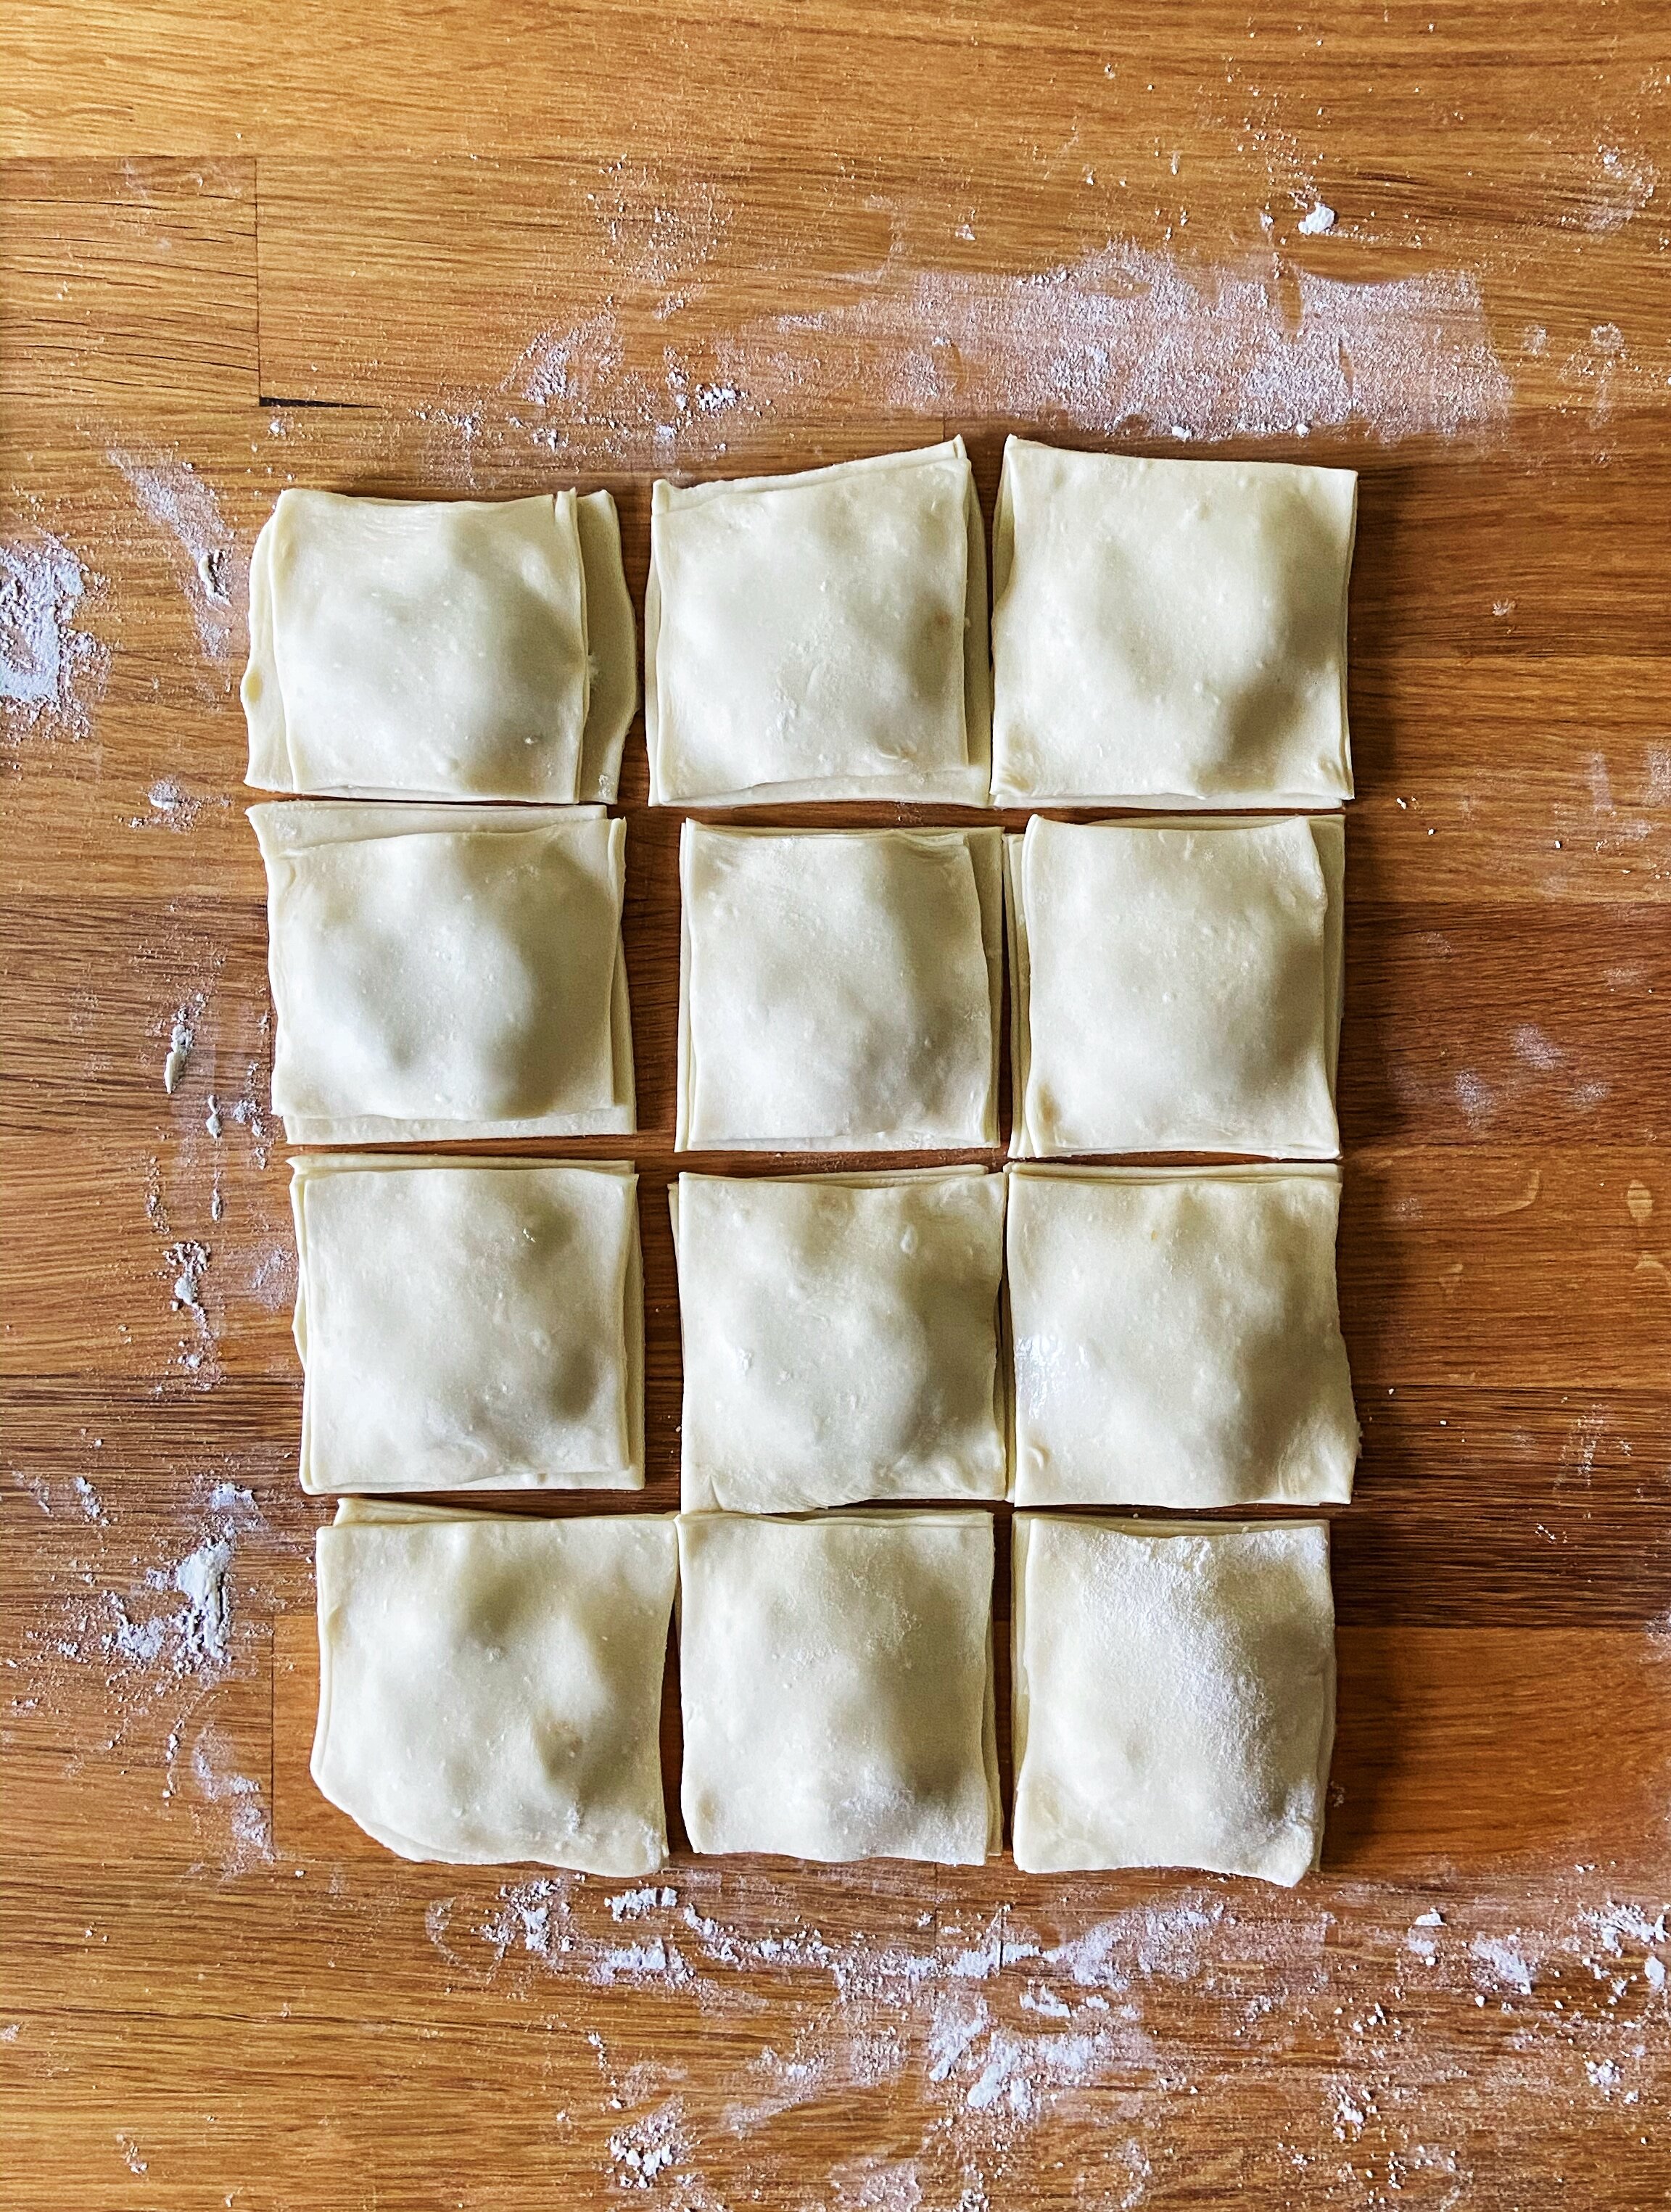
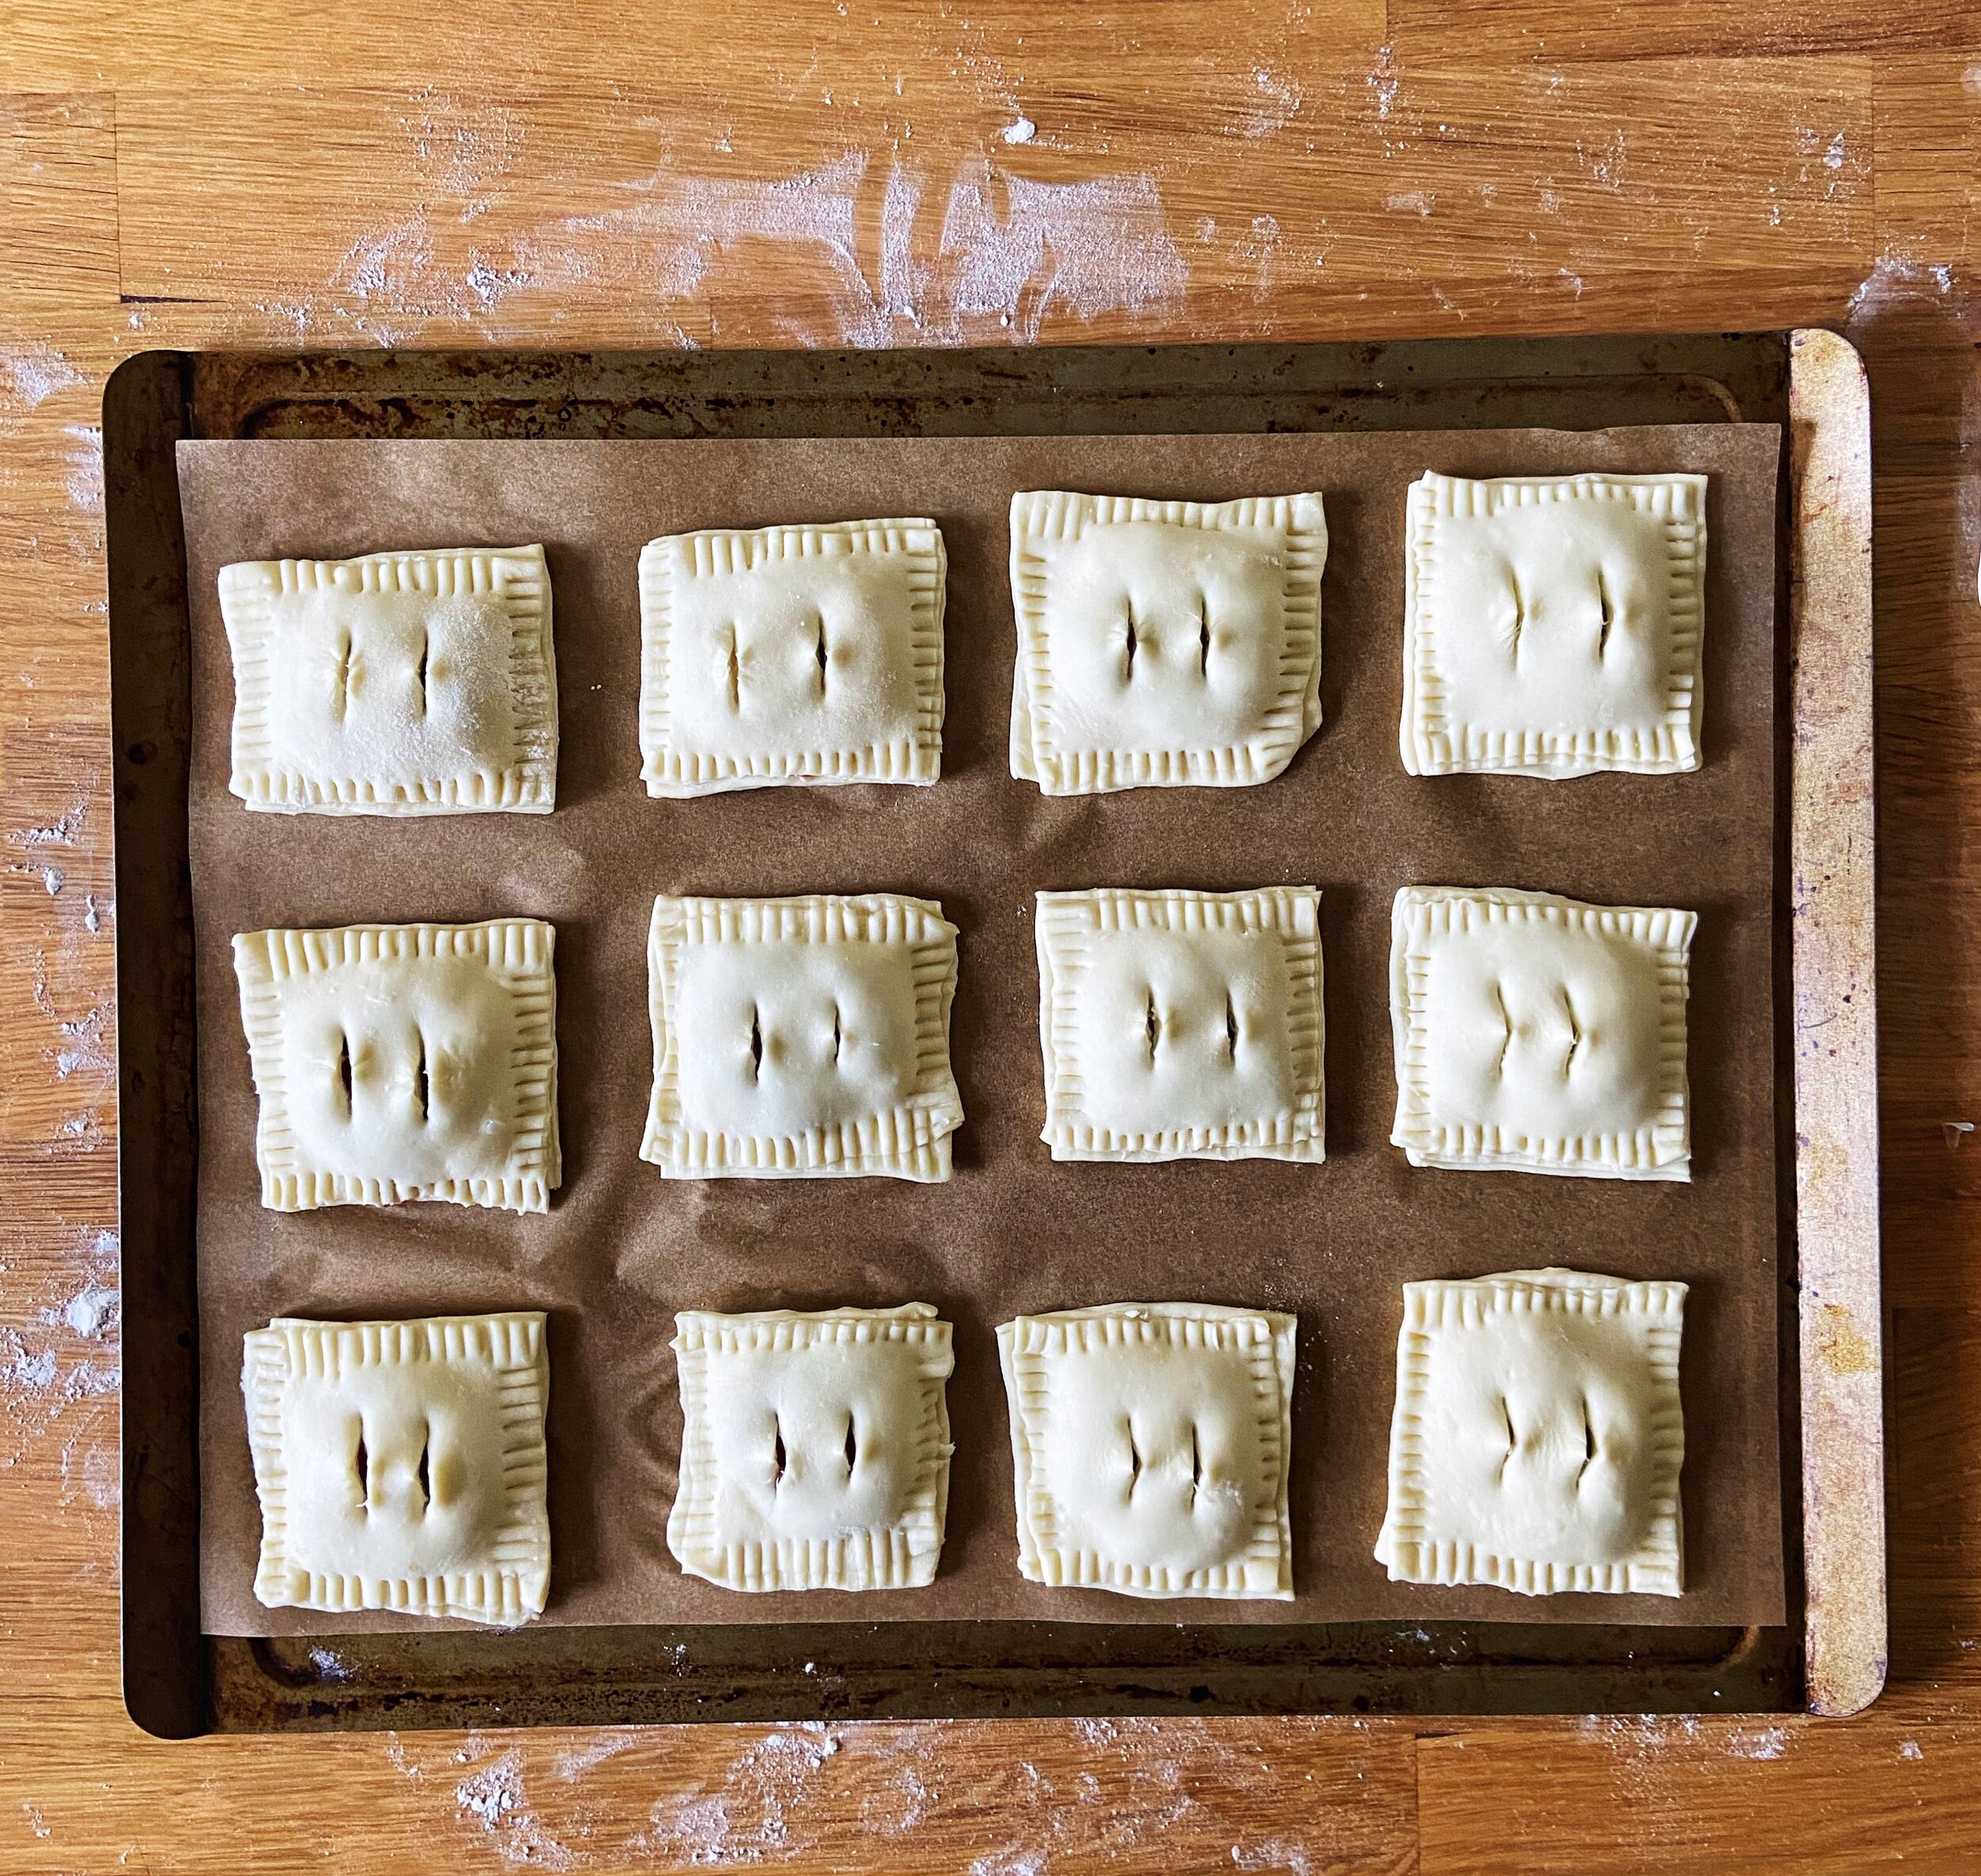
  4. Place the empty pastry squares on top of each of the filled squares to form twelve pastelitos. Use a fork to seal the edges and make two small cuts in the top of the pastry. Transfer pastries to your prepared sheet pan.
  5. Brush pastries with egg wash and sprinkle with demerara sugar. Bake for 10 minutes, then rotating the pan and bake for 10-15 minutes longer, until pastries are deeply golden. Let cool completely before enjoying.

Notes:

For this recipe, you can use homemade puff pastry or store bought. Find a recipe and step by step instructions for puff pastry here.

Recommended Products:

Did you make this recipe?
Tag @gatheredatmytable on instagram and hashtag it #gatheredatmytable
Created using The Recipes Generator

Puff Pastry

lamination4.jpg

If nothing else, this quarantine period has given us a bounty of time. People who have never had interest in baking before are suddenly churning out loaves of sourdough on a regular basis. We’re signing up for free photography/painting/writing classes online, and working on becoming gardeners or teaching ourselves how to give haircuts. The phrase “It’s a great day to learn something new” has never been truer, so in that ultra-motivated spirit, let’s learn to make puff pastry at home!

Puff pastry is a bit of an outsider in the pastry world. It’s like that person who is friends with everyone so they don’t fit squarely into a specific group (but their versatility makes us love them even more). Puff pastry is a laminated dough, like croissants and danishes, but because it doesn’t use yeast or natural leavening, it’s not technically considered a viennoiserie (the French word for leavened pastries with added sugar, butter, eggs, and usually laminated—its the bridge category between breads and pastries). There are four main types of puff pastry, and I would venture to say that three of them are best left up to professional bakers with sheeting machines in order to save a lot of headaches. Traditional puff pastry is sheeted similarly to croissant dough, with a detrempe (dough) that envelops a butter block that’s then rolled and folded to create lots of flaky layers. Italian puff pastry includes eggs and white wine in the dough and is mixed more intensively than other puffs. Inverted puff pastry laminates the butter on the outside of the dough, rather than the inside creating a flakier, crispier pastry (and really needs fancy equipment like a reversible dough sheeter, which I unfortunately do not have the space or money for in my tiny duplex kitchen). Finally, blitz (or rough) puff pastry is the most basic and quickest puff pastry and it’s what we are going to learn today.

To make blitz puff pastry, cold butter is worked into the dough into pea-sized chunks, as if you are making a pie or tart dough. The dough is then given a series of folds over the course of a couple hours to create those flaky layers before it’s tucked in for an overnight chill. Below, I’ve broken down two of the most common types of dough folds, used in any laminated dough, and added pictures to help you better understand exactly what each should look like.

P.S. I’ll be sharing a few different recipes later this week that use this blitz puff pastry so keep an eye out!

Double Fold

A double fold is usually the first fold completed in a laminated dough. One of my professors in pastry school referred to it as the “church door fold” and it’s very much like closing doors. The dough is rolled to a rectangle and then the edges are folded in to meet in the middle, like closing a double door. The dough is then folded in half, like closing a book.

Single Fold

A single fold, or letter fold, is the most common laminating fold. The dough is simply rolled to a rectangle shape and then folded in thirds like a letter.


Blitz Puff Pastry 

Yield: 2 lbs puff pastry dough

Ingredients 

14 oz (397 g) all purpose flour

10.5 oz (298 g) unsalted butter, cold and cubed

2 tsp kosher salt

1 tsp lemon juice 

7 oz (198 g) cold water


Procedure 

  1. In the bowl of a stand mixer fitted with the paddle attachment, combine flour and salt. Mix on low speed for 30 seconds, just to combine. 

  2. Add the cold, cubed butter to the pie dough and mix on medium-low speed until butter is broken up into pea-sized cubes throughout the flour. This is should resemble pie dough and the butter should not be completely combined. 

  3. In a measuring cup, combine lemon juice and water. With the mixer running on low speed, gradually stream in water mixture and mix until just barely combined. Be careful here not to overmix!

  4. Turn the dough onto a well-floured work surface and gently press into a rectangular shape. Wrap in plastic wrap and refrigerate for 30 minutes. 

Lamination

  1. For the lamination process, we will complete a series of five folds in total in three intervals. *refer to the photos above for a visual reference of the folds*. 

  2. Turn #1: Remove dough from refrigerator, unwrap and place onto your well-floured work surface. Roll the dough into a large rectangle, 18x12” and is about 1/4” in thickness. Make sure that the 18” length of the dough is the horizontal end. Take the far-edge of the dough and fold it in, about 1/3 of the length. Then take the far-left edge of the dough and fold it 2/3 of the way in, until it meets the edge of the first fold just off-center of your rectangle. Grab the left side of the dough and fold it in half like you are closing a book. You will have just completed what’s called a double fold. Wrap the dough in plastic wrap again and return to the refrigerator to chill for another 30-45 minutes. 

  3. Turn #2: Remove the dough from the refrigerator and bring back to your well-floured work surface. This time, you will complete two single-folds. Again, roll the dough back out into your 18x12” rectangle with 1/4” thickness. Bring the right edge of the dough in 1/3 of the way, like you are folding a letter. Then bring the left edge of the dough over the right all of the way over the folded right side. This is one single fold. Turn the dough 90° so that the open sides are now facing horizontally. Roll the dough back out to your 18x12” rectangle and fold like a letter one more time. Re-wrap the dough and return to the refrigerator for another 30-45 minute rest. 

  4. Turn #3: This last turn will consist of the exact same folds as turn #2. Roll the dough out to the 18x12” rectangle, fold like a letter, and then turn 90° and repeat the whole thing. Re-wrap the dough tightly and return to the refrigerator. Let the dough rest overnight and then use however you would like! You can also divide the dough into two, 1-lb squares, wrap them individually and then freeze them for later use. If freezing the dough, be sure to let them defrost in the refrigerator overnight before you plan to use them. 


Note: When you are completing folds back to back, remember that the dough should always be turned 90° between folds so that the open edges are facing horizontally.

more recipes like this…

Croissants1.jpg

classic croissants

Baklava2.jpg

traditional baklava

Babka5.jpg

chocolate tahini brioche babka

plated1.jpg

fig and blue cheese rugelach

Print Friendly and PDF

Pesto-Filled Challah Snails

styled2.jpg

Last fall, I started making challah on a bi-weekly basis. I tried different recipes, different seed toppings, an array of fillings all in the name of recipe development. We had a continual rotation of challah in the freezer, which I quickly learned is a fantastic hosting move. You never know when a guest or friend is going to drop in and having fresh challah on hand is always a win. I tried challah recipes with honey and sugar, debated the differences between olive oil and neutral oil (both are great) and practiced every type of challah braiding technique I could find on the internet. After months of testing, I’ve finally perfected my own challah recipe and I’m sharing it with you, along with a very versatile pesto filling and some shaping ideas today.

First, let’s talk about challah. Challah is an bread, enriched with fat, sugar, and lots of eggs. It’s similar to a brioche in ingredients and categorization, but leans a little more toward the savory side. Challah bread is synonymous with Jewish culture and cuisine and is often eaten as part of special celebrations or rituals. (Once, while at the restaurant, we made a big, giant challah loaf for a 200 person wedding. It was very impressive.) Because the dough is so smooth and easy to work with, it lends itself well to fun shaping and braiding. You can use challah dough for pretty much anything you want, you can make and bake a batch in one day (no overnight proofing needed), and you can fill it and top it with whatever your heart desires.

threesnails3.jpg

Now, let’s move on to pesto. For me, making pesto is a personal experience and should not be made with a recipe. It’s more intuitive than scripted and really it should be made with anything and everything that you have on hand. So instead of providing you with a very specific pesto prescription, I’m going to give you some general guidelines so that you are able to make a great pesto to suit any mood.

I normally follow this idea when pesto-ing:

-about 4 cups of greens (4 large handfuls)—I use spinach, kale, arugula, basil, parsley…anything goes! For a more traditional pesto, try to use basil leaves as half of your green count. For this particular batch, I used half basil and half spinach.

-1-2 garlic cloves

-about 1/4 cup (a small handful) of nuts— pine nuts are traditional and make for a creamier pesto. Walnuts are my favorite, but you can use any nut that you have on hand. Kale and walnuts are the most popular pesto combination in our house.

-about 1/4 cup (another small handful) of freshly grated parmesan cheese

-lemon juice—either half of a large lemon, or a whole small lemon

-salt and pepper

*Combine all of this in a food processor, pulsing until everything is broken down and a paste begins to form. With the food processor running, slowly stream in olive oil until the paste begins to loosen into a sauce. The consistency is up to you, but I usually use between 1/4-1/2 cup of olive oil. Taste and adjust by adding more salt, pepper, lemon juice.

My Favorite Challah 

Yield: 2 loaves

Ingredients: 

400 g (3 cups) all purpose flour

280 g (2 cups) bread flour

285 g (1 1/4 cups) warm water

2 tsp active dry yeast

2 whole eggs

1 egg yolk

110 g (1/3 cup) honey 

90 g (1/2 cup) oil, like avocado*

1 tbsp kosher salt 

  • more flour for dusting

  • one egg, for egg wash

  • optional: flaky salt, za’atar, poppy seeds, everything but the bagel seasoning, for topping

Procedure: 

  1. In a large mixing bowl, combine 1/2 cup water and yeast. Stir and let rest for about 5 minutes, until foamy. 

  2. When yeast is ready, add eggs, egg yolks, honey, oil, and the rest of the water. Whisk to combine. 

  3. Add all purpose flour, bread flour, and salt to the bowl and use a wooden spoon or a rubber spatula to stir until all of the flour has been moistened and a shaggy dough begins to form. 

  4. Turn dough onto lightly floured work surface and then sprinkle the top of the dough with a little more flour. Knead dough on the countertop for 3-5 minutes, until smooth and the dough passes the window pane test.

  5. Wipe a small amount of oil around a large bowl. Place the dough into the bowl, cover with plastic wrap and let proof for 1-1 1/2 hours, until the dough is doubled in size. 

  6. When proofed, punch the dough down and turn onto a lightly floured work surface. Use a bench scraper and a kitchen scale to divide the dough into eight equal pieces. Shape dough into small rounds, cover with plastic wrap and let rest for 20 minutes. 

  7. Shape each dough round into a rope, about 8” in length. You should now have eight ropes, four for each challah loaf.

  8. These are the instructions for shaping a four-strand challah braid. If you want to do a three or five strand braid, just divide your dough into the appropriate number of pieces. Shape the challah loaves: I started to type out all of the steps for braiding, but I find that it is SO MUCH EASIER to watch a video that shows exactly where each strand should go. Here’s a great one that I’ve used often.

  9. Place braided challah loaves on a parchment lined baking sheet. Cover with plastic wrap and let rise for another 30-45 minutes. 

  10. When there is 10 minutes left in the final proofing time, preheat the oven to 375°F. Brush the tops of the challah with egg wash and sprinkle with salt, poppy seeds, za’atar, etc. 

  11. Bake for 20 minutes, rotate the pans, and bake for another 15 minutes until challah is deeply golden brown. 

Pesto Challah Snails

Yield: 3 large snails

Ingredients:

1 batch challah dough, recipe above

1 cup fresh pesto

egg wash, for brushing

grated parmesan cheese, optional

Procedure:

  1. Follow challah steps #1-5 in the recipe above.

  2. After the bulk proof, turn the challah dough out onto a lightly-floured work surface and divide into three equal parts.

  3. Working with one piece of dough at a time, roll out into a 12x10” rectangle, about 1/2” in thickness. Use a spoon or an offset spatula to spread 1/4 cup of pesto in an even layer over the dough, reaching all the way to the edges. Then, starting with the horizontal edge in front of you, begin to roll the dough into a tight spiral to form a log and pinch the edges to seal. Take one end of the log and begin twisting it into itself to form a spiral and tuck the edge underneath. Transfer to a parchment-lined baking. sheet, cover, and let rest for 30 more minutes. Repeat with the other two pieces of dough.

  4. Preheat oven to 375° F. When the spirals are finished resting, brush the tops with a little beaten egg and sprinkle with parmesan cheese. Bake for 30-35 minutes, rotating the pans halfway through, until challah is deeply golden.

Print Friendly and PDF