

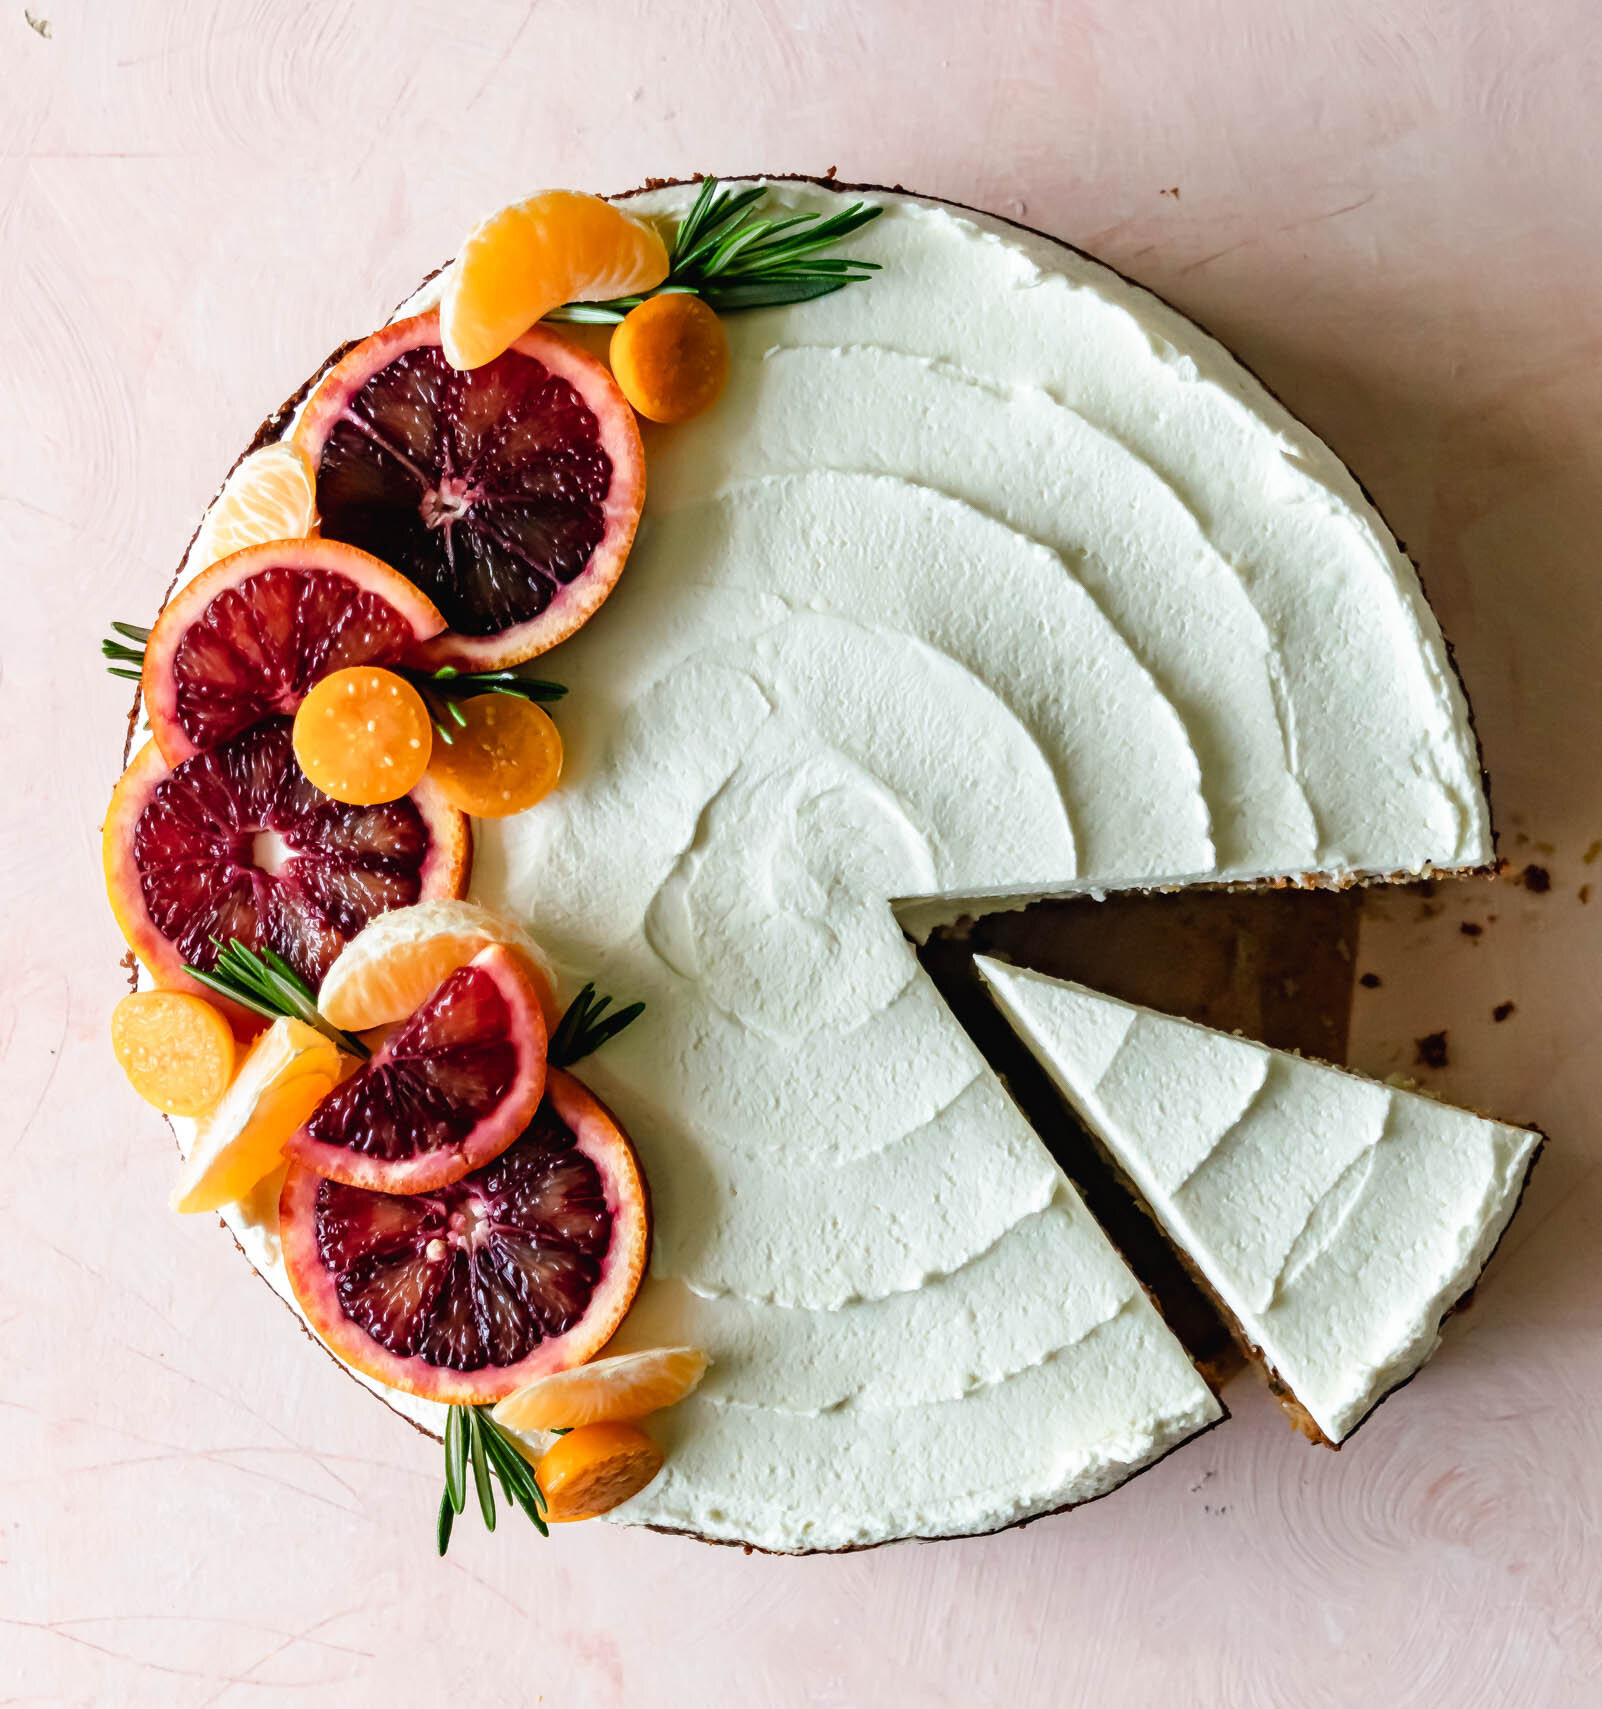
Blood Orange and Rosemary Snack Cake
/
January in Florida is simply the best. Yes, Florida has it’s drawbacks. We have to suffer through 100% humidity and 90°F weather most of the year. We have to deal with hurricanes. We don’t get anything that remotely resembles “fall”. We spend an inordinate amount of time unsticking our thighs from leather seats. But when late winter rolls around, there is no where else I would rather be. The months of January and February are just perfect. While the rest of the country is hunkered down against snow and biting winds, we are sipping our iced beverages on a patio in a perfectly mild, always sunny 75°F. But the real highlight is that Florida citrus. Farmers market stands and grocery stores shelves are lined with citrus of every shape and size and if you drive through an orange grove with your windows down, wafts of that bright, freshly peeled aroma chase you down the highway. It’s a wonderful time to be in the Sunshine State.
[Side note: I wrote this first paragraph a little over a week ago in an effort to be proactive and work ahead a bit. Since I’ve written this, our perfect Florida temperatures dropped into the 30s and frozen iguanas began to fall from the sky. Such is life in Florida. At least our citrus is still really great.]
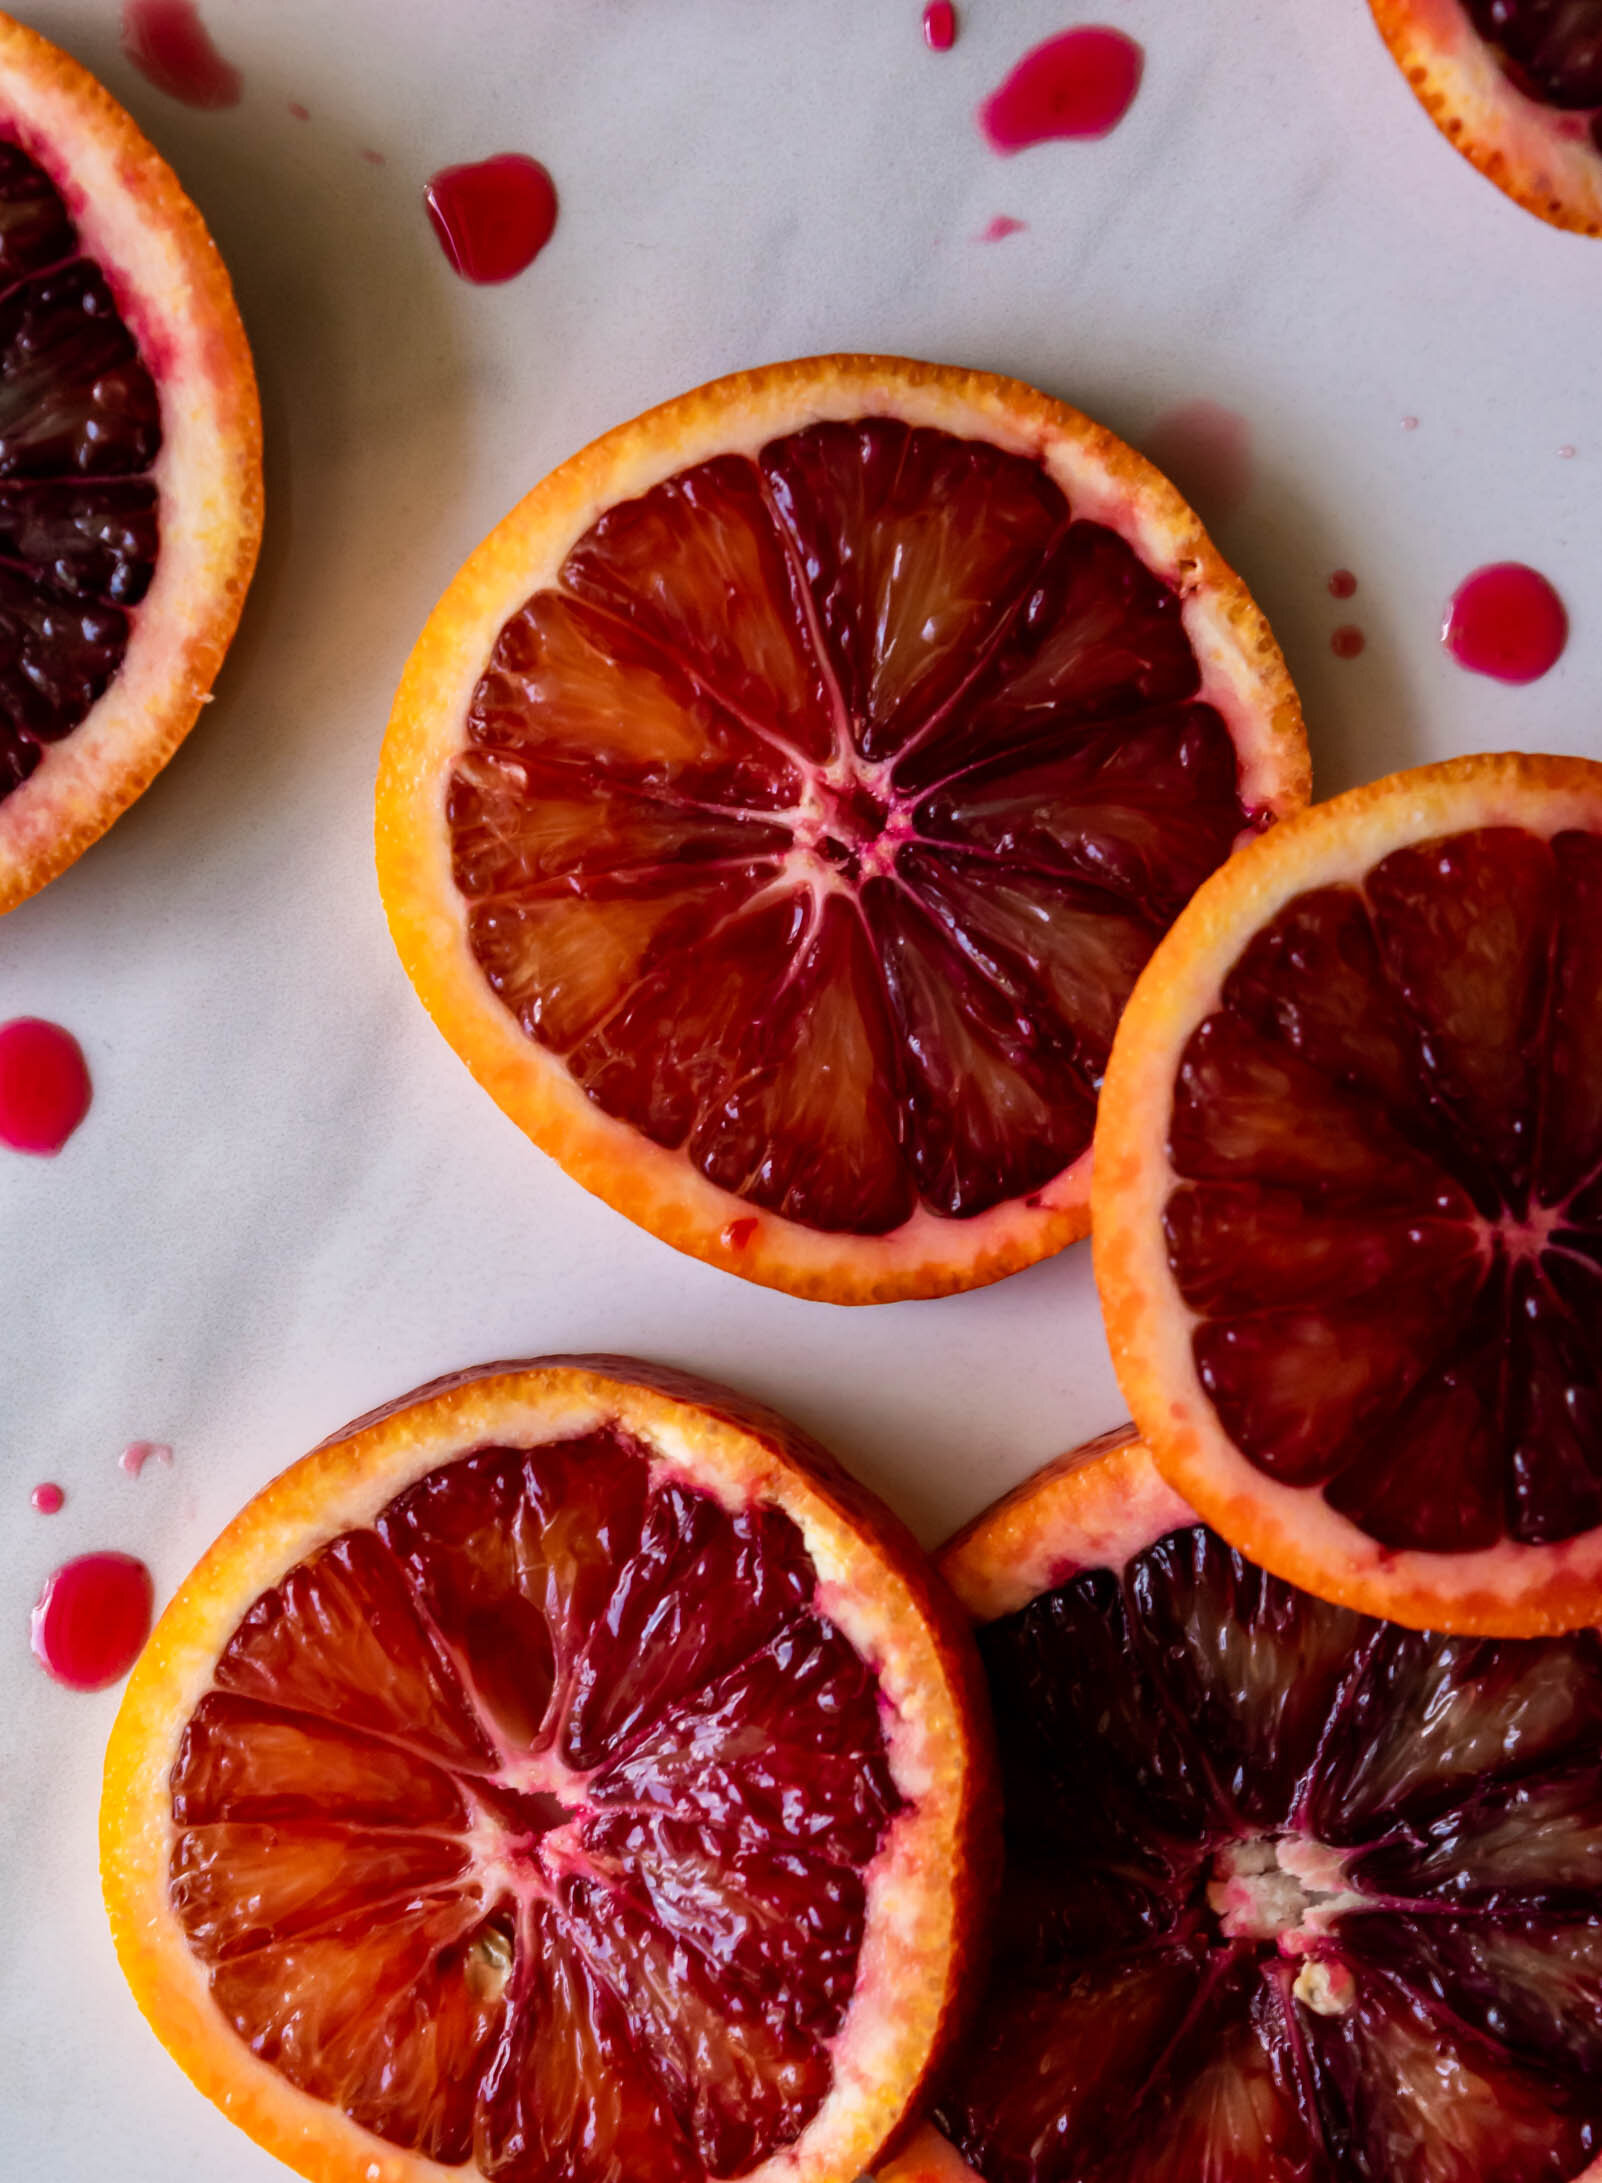
The fruit bowl on my counter is overflowing with satsumas, grapefruits, and Florida honeybelles, but my absolute favorite is the blood orange. Their deep, vibrant reds are startling when you first slice into them, staining your hands a luscious fuchsia color. They also impart a sharp citrus flavor, without overwhelming your taste buds with tartness and making your lips pucker. Each year, at the first sight of blood oranges, my mind starts racing at all of the possibilities and bag after bag come home for recipe development. This year’s blood orange haul made it into this simple and unassuming snack cake. I love a good snack cake. There is no worry about layering or filling, you don’t have to deal with an enormous birthday cake sized monstrosity taking up space in your fridge, and the cake to frosting ratio is always spot on. This snack cake uses semolina flour for added texture, and subs out some of the sugar for honey, complementing the citrus and rosemary nicely and dialing down the sweetness a bit so you can get away with eating a slice in the morning and calling it breakfast. You’re welcome.
I’ve used blood oranges because they are my favorite, but feel free to substitute another citrus if that is what is fresh where you live. Grapefruit or navel oranges would work really in this cake as well.

Blood Orange and Rosemary Snack Cake with Cream Cheese Whipped Cream
Yield: 1 9” round cake
Ingredients:
For the cake
2 cups (265 g) cake flour
1 cup (160 g) semolina flour
2 1/2 tsp baking powder
1/2 tsp kosher salt
Zest of 3 blood oranges
1 1/2 tbsp fresh rosemary, chopped (from about 2 sprigs)
1 cup (225 g) granulated sugar
1/2 cup (160 g) honey
11 T (160 g) butter, at room temperature
3 eggs, at room temperature
1/4 cup blood orange juice (from about 3 blood oranges)
3/4 cup (165 g) plain whole milk yogurt
1 tsp vanilla extract
for the syrup soak:
1/3 cup granulated sugar
2/3 cup water
1 sprig fresh rosemary
3 blood orange halves
for the cream cheese whipped cream:
2 oz cream cheese, at room temperature
1 cup heavy cream
1/4 cup confectioner’s sugar
pinch of salt
splash of vanilla extract
Procedure:
to make the cake:
Preheat oven to 350° F. Grease a 9” springform pan and line the bottom with a parchment paper round. Set aside.
In a medium bowl, combine cake flour, semolina flour, baking powder, and salt. Set aside.
In the bowl of a stand mixer fitted with a paddle attachment, combine butter, sugar, and honey. Cream together until thoroughly combined and mixture has the consistency of wet sand. Add orange zest, rosemary, and vanilla and beat for another 20-30 seconds. Scrape down the sides of the bowl.
Add the eggs to the butter and sugar mixture, one at a time, mixing after each addition. Scrape down the sides of the bowl again.
Meanwhile, juice the oranges into a glass measuring cup. Add yogurt to orange juice mixture and whisk to combine. (Place 3 halves of your zested, juiced oranges in a small saucepan for your syrup.)
With the mixture on low speed, add one-third of the dry ingredients, mixing until just combined. Then add half of the yogurt/orange juice mixture, followed by another third of the dry ingredients. Continue to mix on low speed, adding the remaining yogurt mixture and ending with the last third of the dry ingredients. Mix for another 30 seconds or so, until no flour streaks remain.
Remove from mixture and use a rubber spatula to fold the batter a few times to ensure that everything is well mixed and then transfer to your prepared pan.
Bake for 35-45 minutes, rotating halfway through, until the top of the cake is golden brown and a toothpick comes out clean when inserted. Remove from oven and let cake cool in the pan for at least 30-45 minutes.
to make the syrup:
While the cake is baking, combine sugar, water, orange peels, and rosemary in a small saucepan.
Bring mixture to a boil and then reduce heat to medium and simmer about 10 minutes.
Remove from heat and let mixture cool before straining out orange peels and rosemary spring.
Brush syrup over the top of the cake immediately after removing the cake from the oven.
*Note: You will not use all of the syrup. I like to brush it once or twice, let the syrup absorb and then brush once or twice more. I was left with about 1/4 cup of syrup which conveniently makes a great cocktail base when mixed with sparkling water and gin. Cheers!
to make the cream cheese whipped cream:
Place the cream cheese in the bowl of a mixer fitted with the whisk attachment. Mix on medium-speed for 30 seconds or so, until cream cheese is soft and broken up. Scrape down the sides of the bowl.
Add heavy cream to the cream cheese and continue to mix on medium-low speed until the mixture begins to thicken slightly. (Make sure to scrape the bottom and sides of the bowl regularly to ensure that all the cream cheese gets combined and isn’t clumpy. If you notice small clumps of cream cheese before the cream begins to thicken, you can transfer to the paddle attachment and beat on high speed for a minute to help break up the cream cheese. Then switch back to the whisk to continue whipping.)
When the cream begins to thicken slightly, add powdered sugar, vanilla, and salt and increase mixer speed to medium-high. Whip until soft peaks form.

