Roasted Tomato Cornbread

sliced4.jpg

When I was working at the restaurant, I always dreaded cornbread day. As a part of the bread baking team, we were in charge of making all of the breads and pastries for the entire resort, the types varying based on the days of the week or the events taking place on property. Cornbread was for outdoor events, usually large groups, so days when we made cornbread, we were cranking out about 300 little golden muffins an afternoon. Mixing the batter was easy, but baking them off was quite a feat. Because of the set up of the kitchen, we would corner ourselves in front of the 400° F convection ovens, filled with pre-heated muffin tins. Then, with that hot air blowing from the oven, we quickly pulled out the hot tins, sprayed them with cooking spray, and scooped batter into each little crevice, before shoving them back in and slamming the door. After ten minutes, we flipped them out and repeated the whole process over again. (It was definitely a two-person job so at least you had someone to commiserate with.) Between the hot oven air and that warm, East Tennessee July summer sun, you were dripping with sweat and all of your pores were filled with cooking spray by the end of the whole she-bang. We always saved cornbread for last, so thankfully, we were able to pull our last trays just before dragging our cornbread-smelling bodies home where I beelined straight for the shower. Needless to say, when I got back home to Orlando, I took a little cornbread baking hiatus.

Lucky for us, this cornbread doesn’t make 300 muffins and you don’t have to stand in front of a hot oven, shoveling the batter in at record-high speeds. This is a much more chill cornbread, perfect for any summer dinner party. I slow roasted grape tomatoes in a hefty glug of olive oil and then poured cornbread batter right over top before baking. It may not be the prettiest cornbread, but it’s simple and delicious and I think it will become a favorite around here.

whole2.jpg

Roasted Tomato Cornbread

Yield: 1-10 inch cast iron skillet

Ingredients 

roasted tomatoes

1 pint grape tomatoes

2 T olive oil

1/2 tsp kosher salt

cornbread

1 3/4 cup (245 g) cornmeal

1 cup (125 g) all purpose or whole wheat flour

1 tsp granulated sugar

1 tsp kosher salt

1 tsp baking powder

1/4 tsp baking soda

1 3/4 cup buttermilk

2 eggs

1/2 cup (113 g) unsalted butter, melted + 2 T for pan

Procedure:  

  1. Preheat oven to 300° F.

  2. In medium bowl, combine tomatoes, olive oil, and salt. Toss to coat tomatoes and then transfer to a cast iron skillet. 

  3. Bake for 90 minutes, checking and gently stirring every 20 minutes.

  4. When the tomatoes are finished roasting, increase oven temperature to 400° F and place 2 tablespoons of butter in the skillet to melt while you mix the cornbread. 

  5. Meanwhile, in a large bowl, whisk together cornmeal, flour, sugar, salt, baking powder, and baking soda. 

  6. In a small bowl or large measuring cup, whisk together buttermilk, eggs, and melted butter until homogenous. 

  7. Pour liquid ingredients into the bowl with the dry ingredients and whisk until combined and no dry streaks remain. 

  8. Pour cornbread batter over top of roasted tomatoes and bake for 20-25 minutes until crust is deeply golden brown. Remove from oven and top with a little more butter. When cooled slightly, gently flip cornbread out onto a plate and serve. 

Print Friendly and PDF

Holiday Charcuterie Board How-To

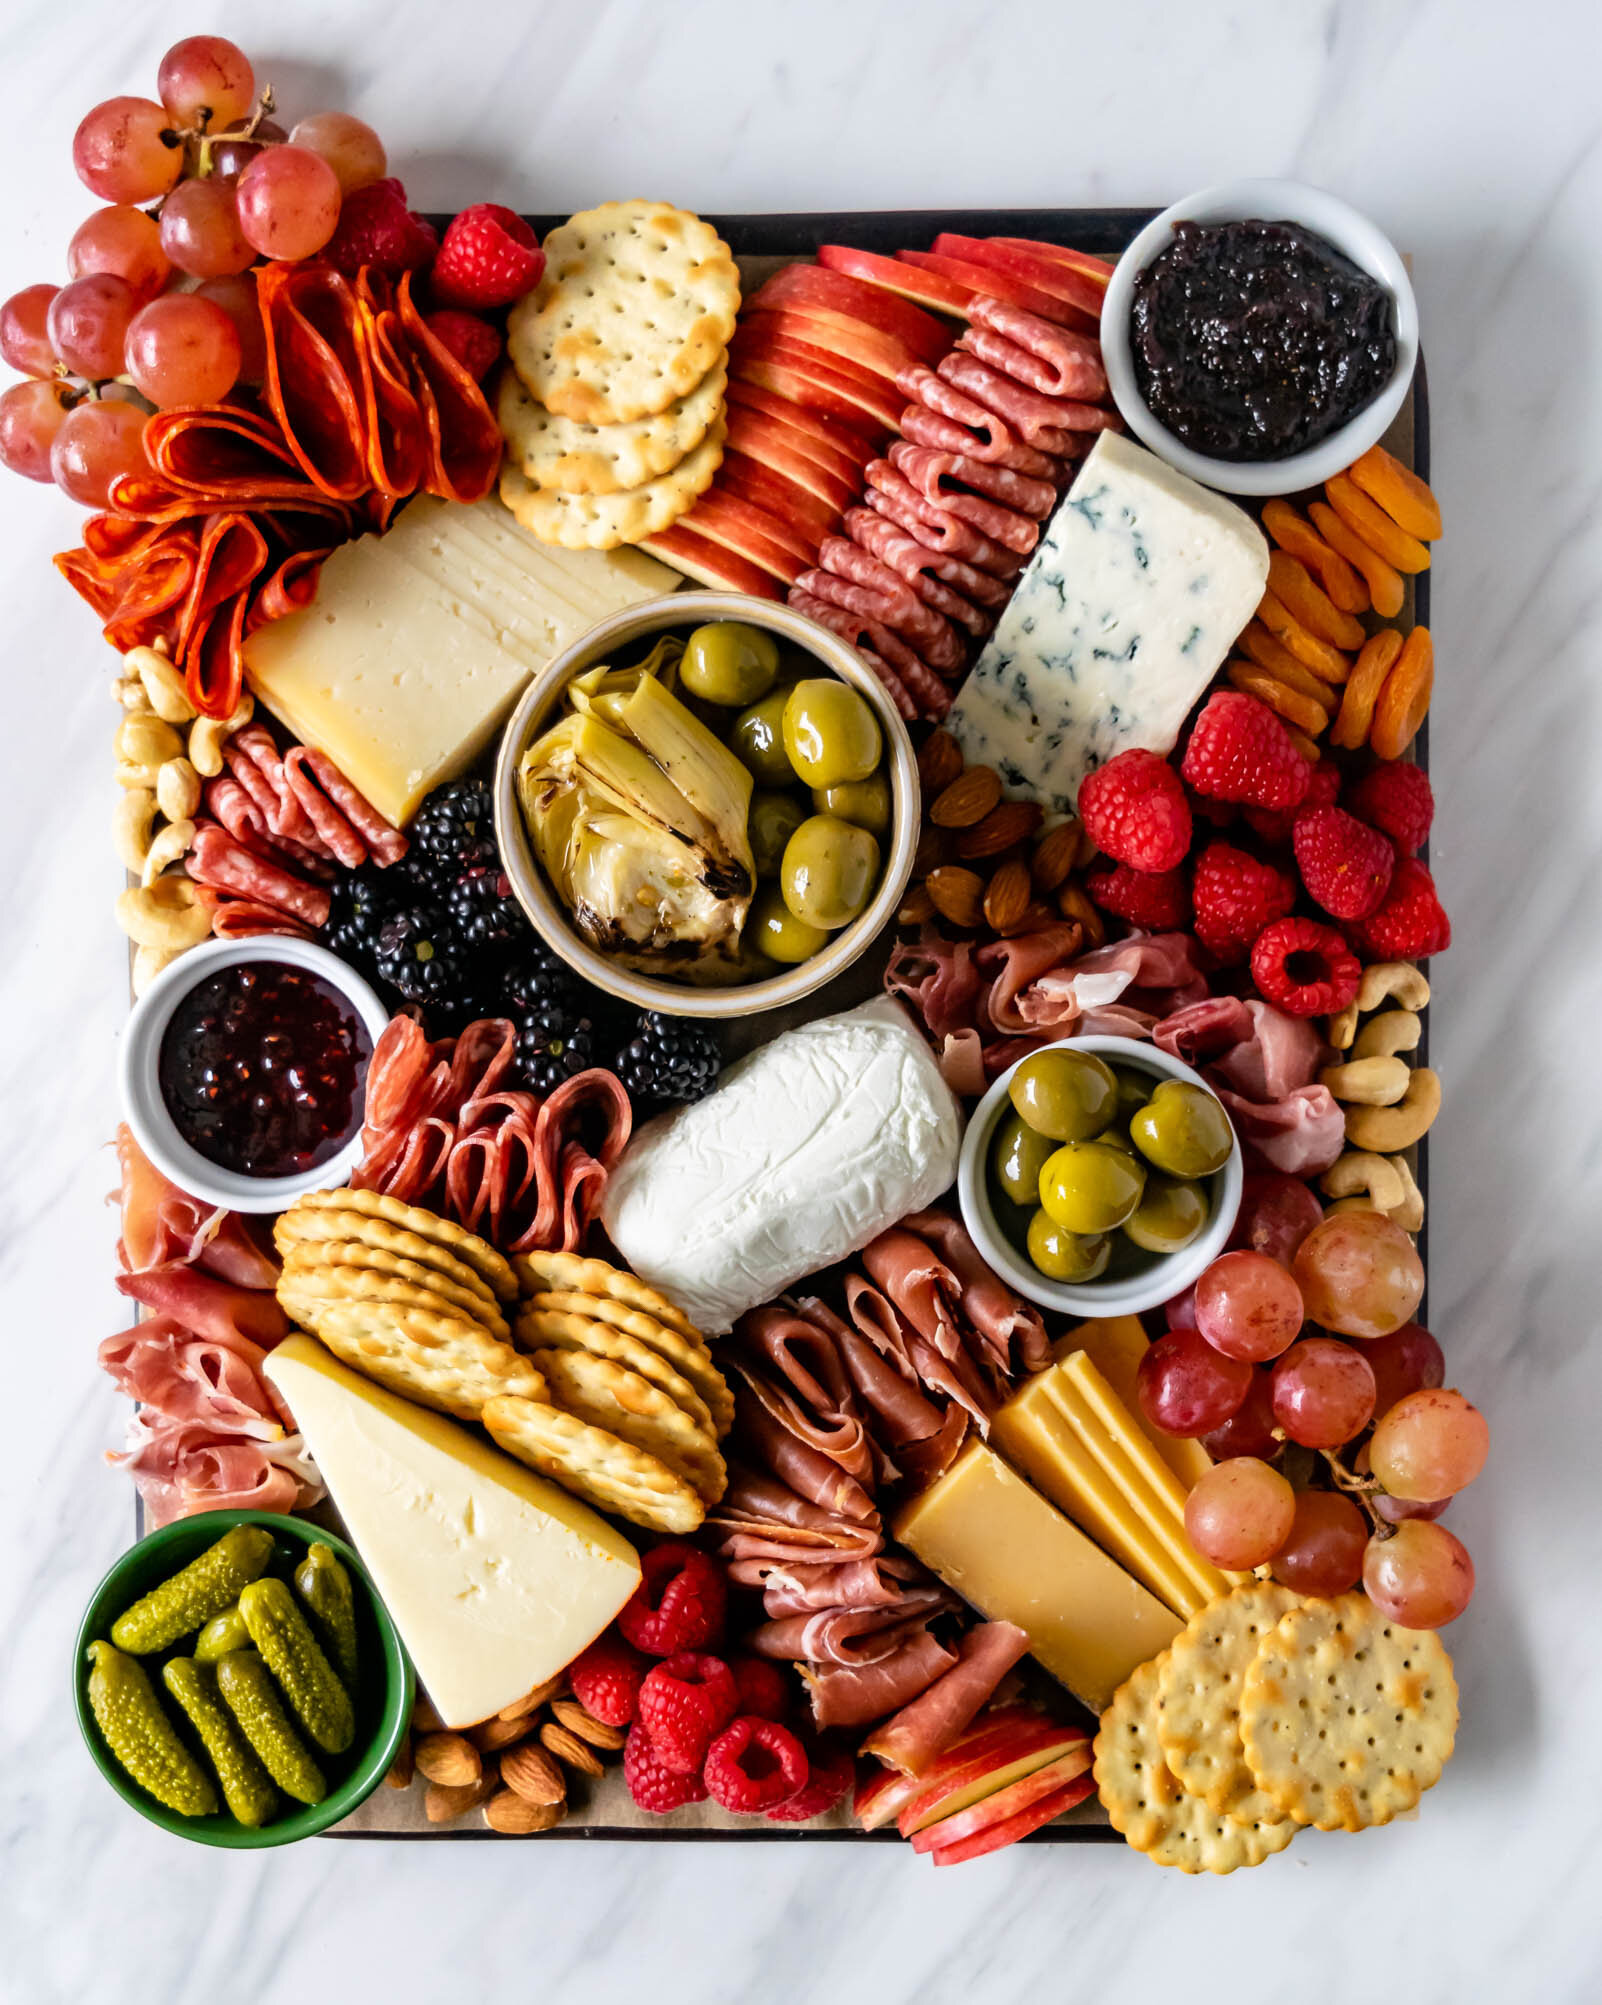
I love the holiday season because it is a wonderful excuse to gorge on cheese and salty meats. I love it even more now that highly-styled, decorative plates filled with said meats and cheeses have become a cool, trendy thing because it gives me another excuse to play with my food. The beauty of a great charcuterie board is it’s versatility. You can use pretty much anything that you like snacking on and it’s great for any occasion- from that Christmas potluck you signed up to bring an appetizer for, to Thursday night snack-dinner. Charcuterie boards are always there for you.

I put together a holiday-esque snacking board a few weeks ago and have compiled a few tips and tricks to help you create your own.

holidaycharcuteriefinal1.jpg

Step 1:

holidaycharcuteriestep1.jpg

Start with a board. Fancy bamboo platters are very nice and beautiful, but they can also be kind of expensive and, if your kitchen storage is anything like ours, a little tricky to find a home for. If you already have a big platter, then by all means, cheese it up. But if you don’t have a fancy platter, not to worry. You can really use any, large flat-surfaced item that you have. I used a baking stone for mine, and just trimmed a piece of parchment to lay on top of it. My board was 12”x16”.

I find that it’s also really helpful for me to pull out all of the items I’m going to put on the board before starting to arrange so that I get an idea of how much space I will need. If you’re only using 1-2 cheeses and a couple of other little snacks, you might want to use a smaller platter or a plate. For more cheese/snacks/charcuterie, use a bigger platter.


Step 2:

Place your cheeses, spread out a bit, on the board. They are your anchors and the whole board will revolve around them. I’ve read quite a few charcuterie board “recipes” that call for a soft cheese, a hard cheese, an aged cheese, and a blue cheese. This is a good rule of thumb to ensure you have a little diversity on your board, but ultimately, you should pick cheeses that you like.

For this board, I used: goat cheese, a very mild blue cheese, a salty gouda, a creamy port salut, and a smoked sheep’s milk cheese called etxegarai.

holidaycharcuteriestep2.jpg

Shop local when you can, and when you can’t, there is always Trader Joe’s. Cheese boards can get expensive. Cured meats and good cheese are some of the pricier items in the store and building a whole board out of them can quickly add up. Since I unfortunately do not have a never-ending supply of cheese money, I like to get one or two meats/cheese from my local cheese shop (in Orlando, I like La Femme du Fromage at East End Market) and then bulk the rest of my board up with less-expensive cheese from the grocery store. If you have a Trader Joe’s anywhere near you, it is worth the drive! Their cheese selection is really great and really affordable.

holidaycharcuteriestep3.jpg

Step 3:

After you lay out your cheeses, place small bowls or ramekins on the board for your jams, dips, mustards, and olives. I like to spread these out in empty spaces around the cheeses. Don’t fill your bowls, just yet. We will just use them as placeholders for now.

Step 4:

It’s time for the meats. I cannot exaggerate enough how much I enjoy a salty, cured, meat. I would eat slices of chorizo or salami everyday for breakfast, lunch, and dinner if I could. (In fact, on my most recent trip to Spain, I did.) I choose my meats the same way I choose my cheese- a variety of different types, splurging on one or two really great ones. When placing your meats on the board, you want to make sure that you are folding or bunching them into little, easy to grab parcels. For larger pieces of meat, like prosciutto or jamon, slice them in half before folding so that everything is bite size.

For this board, I used: prosciutto, chorizo, salami, salchichon, and Serrano jamon.

Step 5:

Fill in all empty space with cheese board accoutrements. Again, pick a variety of bite-sized, stackable foods that you like. Here are some suggestions:

Fruit- Fresh and/or dried. I am berry girl myself, but Martin likes grapes and apples so I included a little of each on this board.

holidaycharcuteriestep4.jpg

Nuts- It’s nice to have a crunchy contrast to all of the soft, creamy things on the board. I used cashews and almonds, but pistachios are also great.

Jams, Jellies, and Dips- For this board, I used raspberry jam and fig butter, because I thought their flavors paired well with the port salut and the blue cheese. I also like the addition of seedy, whole grain mustards, yogurt-based dips with lots of garlic and chives, or marmalades.

Olives and other Marinated/Pickled Goodies: I don’t want a cheese board if it doesn’t have olives. I found some little, buttery green olives, but I also really love Kalamatas, or really anything swimming in oil coming off of an olive bar. Martin doesn’t like olives, so I added grilled marinated artichoke hearts so he didn’t feel left out. Pickles and other pickled vegetables give a briny, pucker-y flavor to the board.

Crackers and Bread: Not exactly a part of the board, I alway like to have a basket of bread off to the side for slathering with cheeses and jams and piling with salami. I like baguettes sliced into little rounds or squares of focaccia best. I also like to include crackers of some sort on the board, for a little extra crunch and for when the bread runs out. I prefer butter crackers without a lot of added flavors so that the cheeses can really sing, but if you’re a water cracker kind of person, go for it. If you can, it’s nice to include a gluten-free cracker for those who are sensitive to gluten, but still love a good cheese board.

holidaycharcuteriefinal2.jpg

We still have a week until Christmas, and two weeks until New Year’s. There is plenty of time to add a cheese board or two to your holiday plans! Swing by your local cheese monger, pick up some snacky foods and let your creative side loose. Happy boarding!

Pomegranate Sage French 75

This weekend, we decorated our little duplex for Christmas. We went to the Christmas tree farm and picked out a barely-five-feet Frasier fir who has a bit of a side lean and we named him Felipe. Then we brought him home and my sweet, patient, loving husband spent three hours trying to construct a make-shift tree stand to tuck inside of a wicker basket in order to recreate a picture that I saw somewhere in the depths of Pinterest. It mostly worked and Felipe is now sparkling in all of his Christmas tree glory in our living room, although my basket tree stand idea doesn’t look exactly like the one from the manicured Pinterest apartment. My desired aesthetic was “minimalist festive” which is the fancy way of saying that I tried to spend as little money on decorations as physically possible so that I would have more money for all the things about Christmas that I really love— hosting dinner parties, making cheeseboards and elaborately decorated cookies, wine, and of course, new cocktails.

I love of a good holiday cocktail. I started working on this one a couple of months ago, right after Halloween when it became acceptable to start drinking holiday cocktails. It’s the perfect drink to take you all the way through the New Year. The pomegranate juice gives a tart, fruity flavor and provides that season-signature deep red color. The sage syrup and gin provide a gentle sweetness and an earthy, floral, component and the Champagne bubbles make it feel festive and party-worthy. This drink is also easy to scale up and mix ahead of time. If you’re heading out to an ugly sweater party or a Christmas Eve dinner, mix up a big batch of the pomegranate juice, sage syrup, and gin and bring a bottle of bubbly along. You can use any dry sparkling wine in place of Champagne (like Cava or Prosecco), but then you may have to change the name to a Spanish 75 or an Italian 75. :) Mix it any way you like, but I recommend enjoying this cocktail with lots of good friends, preferably under some twinkling lights.

Pomegranate Sage French 75

Yield: 4 cocktails 

Ingredients: 

6 oz gin

3 oz pomegranate juice 

1.5 oz sage syrup

8 oz dry champagne

Strips of orange zest from 1 orange

for the sage syrup: 

4 oz sugar 

4 oz water

3-4 sprigs of fresh sage

Procedure: 

  1. To make the sage simply syrup: combine equal parts sugar and water in a medium saucepan over medium heat. Add sprigs of sage and bring to a boil, stirring occasionally. When sugar is dissolved, remove from heat and allow to cool completely. Remove sage (strain if needed) and refrigerate.

  2. For the cocktail: Combine gin, pomegranate juice, and sage syrup and mix well. Divide evenly between glasses. Top each glass with 2 oz champagne and 1 strip of orange zest. Add ice if desired.

pomsagefrench75-9.jpg