Spring Greens Tart

cutwithflowers5.jpg

Even though I spend all day, everyday thinking about cakes, pies, tarts, cookies, and other sweet treats, there’s nothing that gets me more excited than kale. My palette (and those of most other pastry chefs I’ve met) craves anything salty, briny, or savory. I would eat French fries every single day of my life, I only ever want savory breakfast foods, and spring veggie season is the most delightful time of the year for me. Since pots of beans and piles of greens are not exactly “on brand” for the blog, I stick mostly to the sweeter side of things, but decided to take a little savory detour today for our last little puff pastry recipe. *shhh, don’t tell the Instagram algorithm!

This spring greens tart is a great, slightly inventive weeknight dinner option and if you already have a pound of puff pastry in your freezer or decide to use a store bought pastry, it comes together pretty quickly. The pastry is rolled out, filled with tangles of caramelized onions, creamy goat cheese, and lots of garlicky sautéed greens then baked until golden brown. It’s great with whatever spring green you have blossoming in your neck of the woods and pairs nicely with a bright green salad.
cut1.jpg

Spring Greens Tart

Yield: 1 medium-sized tart (serves 2-3)

Ingredients: 

1 lb puff pastry, homemade or store bought

2 small onions, sliced thinly

3 T olive oil, divided

1 T butter

1 large bunch hearty greens (kale, chard, spinach), de-stemmed and roughly chopped

1 clove garlic, minced

2-3 oz goat cheese

salt and pepper

egg wash

Procedure: 

  1. Heat a medium-sized skillet over medium-high heat. Add two tablespoons of olive oil and the butter, followed by sliced onions. sauté, stirring every few minutes, until the onions begin to take on a bit of color and brown along the edges. Turn the heat down to low and add one-two large pinches of salt. Continue to cook for 30-40 minutes, stirring occasionally, until onions are deeply caramelized. Cool and transfer to a bowl. 

  2. Reheat the skillet over medium heat. Add the remaining tablespoon of olive oil, followed by the garlic. Sauté for 1-2 minutes, until garlic is fragrant, but not browned. Add the chopped greens and sauté for another 4-5 minutes, until greens are wilted. Add salt and pepper to taste and let cool. 

  3. Preheat the oven to 350° F and line a sheet pan with parchment paper. 

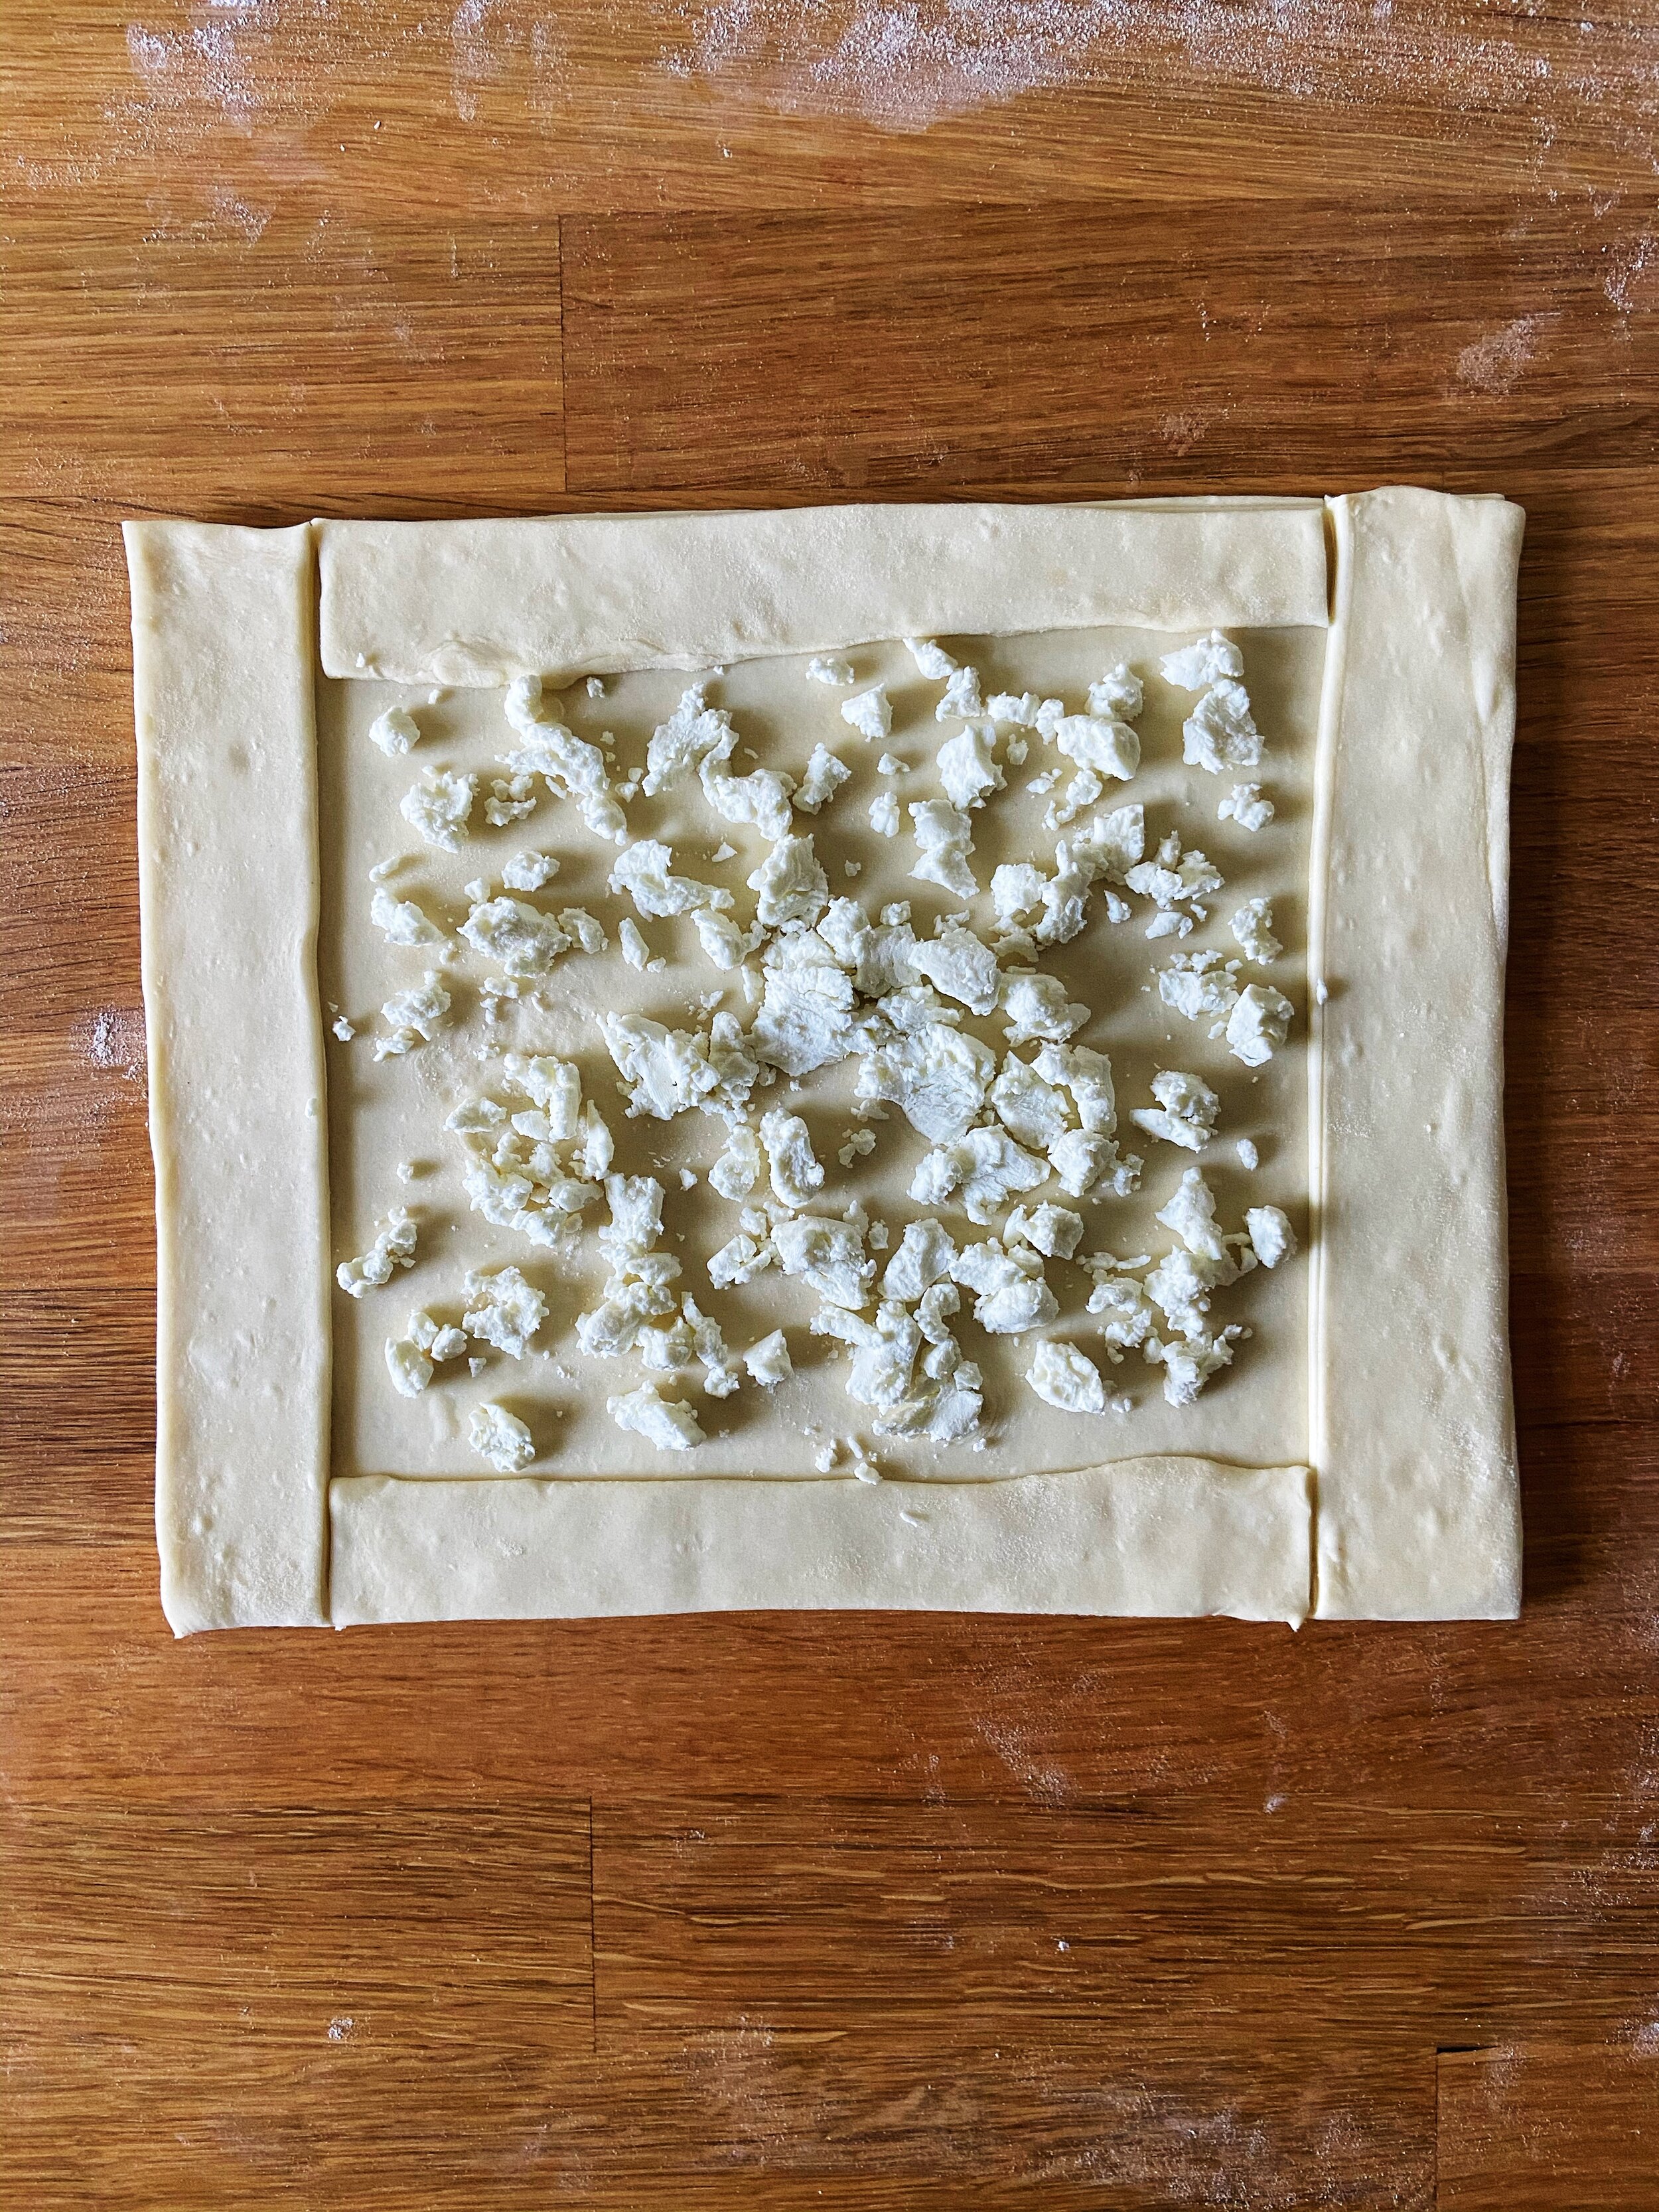
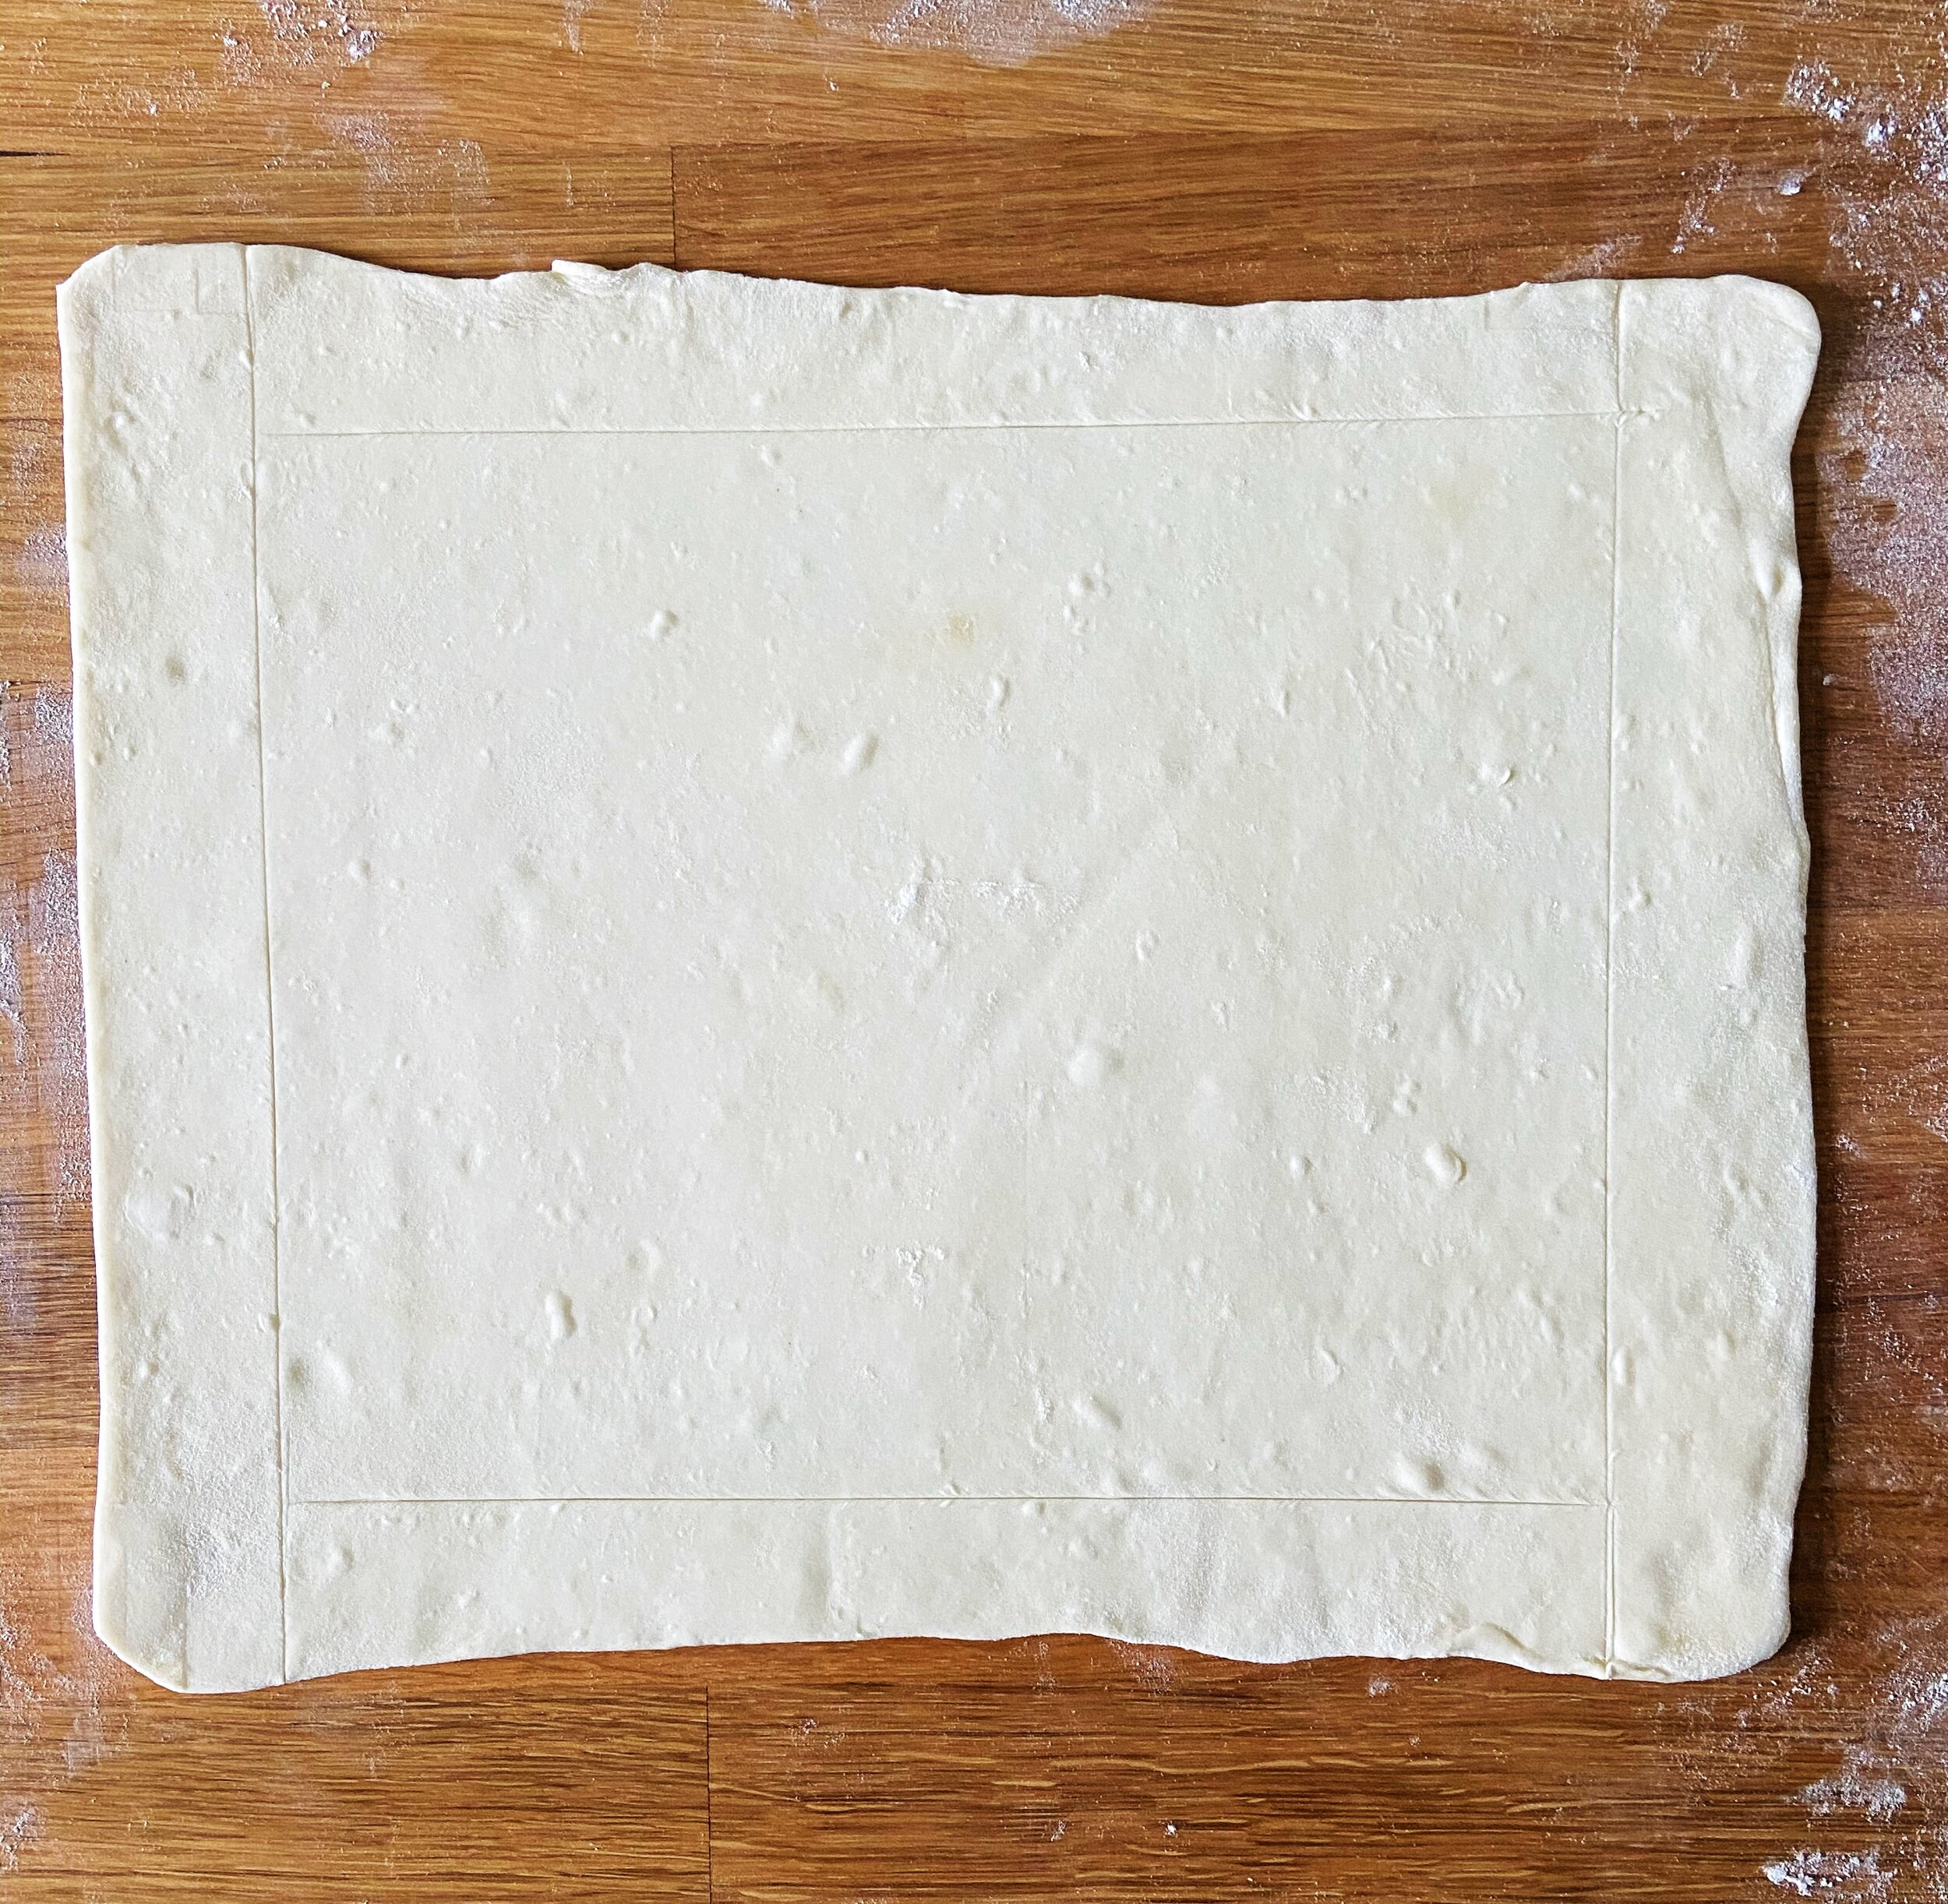
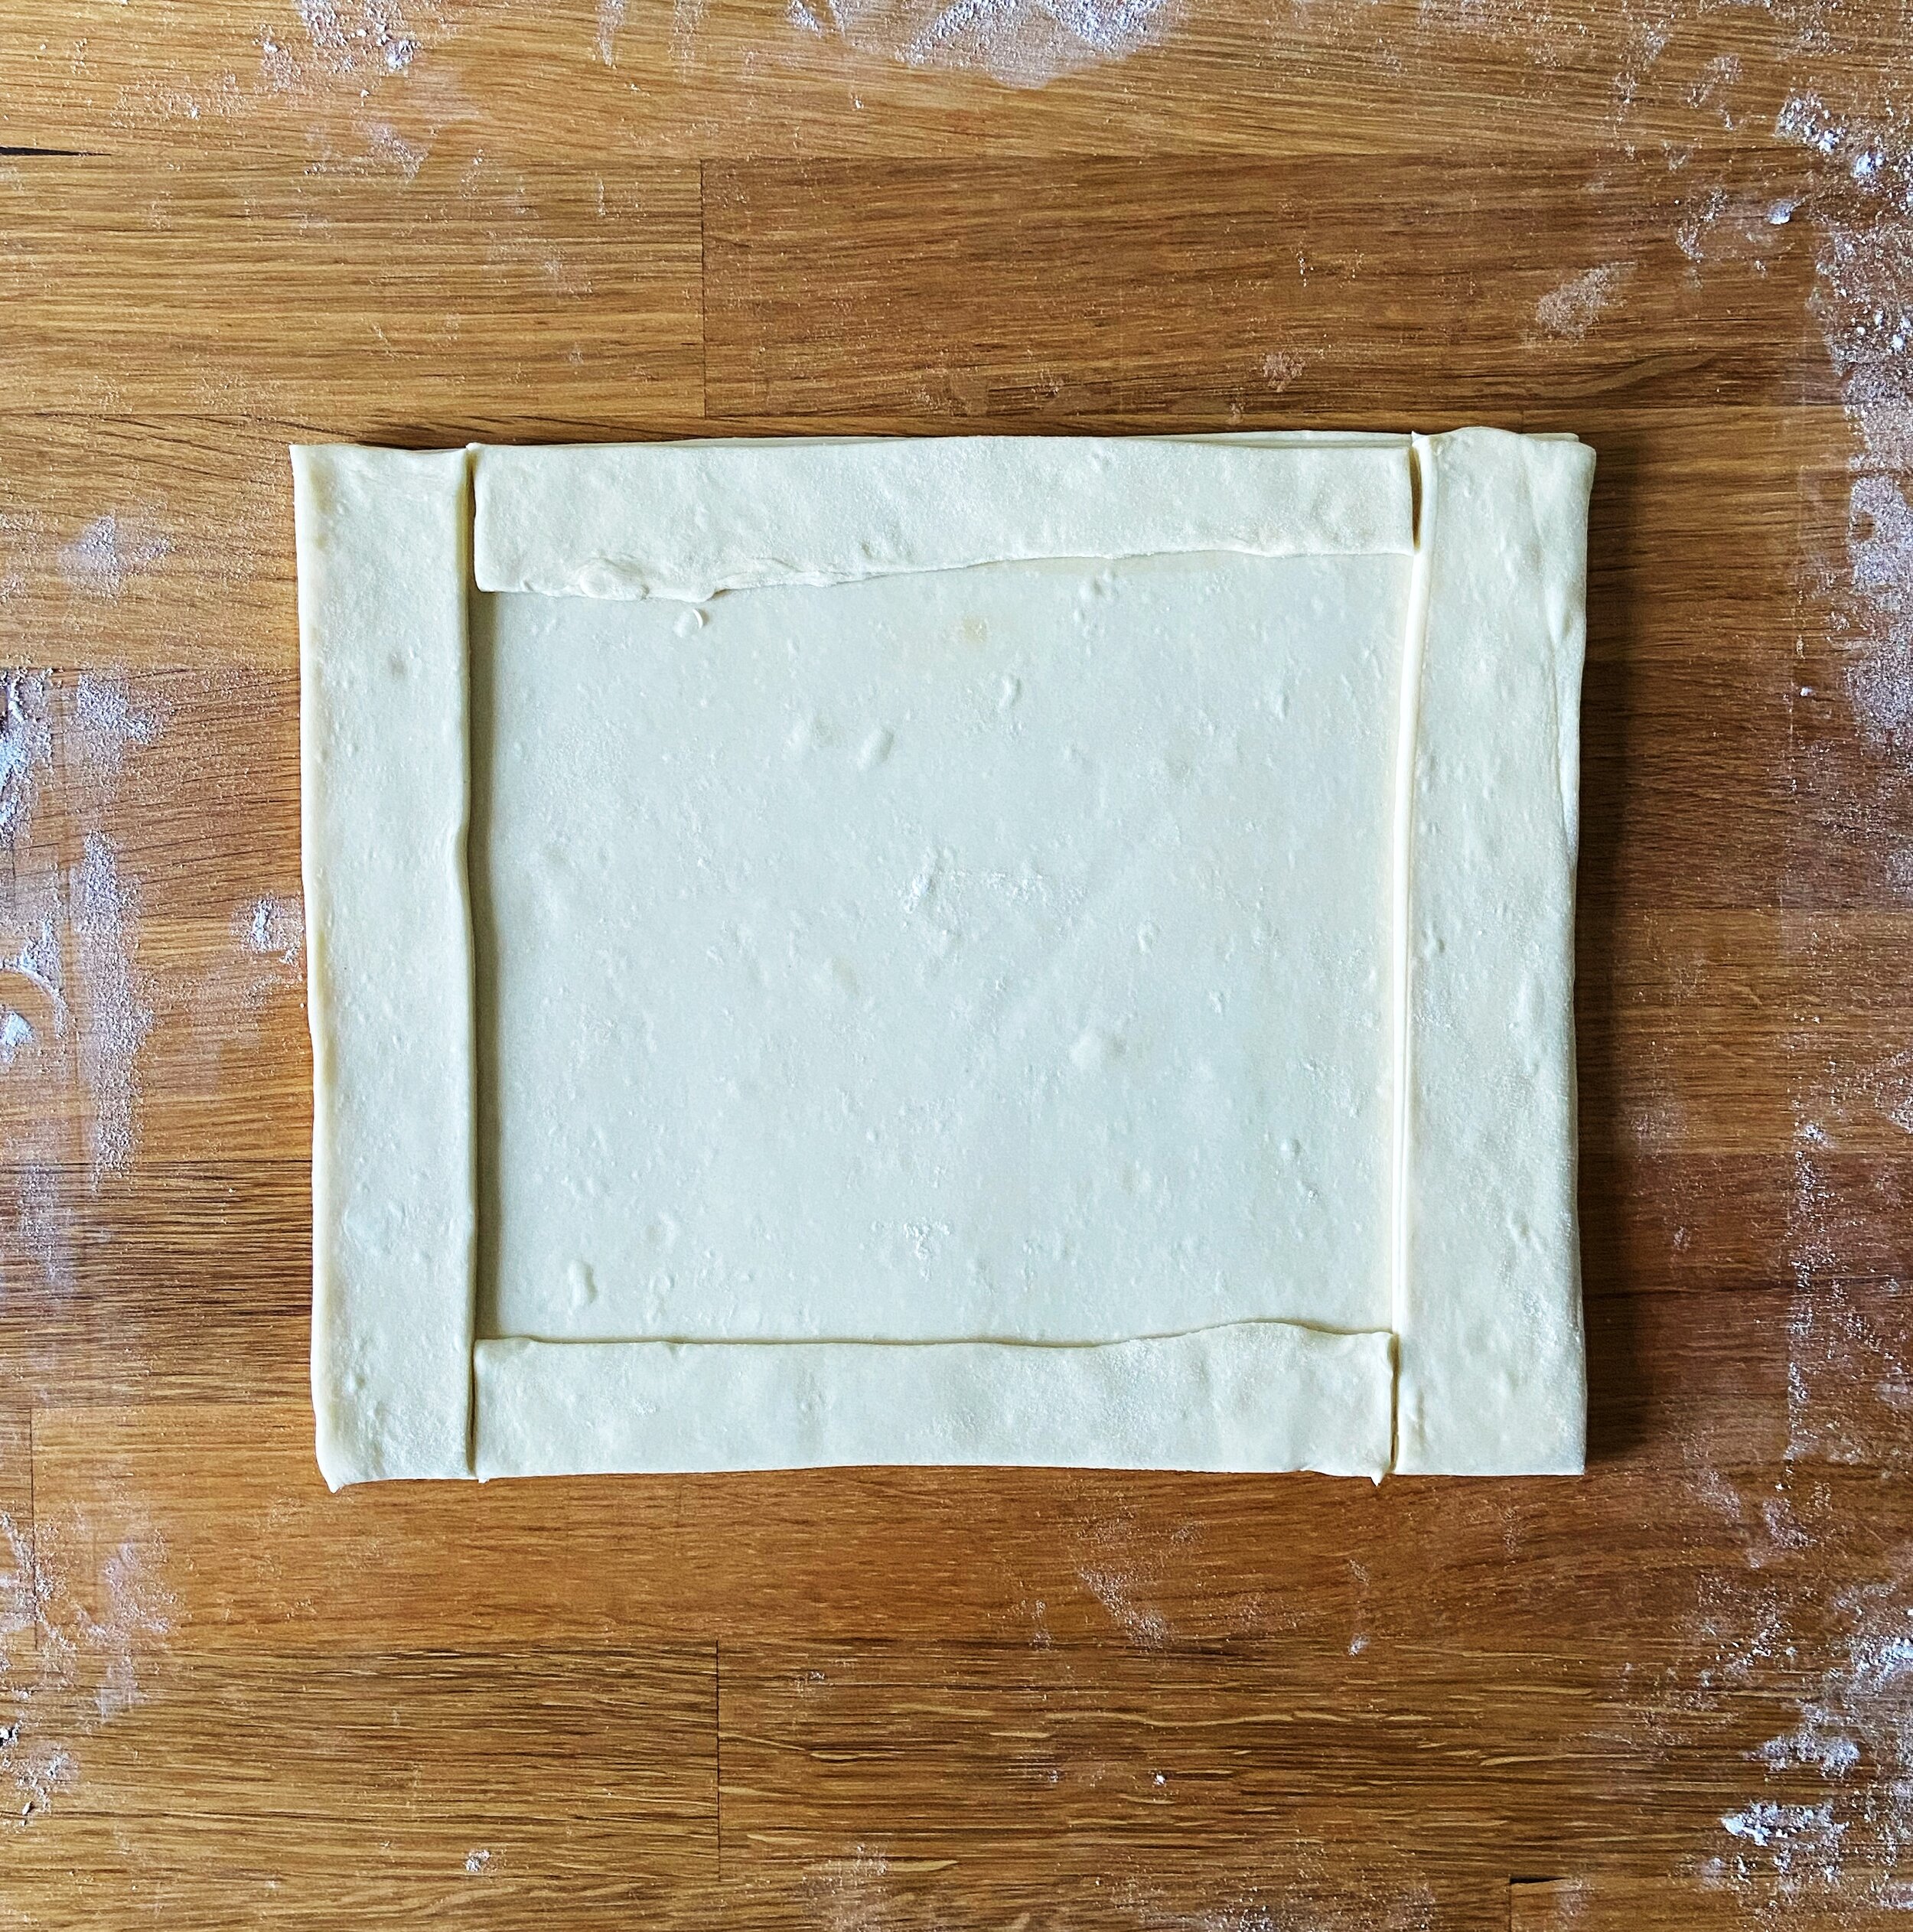
  4. On a lightly-floured work surface, roll puff pastry to a 15x12” rectangle. Using a ruler and a sharp knife, cut 1 1-2” strips around the edges of the pastry. (see photos above for reference)

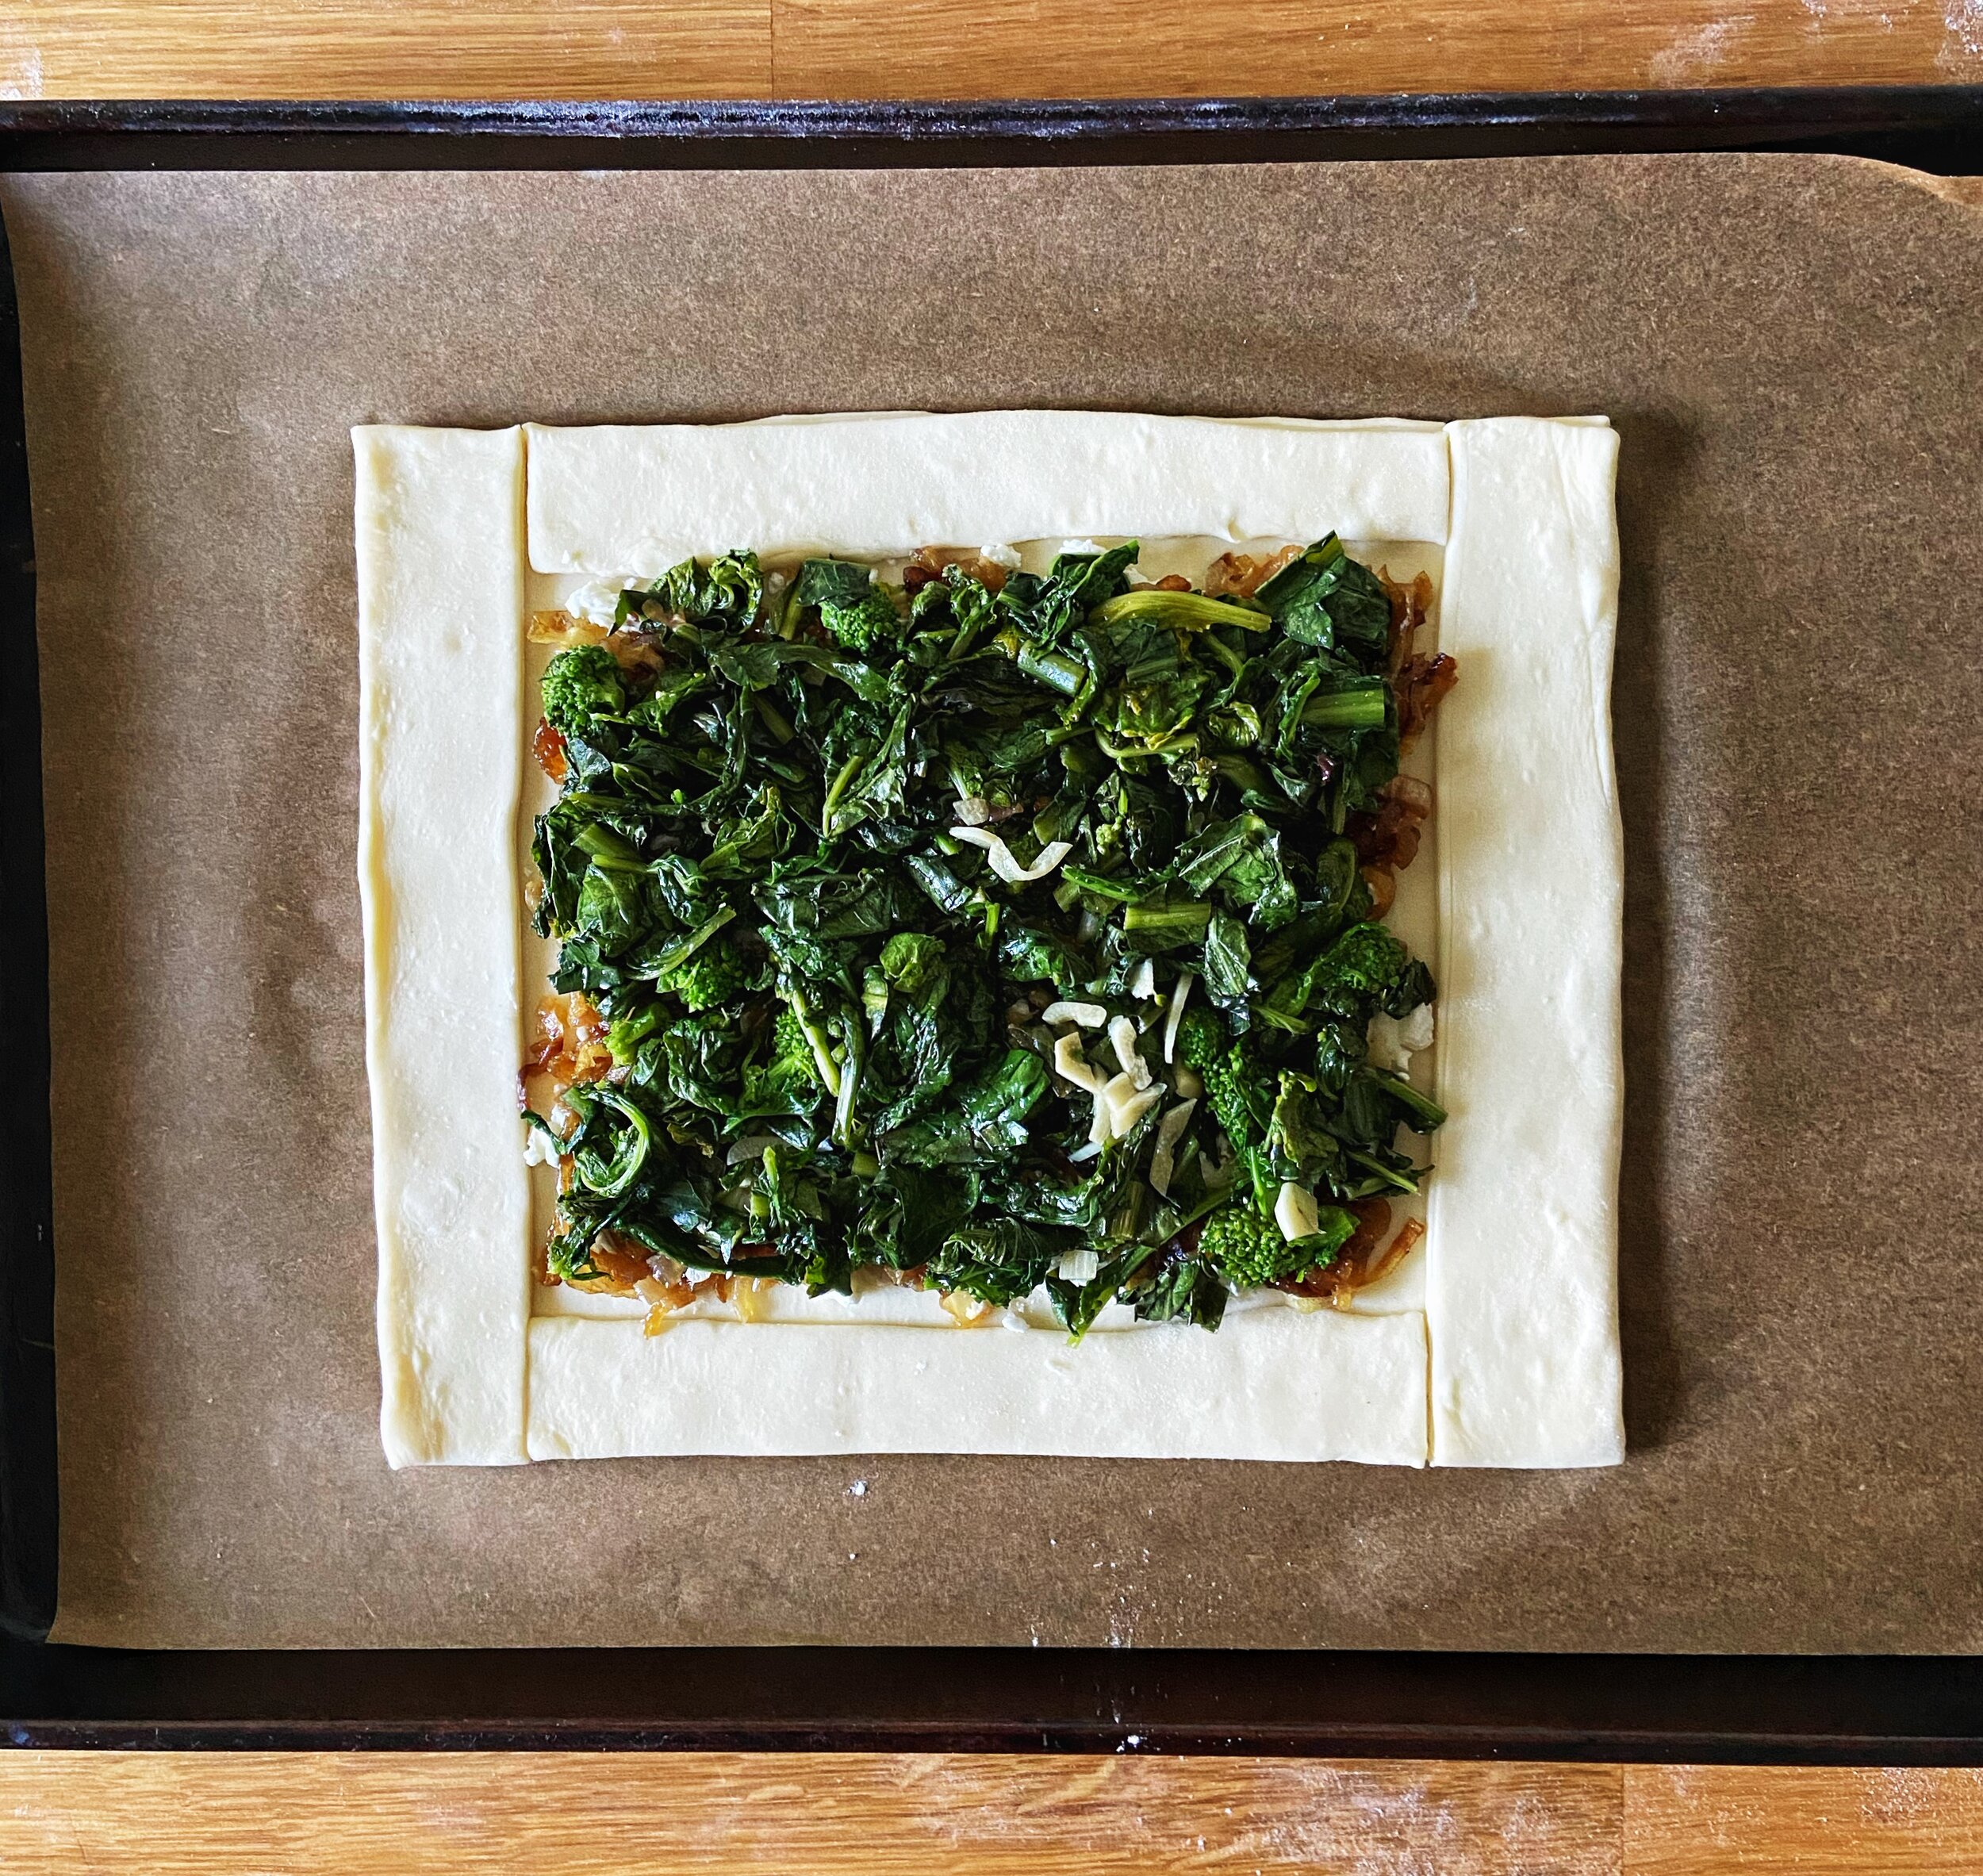
  5. Brush the edges of the rectangle with a bit of egg wash, and lay the strips on top of the puff pastry rectangle, creating a raised border around the edge of the rectangle. Trim the edges a bit if needed. 

  6. Sprinkle with goat cheese on the bottom of the pastry, and then spread on the caramelized onions followed by the sautéed greens. 

  7. Brush egg wash along the edges of the pastry, and bake for 20-25 minutes, rotating halfway through the baking time, until the edges and bottom of the pastry are golden brown. Cool slightly before cutting. 

puffnew.jpg

puff pastry how-to

littlesquares4.jpg

guava and cheese pastelitos

Popovers6.jpg

parmesan and herb popovers

Print Friendly and PDF

Parmesan Herb Popovers

Do you have a Christmas morning breakfast tradition? For as long as I can remember, my mom would wake up when the house was still dark and quiet to make sausage balls. To this day, I am not even certain what exactly is in a sausage ball,—I know it includes sausage, cheese, maybe some sort of flour binder?—but it’s always been my mom’s thing. As the smell of baked cheese began to waft through the house and we could hear the gurgle of the coffee pot, my dad, my sister, and I would crawl out of bed. (This was a very eager crawling that probably happened far earlier in the morning when we were young, but as we’ve gotten older, the whole “rushing to the tree on Christmas morning” has gotten slower and a little later in the morning.) The four of us would sit around the tree, sipping coffee and exchanging gifts, passing a towel-lined basket of ping-pong ball sized sausage rounds between us. By the time the gifts were all opened, the floor sufficiently littered with wrapping paper, that sausage ball basket was always empty.

The last few years, I’ve hosted Christmas at my house and I’ve dabbled in a Christmas morning breakfast to add to our sausage ball tradition. I’ve tried overnight cinnamon rolls, but they still need a solid hour of rise time in the mornings and I’m always struggling to find the time to make the dough on Christmas Eve. I really wanted a breakfast that felt fancy enough for Christmas morning, but that was extremely low maintenance. Enter the good ole’ popover. A popover is a cross between a bread-y muffin and an egg custard and they pillow up in the oven when they bake, like a tray of little soufflés. The batter essentially consists of whisking together milk, flour, and eggs (read: no fancy equipment required) and needs to be made a day or two ahead of time, which means it won’t get in the way of your Christmas Eve dinner prep. All you have to do on Christmas morning is start the coffee, heat a muffin tin in the oven, pour the batter in and watch them rise. I flavored these with herbs and parmesan cheese, but you could really use whatever mix-ins you have laying around—onions, chives, garlic, leftover gouda from your fancy cheese board all would be great. I also recommend eating these warm, breaking them open and plopping a hunk of butter in the middle and finishing with some flaky salt. Merry Christmas, friends!

Popovers6.jpg


Parmesan Herb Popovers

Yield: 12 popovers

Popovers11.jpg

Ingredients: 

3 eggs

1 cup milk

1/2 cup half and half

1 tsp salt

1/2 tsp black pepper

1 1/2 cups (177 g) all purpose flour

3 tbsp (55 g) butter

1-2 tbsp chopped herbs such as oregano, rosemary, and thyme

1/4 cup grated parmesan cheese


Procedure: 

  1. In a medium saucepan set over medium heat, combine butter and chopped herbs. Heat, until butter is sizzling and melted and herbs are fragrant. Remove from heat and let cool while you mix the rest of the popover ingredients.

  2. In a large bowl, whisk together milk, half and half, and eggs until completely homogenous and no egg streaks remain. Add flour, salt, and black pepper and whisk to combine. Whisk in cooled butter until emulsified and gently fold in parmesan cheese. Transfer batter to a container with a lid and chill overnight in the refrigerator.

  3. When you’re ready to bake, remove batter from the refrigerator and allow to come to room temperature. Meanwhile, preheat oven to 450° F. Place a muffin tin in the oven and allow it heat as the oven heats.

  4. Carefully remove hot muffin tin from the oven and spray generously with cooking spray. Divide batter evenly among the muffin cups.

  5. Bake at 450° F for 20 minutes without opening the oven door. Lower oven temperature to 350° F and bake another 5-10 minutes, until popovers are golden brown. Carefully remove from the oven, loosen popovers with a knife, and flip onto a plate. Serve immediately, warm with butter and lots of flaky salt.

*Note: If you use other mix-ins, like onions or garlic or different types of cheese, try to keep the measurements close to that listed in the recipe. If you put too much in your batter, the additions will weigh the batter down and they won’t rise properly.

Holiday Charcuterie Board How-To

I love the holiday season because it is a wonderful excuse to gorge on cheese and salty meats. I love it even more now that highly-styled, decorative plates filled with said meats and cheeses have become a cool, trendy thing because it gives me another excuse to play with my food. The beauty of a great charcuterie board is it’s versatility. You can use pretty much anything that you like snacking on and it’s great for any occasion- from that Christmas potluck you signed up to bring an appetizer for, to Thursday night snack-dinner. Charcuterie boards are always there for you.

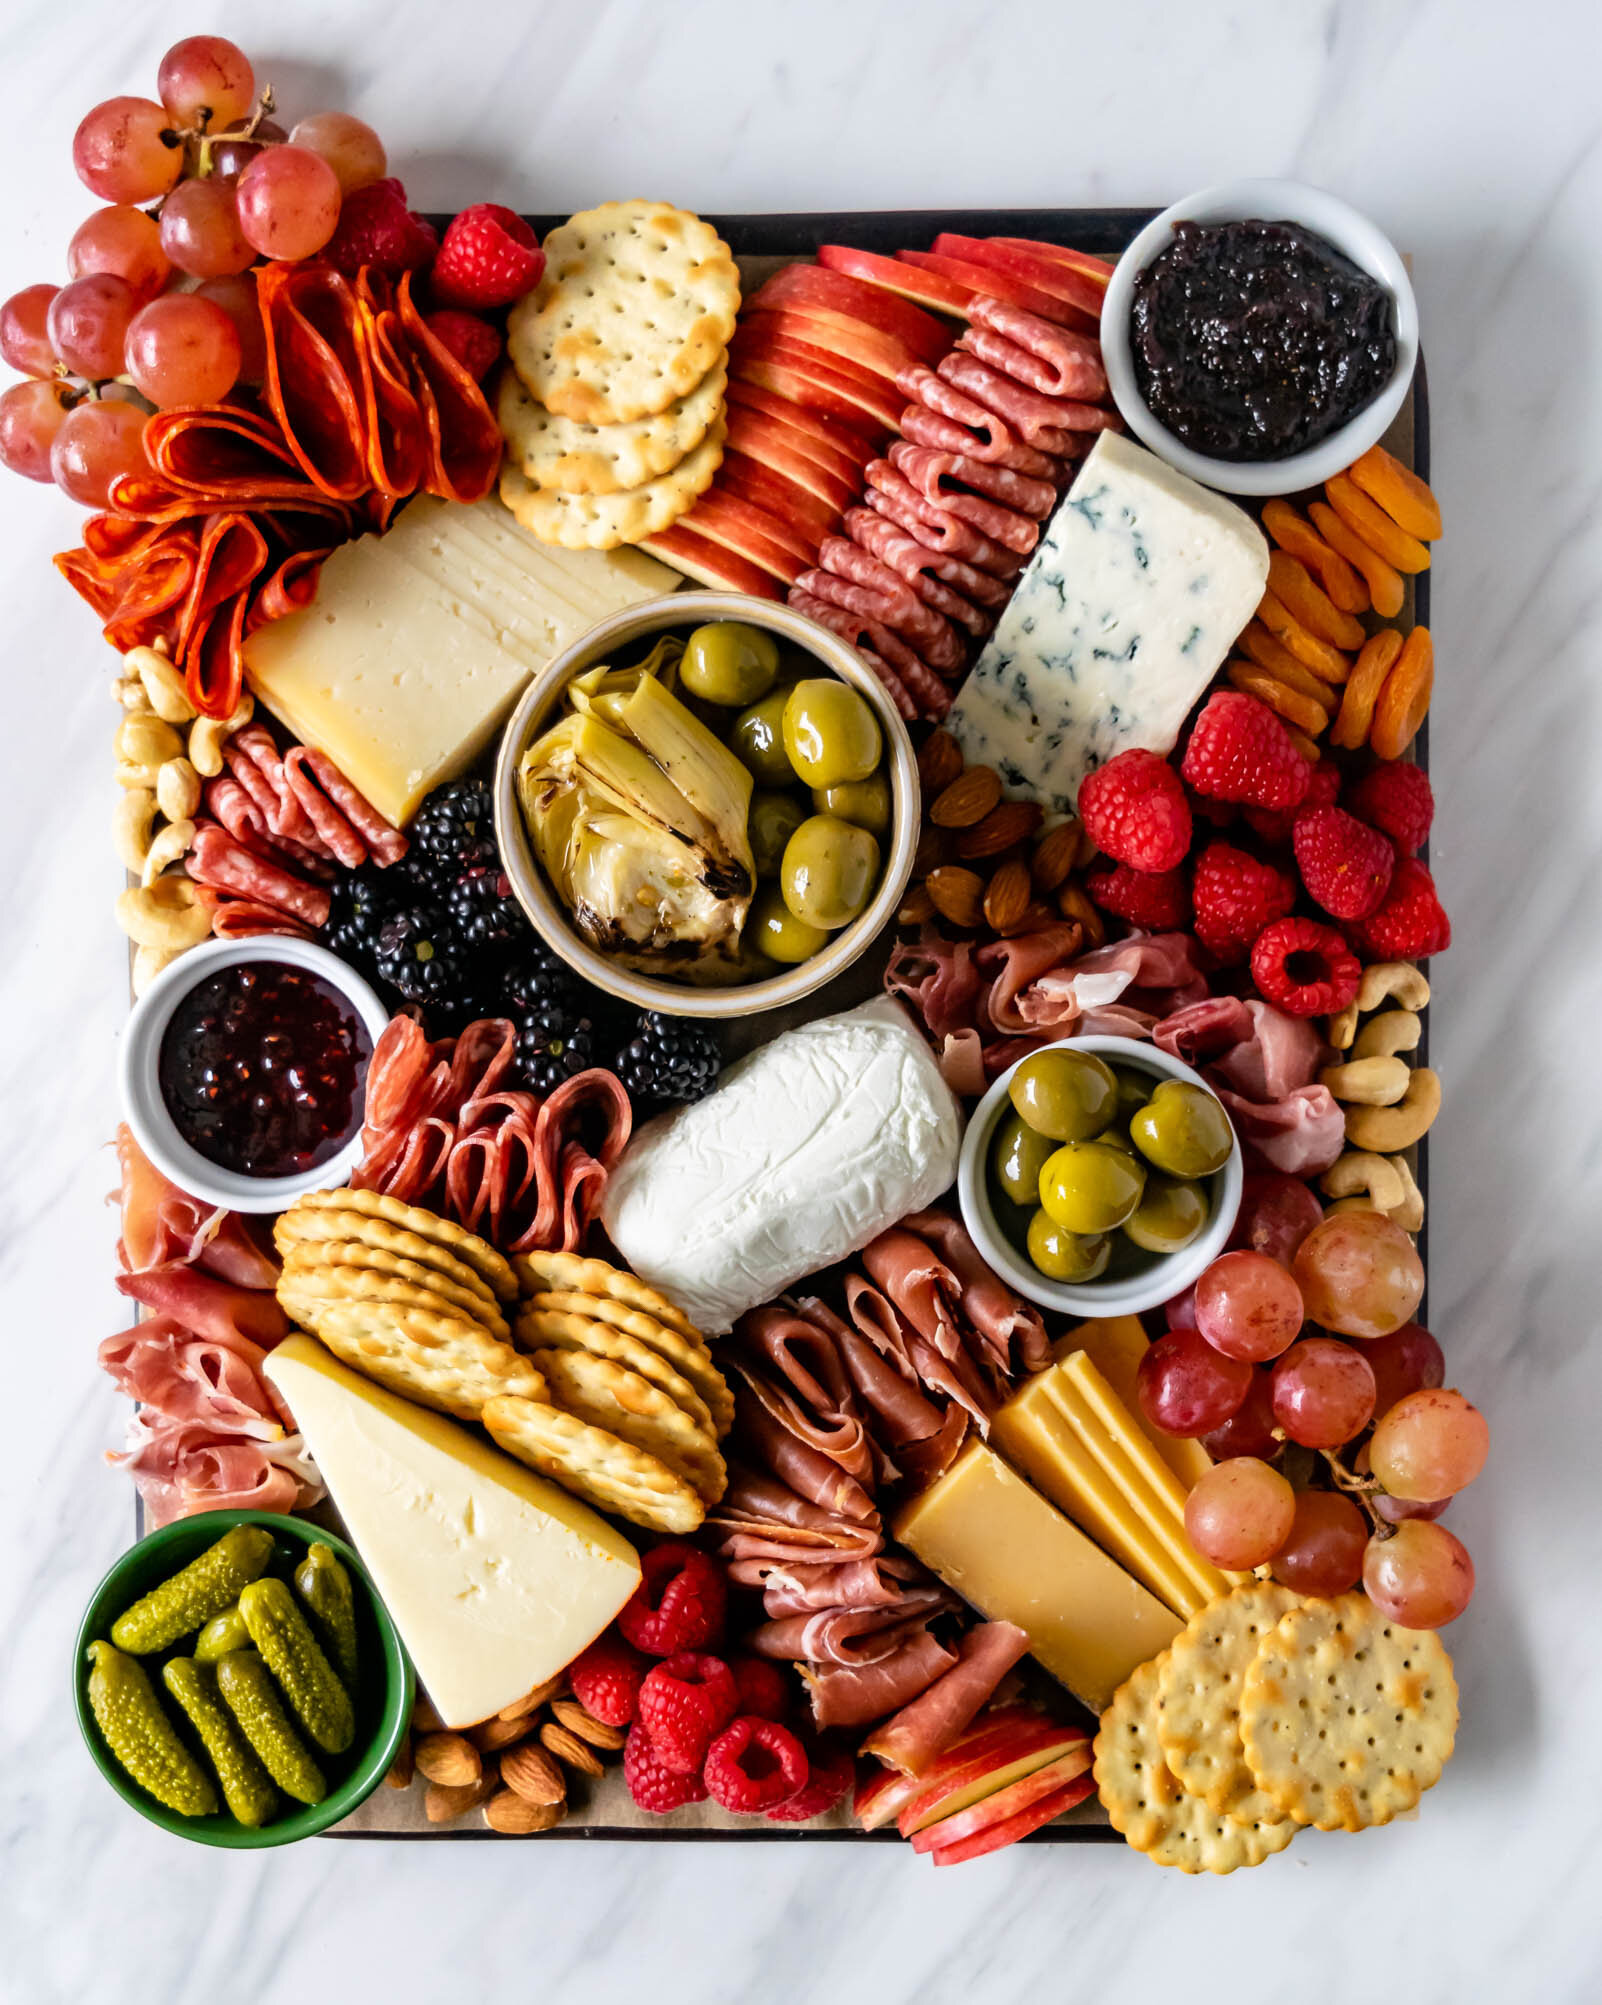
I put together a holiday-esque snacking board a few weeks ago and have compiled a few tips and tricks to help you create your own.

holidaycharcuteriefinal1.jpg

Step 1:

holidaycharcuteriestep1.jpg

Start with a board. Fancy bamboo platters are very nice and beautiful, but they can also be kind of expensive and, if your kitchen storage is anything like ours, a little tricky to find a home for. If you already have a big platter, then by all means, cheese it up. But if you don’t have a fancy platter, not to worry. You can really use any, large flat-surfaced item that you have. I used a baking stone for mine, and just trimmed a piece of parchment to lay on top of it. My board was 12”x16”.

I find that it’s also really helpful for me to pull out all of the items I’m going to put on the board before starting to arrange so that I get an idea of how much space I will need. If you’re only using 1-2 cheeses and a couple of other little snacks, you might want to use a smaller platter or a plate. For more cheese/snacks/charcuterie, use a bigger platter.


Step 2:

Place your cheeses, spread out a bit, on the board. They are your anchors and the whole board will revolve around them. I’ve read quite a few charcuterie board “recipes” that call for a soft cheese, a hard cheese, an aged cheese, and a blue cheese. This is a good rule of thumb to ensure you have a little diversity on your board, but ultimately, you should pick cheeses that you like.

For this board, I used: goat cheese, a very mild blue cheese, a salty gouda, a creamy port salut, and a smoked sheep’s milk cheese called etxegarai.

holidaycharcuteriestep2.jpg

Shop local when you can, and when you can’t, there is always Trader Joe’s. Cheese boards can get expensive. Cured meats and good cheese are some of the pricier items in the store and building a whole board out of them can quickly add up. Since I unfortunately do not have a never-ending supply of cheese money, I like to get one or two meats/cheese from my local cheese shop (in Orlando, I like La Femme du Fromage at East End Market) and then bulk the rest of my board up with less-expensive cheese from the grocery store. If you have a Trader Joe’s anywhere near you, it is worth the drive! Their cheese selection is really great and really affordable.

holidaycharcuteriestep3.jpg

Step 3:

After you lay out your cheeses, place small bowls or ramekins on the board for your jams, dips, mustards, and olives. I like to spread these out in empty spaces around the cheeses. Don’t fill your bowls, just yet. We will just use them as placeholders for now.

Step 4:

It’s time for the meats. I cannot exaggerate enough how much I enjoy a salty, cured, meat. I would eat slices of chorizo or salami everyday for breakfast, lunch, and dinner if I could. (In fact, on my most recent trip to Spain, I did.) I choose my meats the same way I choose my cheese- a variety of different types, splurging on one or two really great ones. When placing your meats on the board, you want to make sure that you are folding or bunching them into little, easy to grab parcels. For larger pieces of meat, like prosciutto or jamon, slice them in half before folding so that everything is bite size.

For this board, I used: prosciutto, chorizo, salami, salchichon, and Serrano jamon.

Step 5:

Fill in all empty space with cheese board accoutrements. Again, pick a variety of bite-sized, stackable foods that you like. Here are some suggestions:

Fruit- Fresh and/or dried. I am berry girl myself, but Martin likes grapes and apples so I included a little of each on this board.

holidaycharcuteriestep4.jpg

Nuts- It’s nice to have a crunchy contrast to all of the soft, creamy things on the board. I used cashews and almonds, but pistachios are also great.

Jams, Jellies, and Dips- For this board, I used raspberry jam and fig butter, because I thought their flavors paired well with the port salut and the blue cheese. I also like the addition of seedy, whole grain mustards, yogurt-based dips with lots of garlic and chives, or marmalades.

Olives and other Marinated/Pickled Goodies: I don’t want a cheese board if it doesn’t have olives. I found some little, buttery green olives, but I also really love Kalamatas, or really anything swimming in oil coming off of an olive bar. Martin doesn’t like olives, so I added grilled marinated artichoke hearts so he didn’t feel left out. Pickles and other pickled vegetables give a briny, pucker-y flavor to the board.

Crackers and Bread: Not exactly a part of the board, I alway like to have a basket of bread off to the side for slathering with cheeses and jams and piling with salami. I like baguettes sliced into little rounds or squares of focaccia best. I also like to include crackers of some sort on the board, for a little extra crunch and for when the bread runs out. I prefer butter crackers without a lot of added flavors so that the cheeses can really sing, but if you’re a water cracker kind of person, go for it. If you can, it’s nice to include a gluten-free cracker for those who are sensitive to gluten, but still love a good cheese board.

holidaycharcuteriefinal2.jpg

We still have a week until Christmas, and two weeks until New Year’s. There is plenty of time to add a cheese board or two to your holiday plans! Swing by your local cheese monger, pick up some snacky foods and let your creative side loose. Happy boarding!