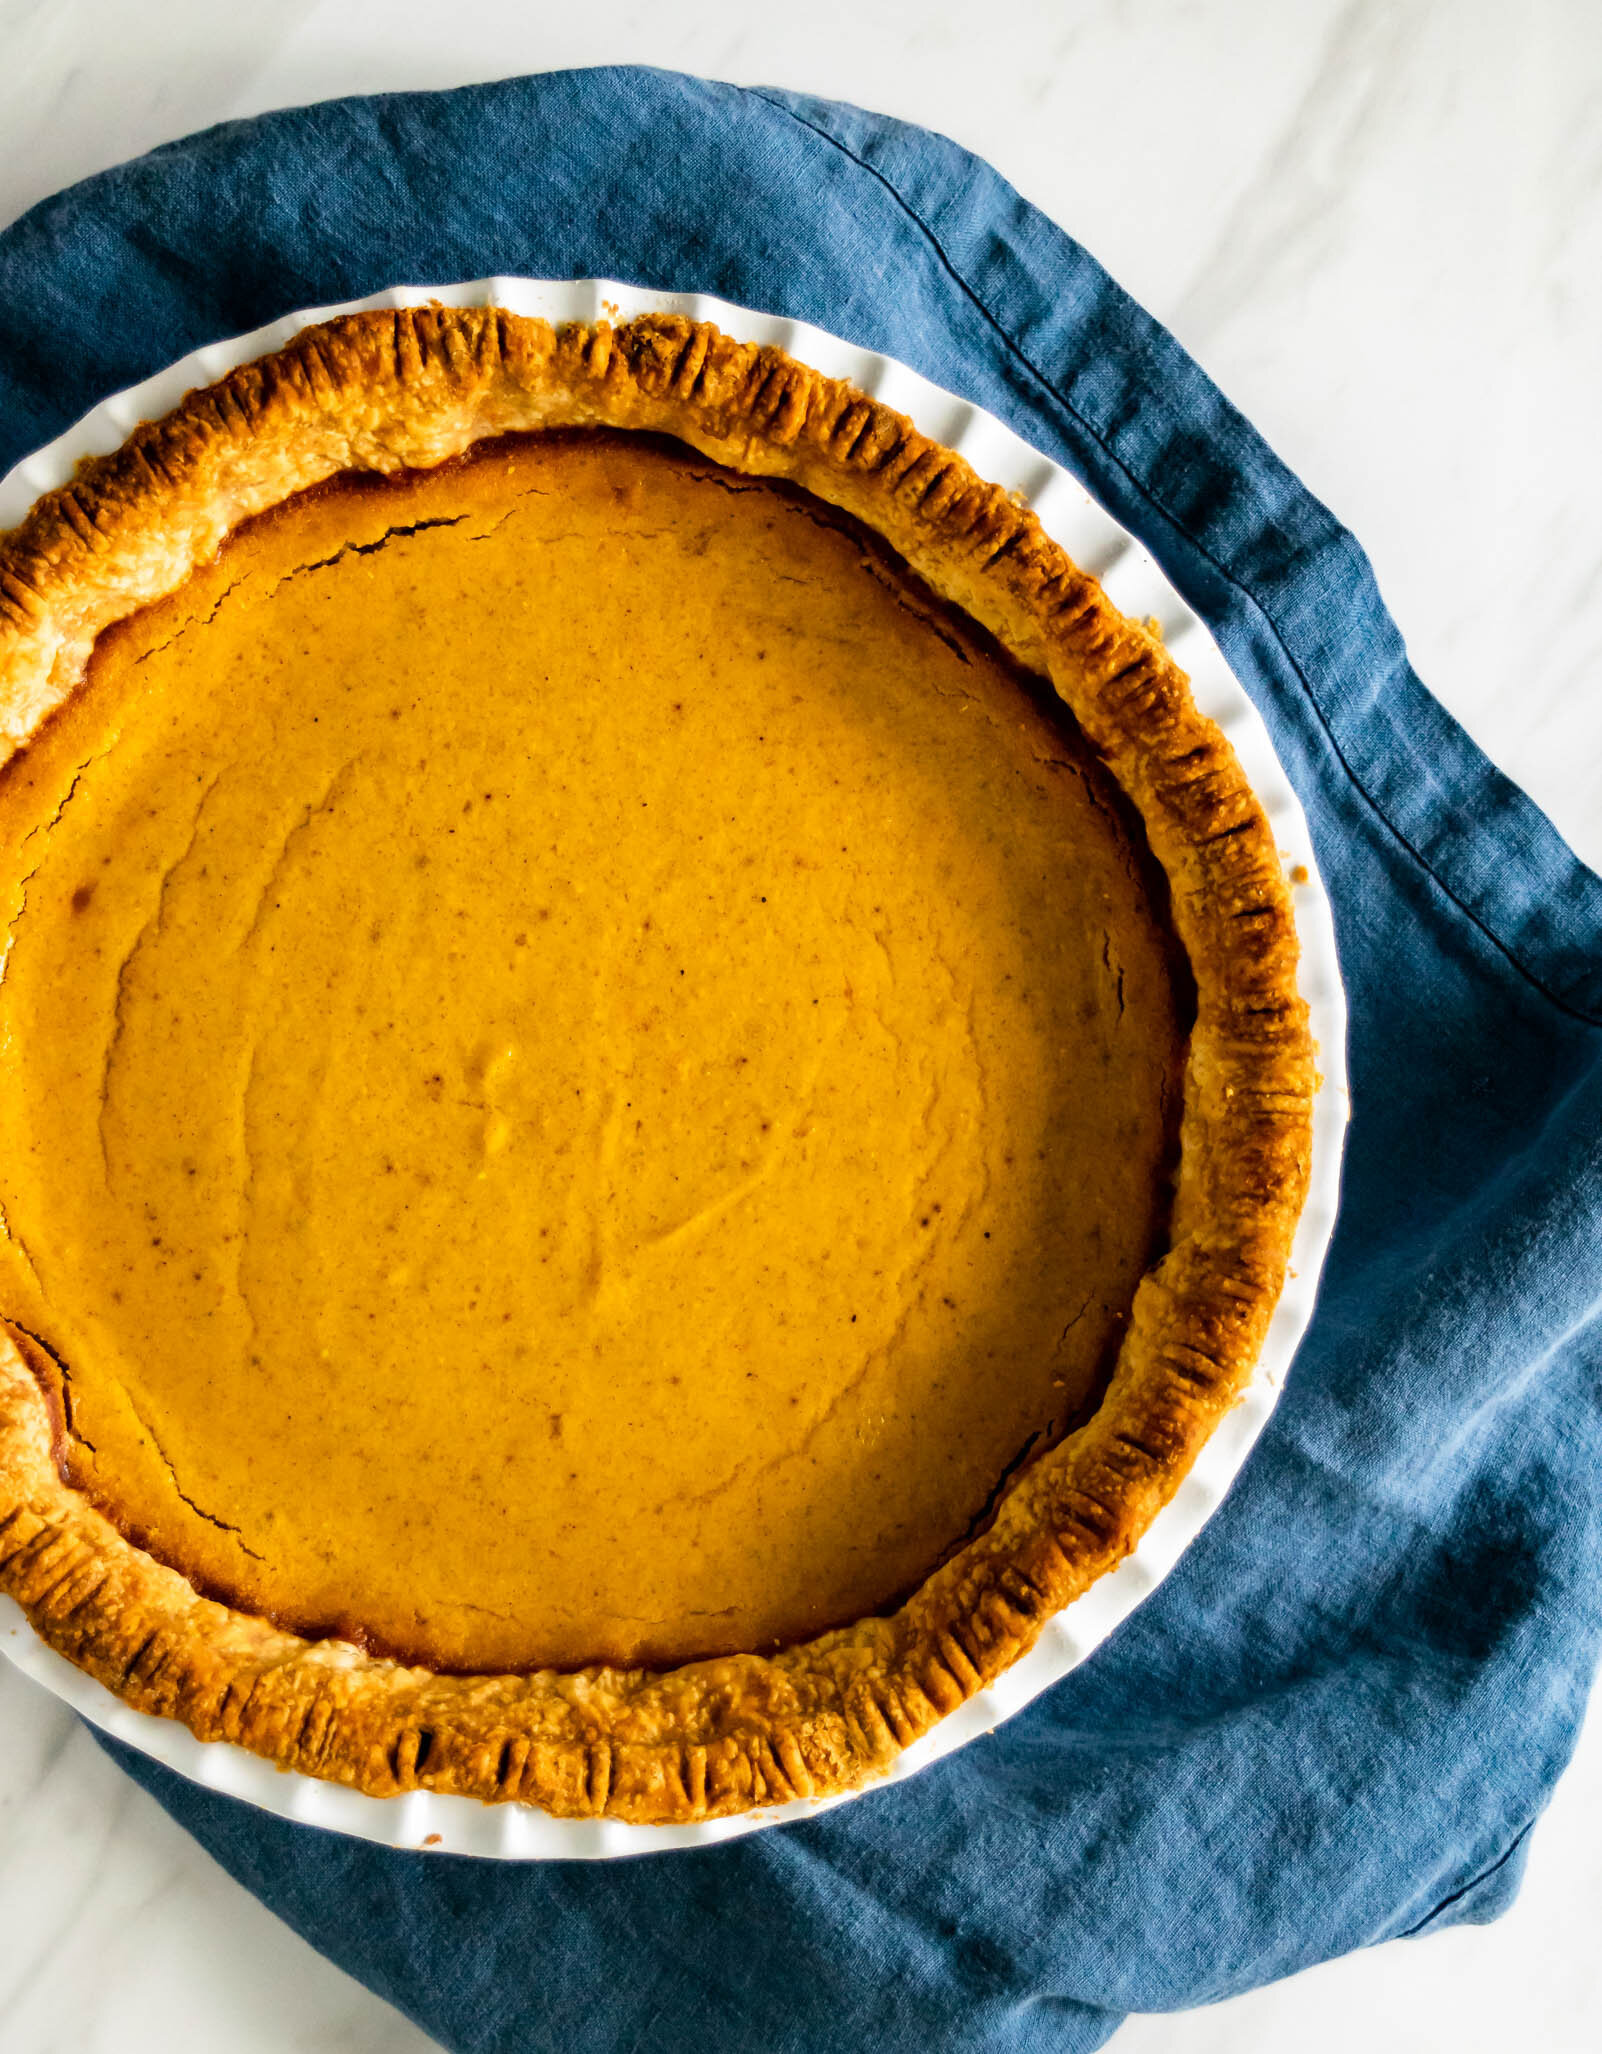
Roasted Squash Pie with Brown Sugar Cinnamon Bavarian Cream and Candied Pecans

Thanksgiving has always been one of my favorite meals of the year. Some people really love Christmas. Their stockings were hung by the chimney with care before they finished eating all of their Halloween candy. This is not me. I have never been able to jump into Christmas until after Thanksgiving. I love the creative opportunities that Thanksgiving provides and the dinner party fan-girl that I am really loves hosting Thanksgiving dinner. I am not a Thanksgiving traditionalist. I have made Cornish hens and roasted chickens, added squash to almost any dish on the table, and I would be 100% okay with skipping stuffing completely. My father, however, makes the term “traditionalist” feel like an understatement. He would love nothing more than for every single Thanksgiving dinner to look exactly like the ones he remembers from his childhood, and if I’m being honest, it does not mesh well with my unconventional Thanksgiving mentality. The last few years I’ve hosted Thanksgiving at my house and I’ve had to get a little creative and I’ve learned a few lessons in compromise so I figured this year, I would put together a little guide to help navigate the treacherous world of the turkey day table.

Today, I’m sharing a pumpkin pie inspired recipe that allows for endless modifications, to give the creative culinarians among us some opportunities to try something new while still appeasing the more traditionally-minded guests at the table. Without further ado, let’s break it down piece by piece.


the crust- For this pie crust, I used blend of all purpose flour and spelt flour. The addition of spelt flour gives a slightly nuttier, more complex flavor to your regular pie crust. You can play around with any alternative flours you’re interested in (I would love to try buckwheat or einkorn), just remember to keep alternative flours to 20% or less of the total weight so that you’re still able to achieve appropriate gluten structure.

the filling- In place of the traditional canned pumpkin, I used a large roasted butternut squash. Pumpkin is a little bit sweeter than butternut squash, but I really like the more vegetal flavor butternut gives. Pumpkin and butternut squash have very similar consistencies, so they are interchangeable when it comes to pies.

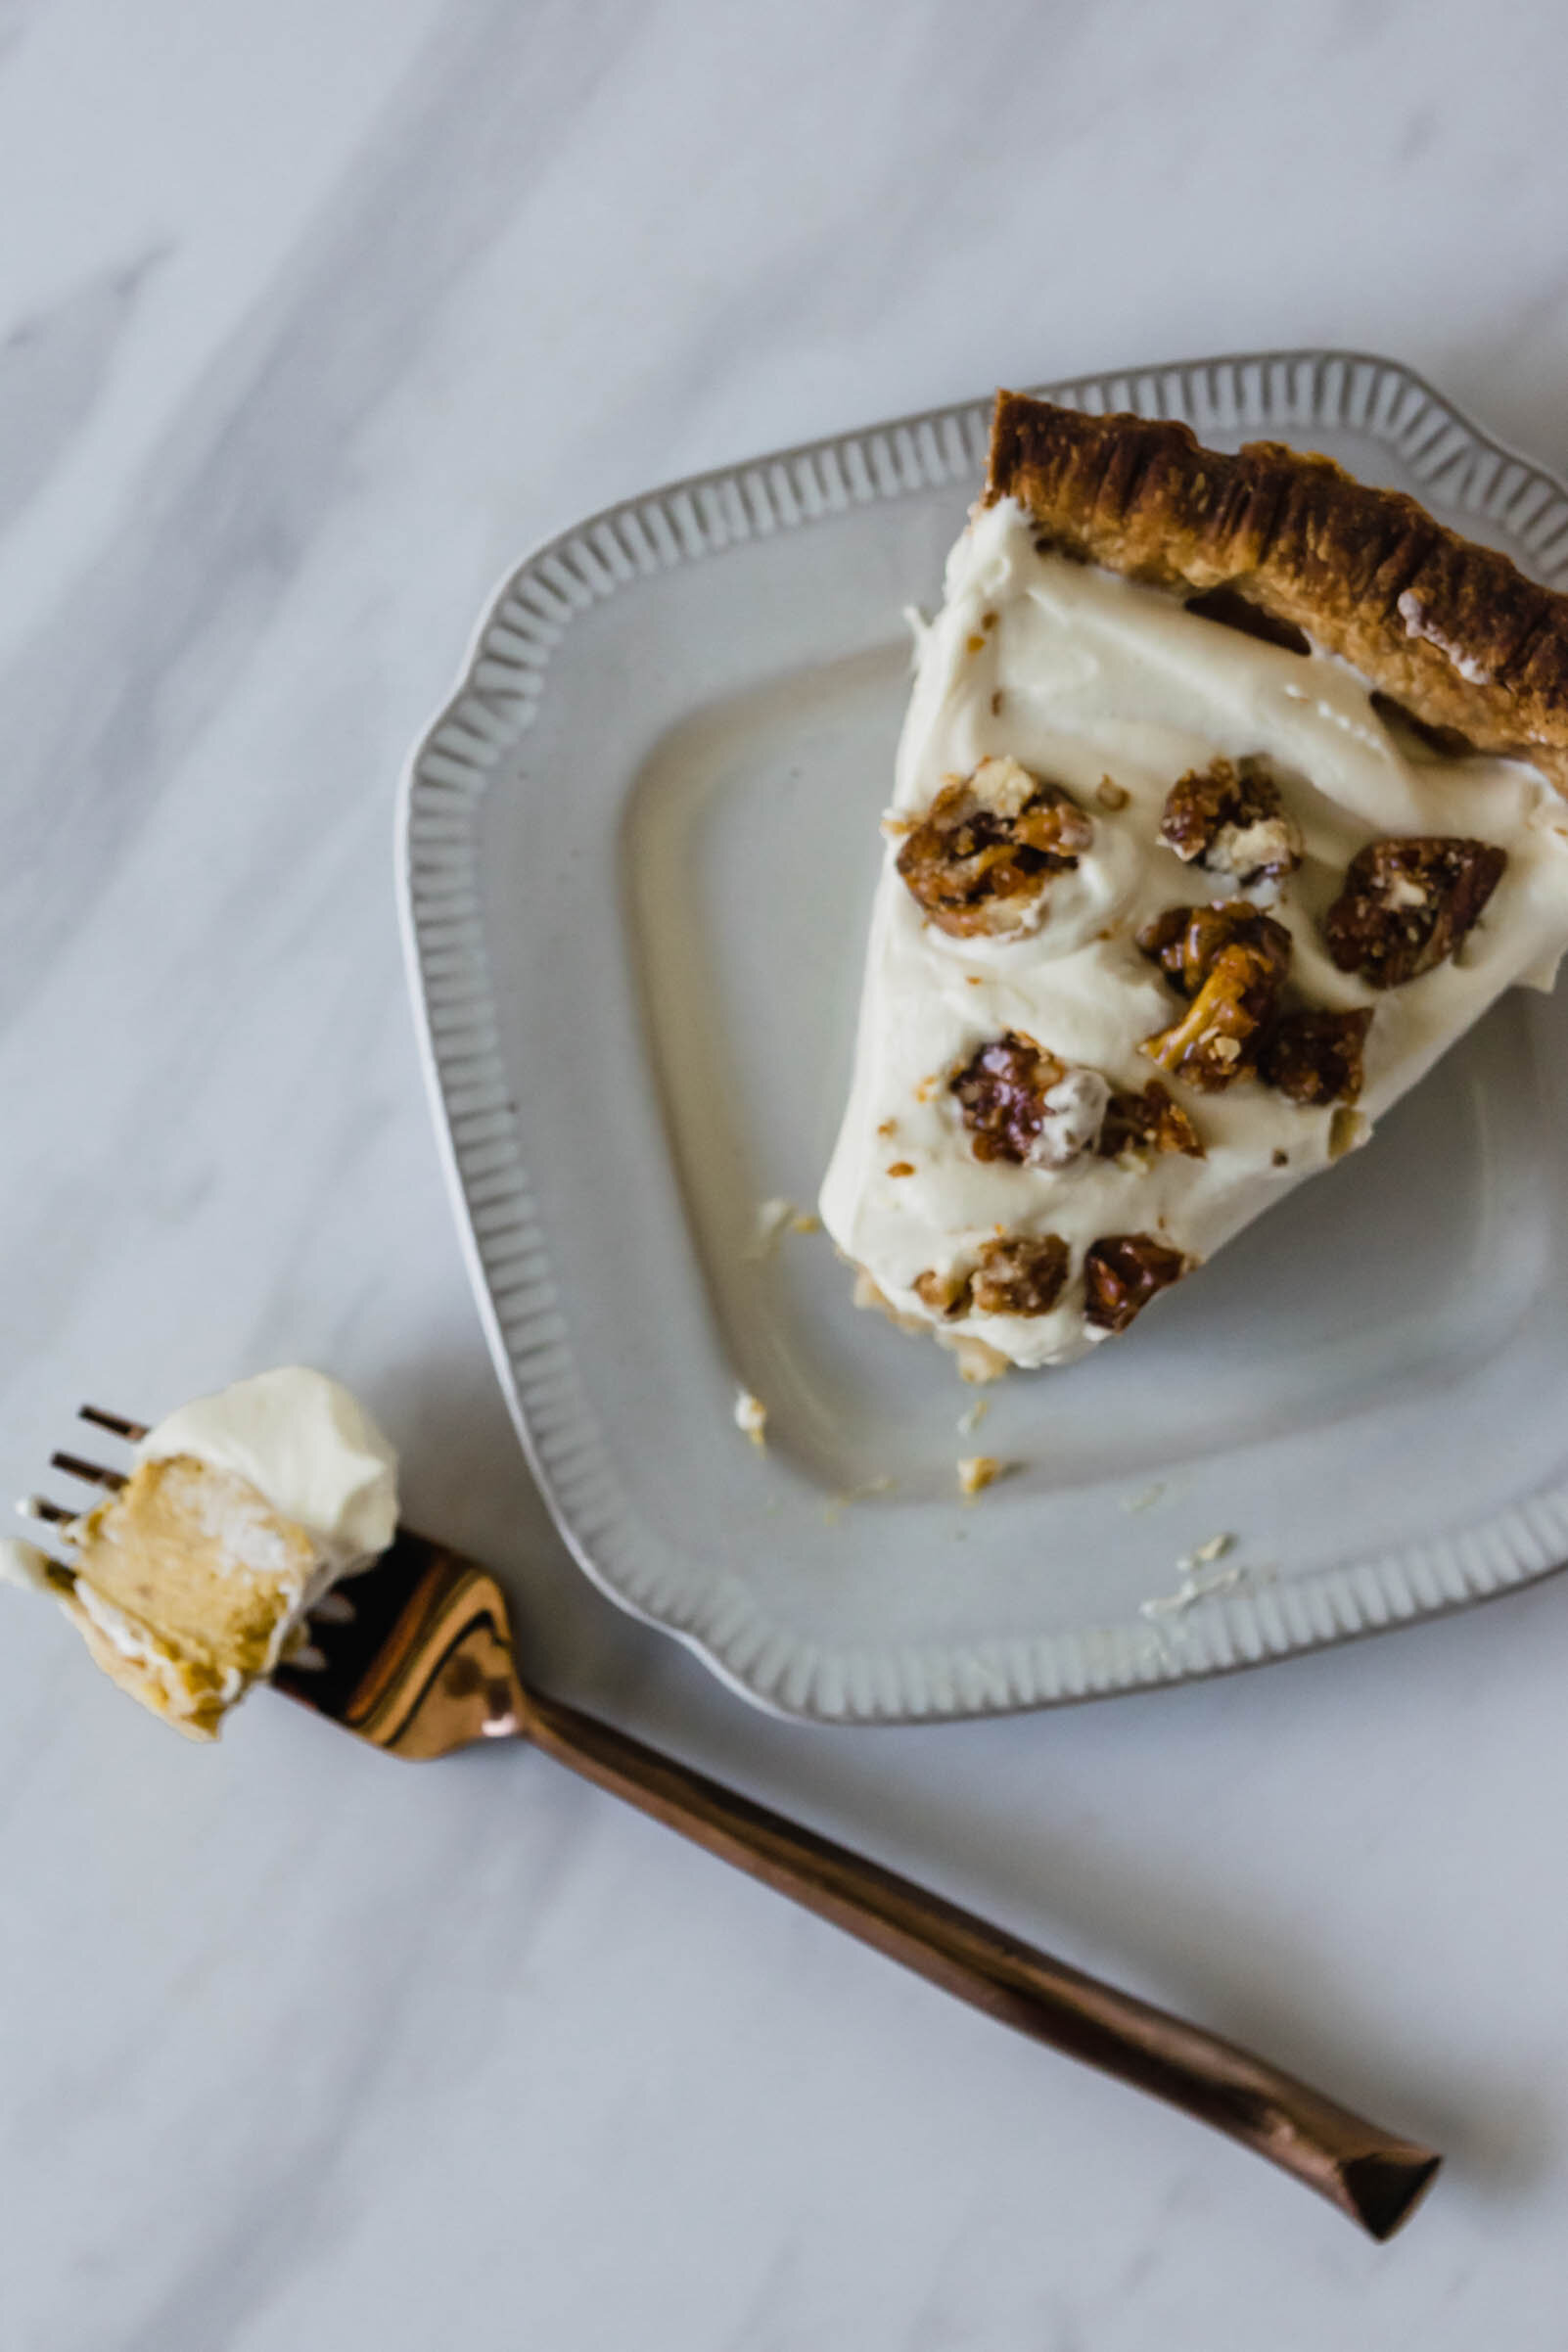
the topping- In my opinion, the very best part of a pumpkin pie is whipped cream. There needs to be enough whipped cream on the pie that you get some in each bite, but not so much that you end up eating cool whip by the spoonful at the end. I decided to make a brown sugar Bavarian cream and top this pie with a big thick layer, like a chocolate cream pie or a lemon meringue. The fun thing about a Bavarian cream is that it is simply a creme anglaise sauce, cooled and folded into whipped cream. If you wanted to serve this pie warm, you could make the brown sugar cinnamon anglaise and stop there, spooning the warm sauce over the warm pie to serve. That would be very delicious. Or you could follow the recipe exactly as written below and pile that Bavarian cream on top of the pie until you get lost in it’s fluffy layers. Or you could leave half the sauce as a creme anglaise, and make Bavarian cream with the other half, and let everyone at the table choose their own adventure. See what I mean, this is a very versatile pie.

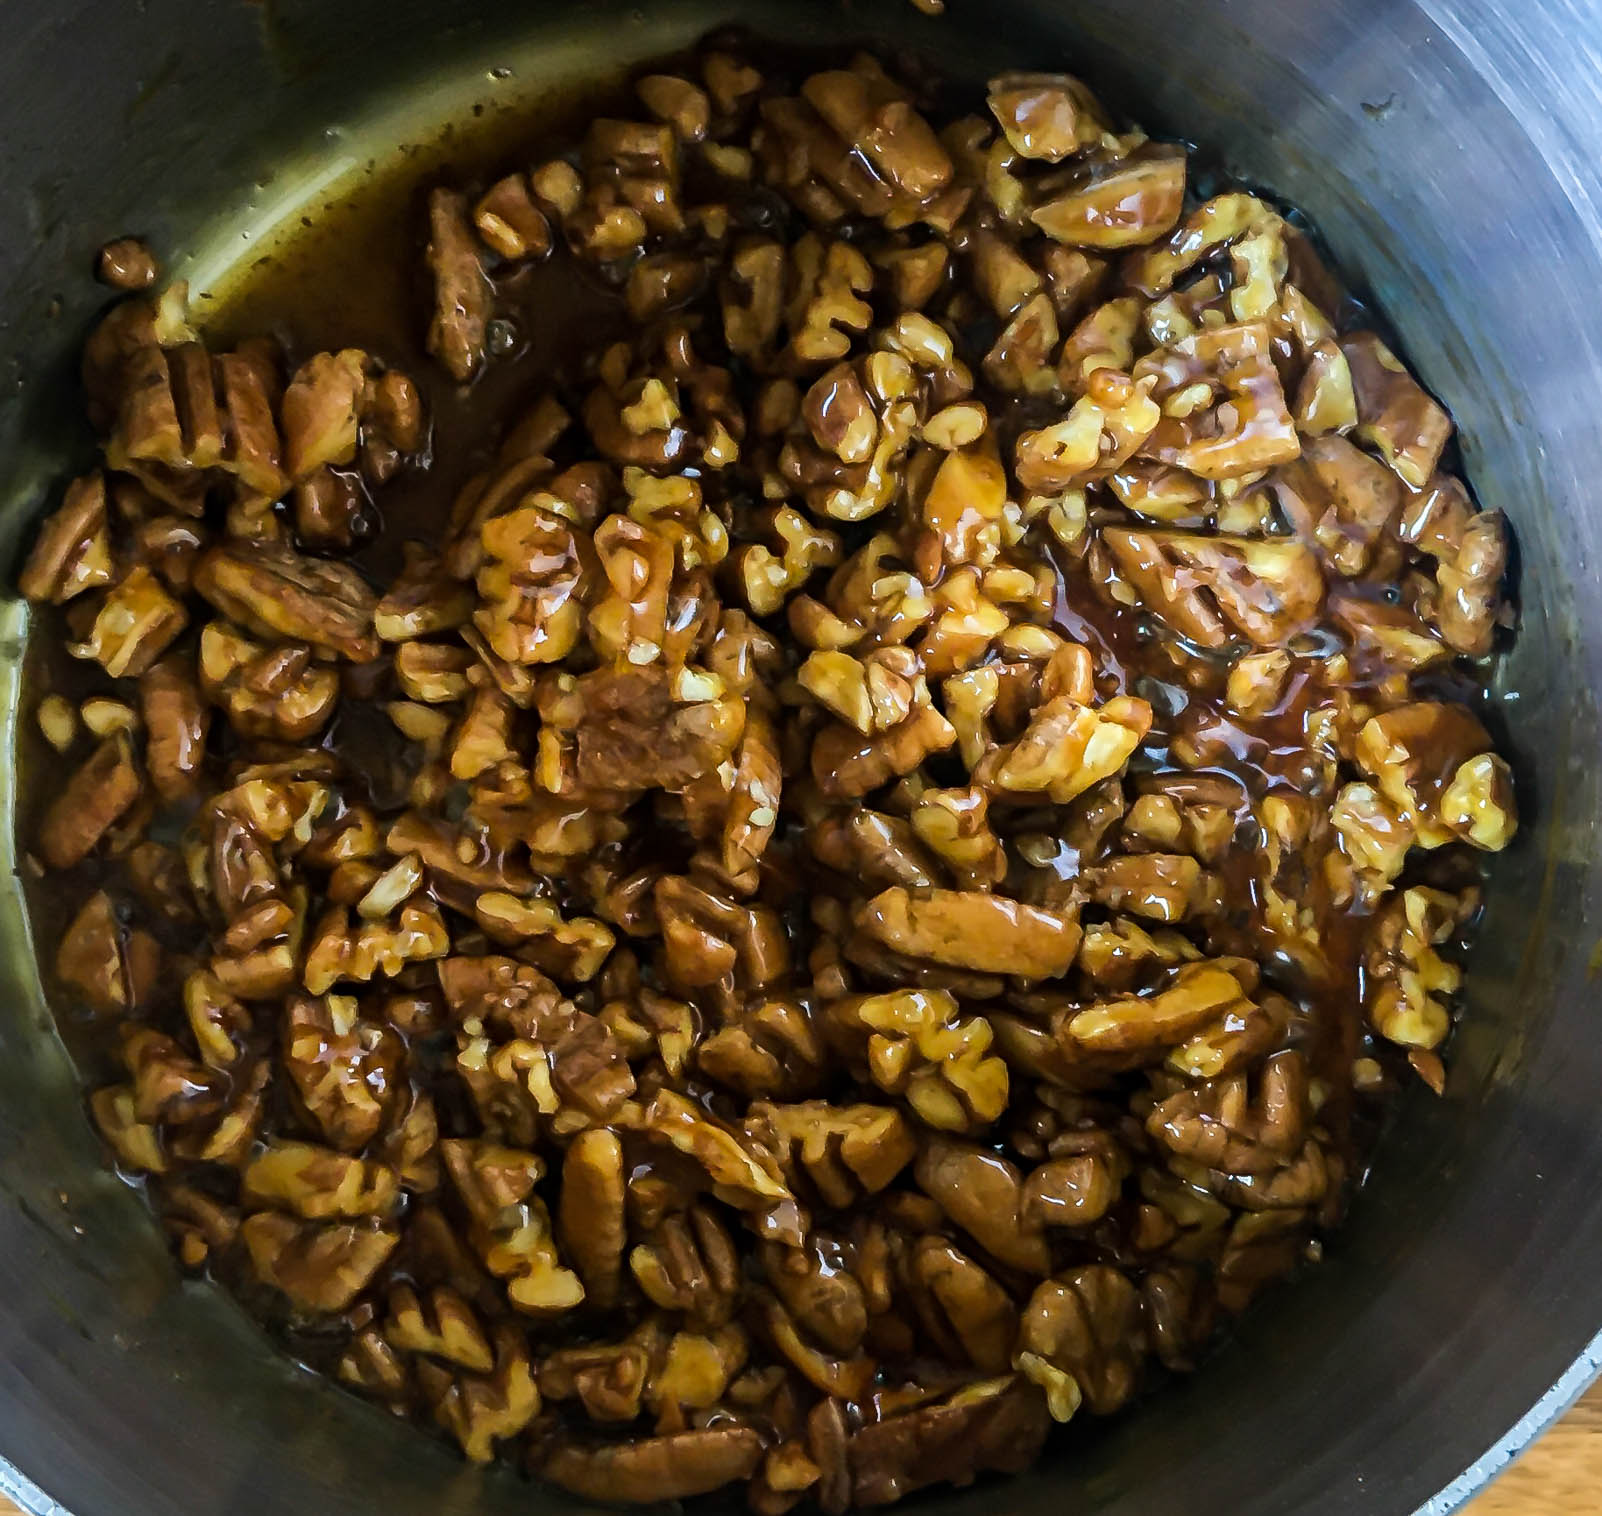
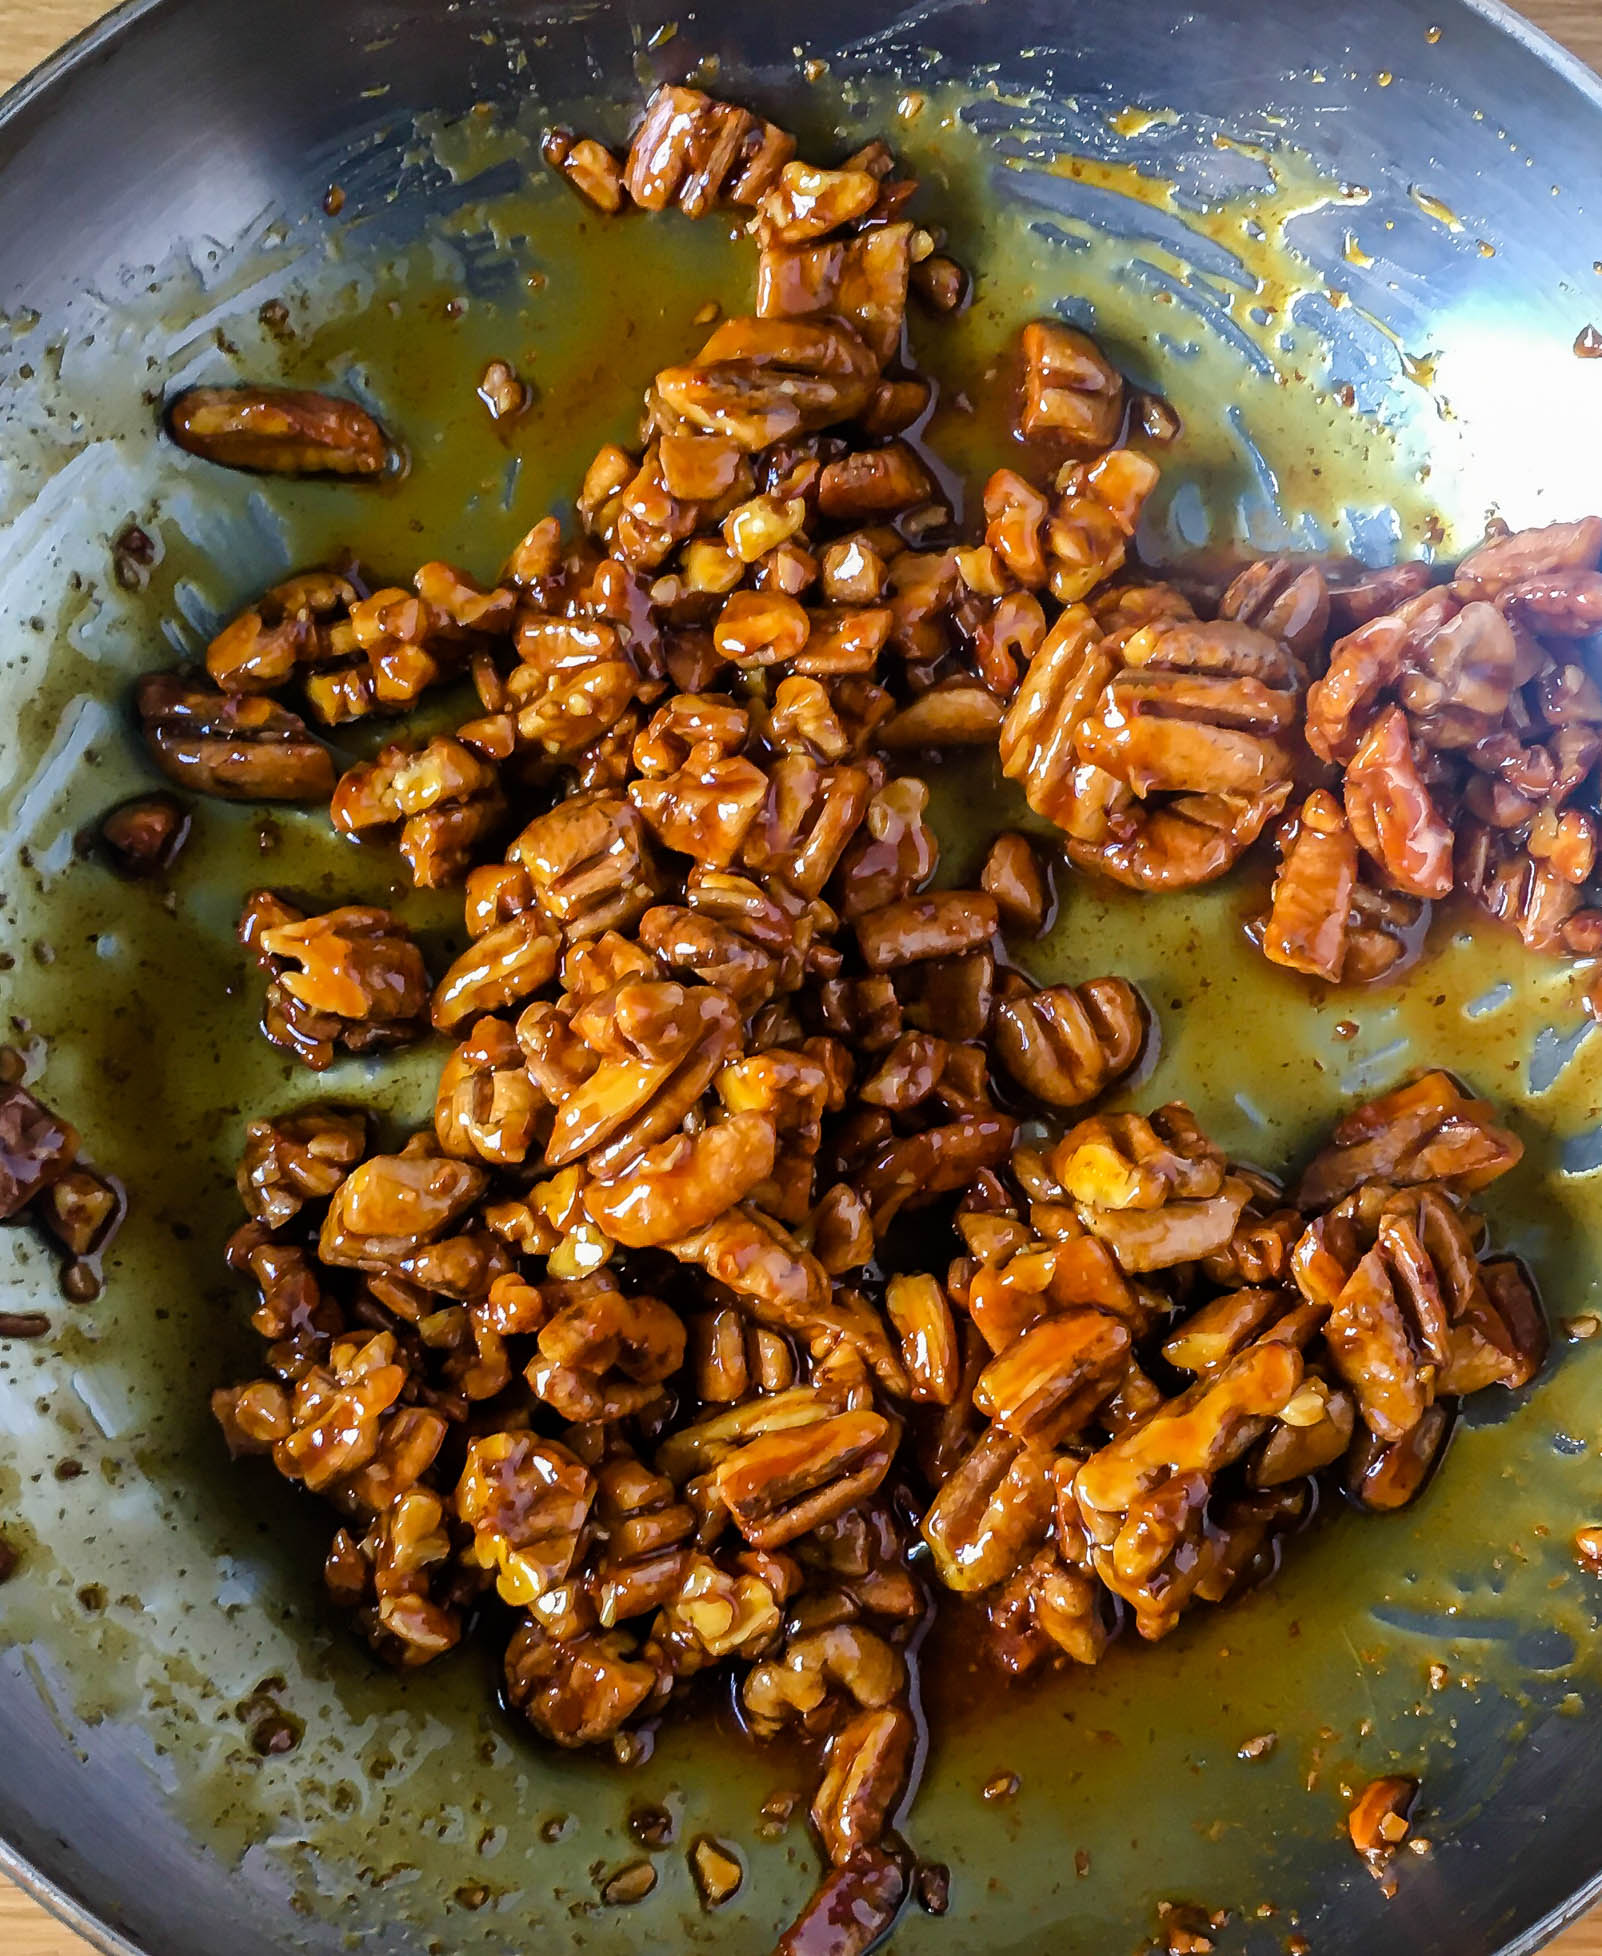
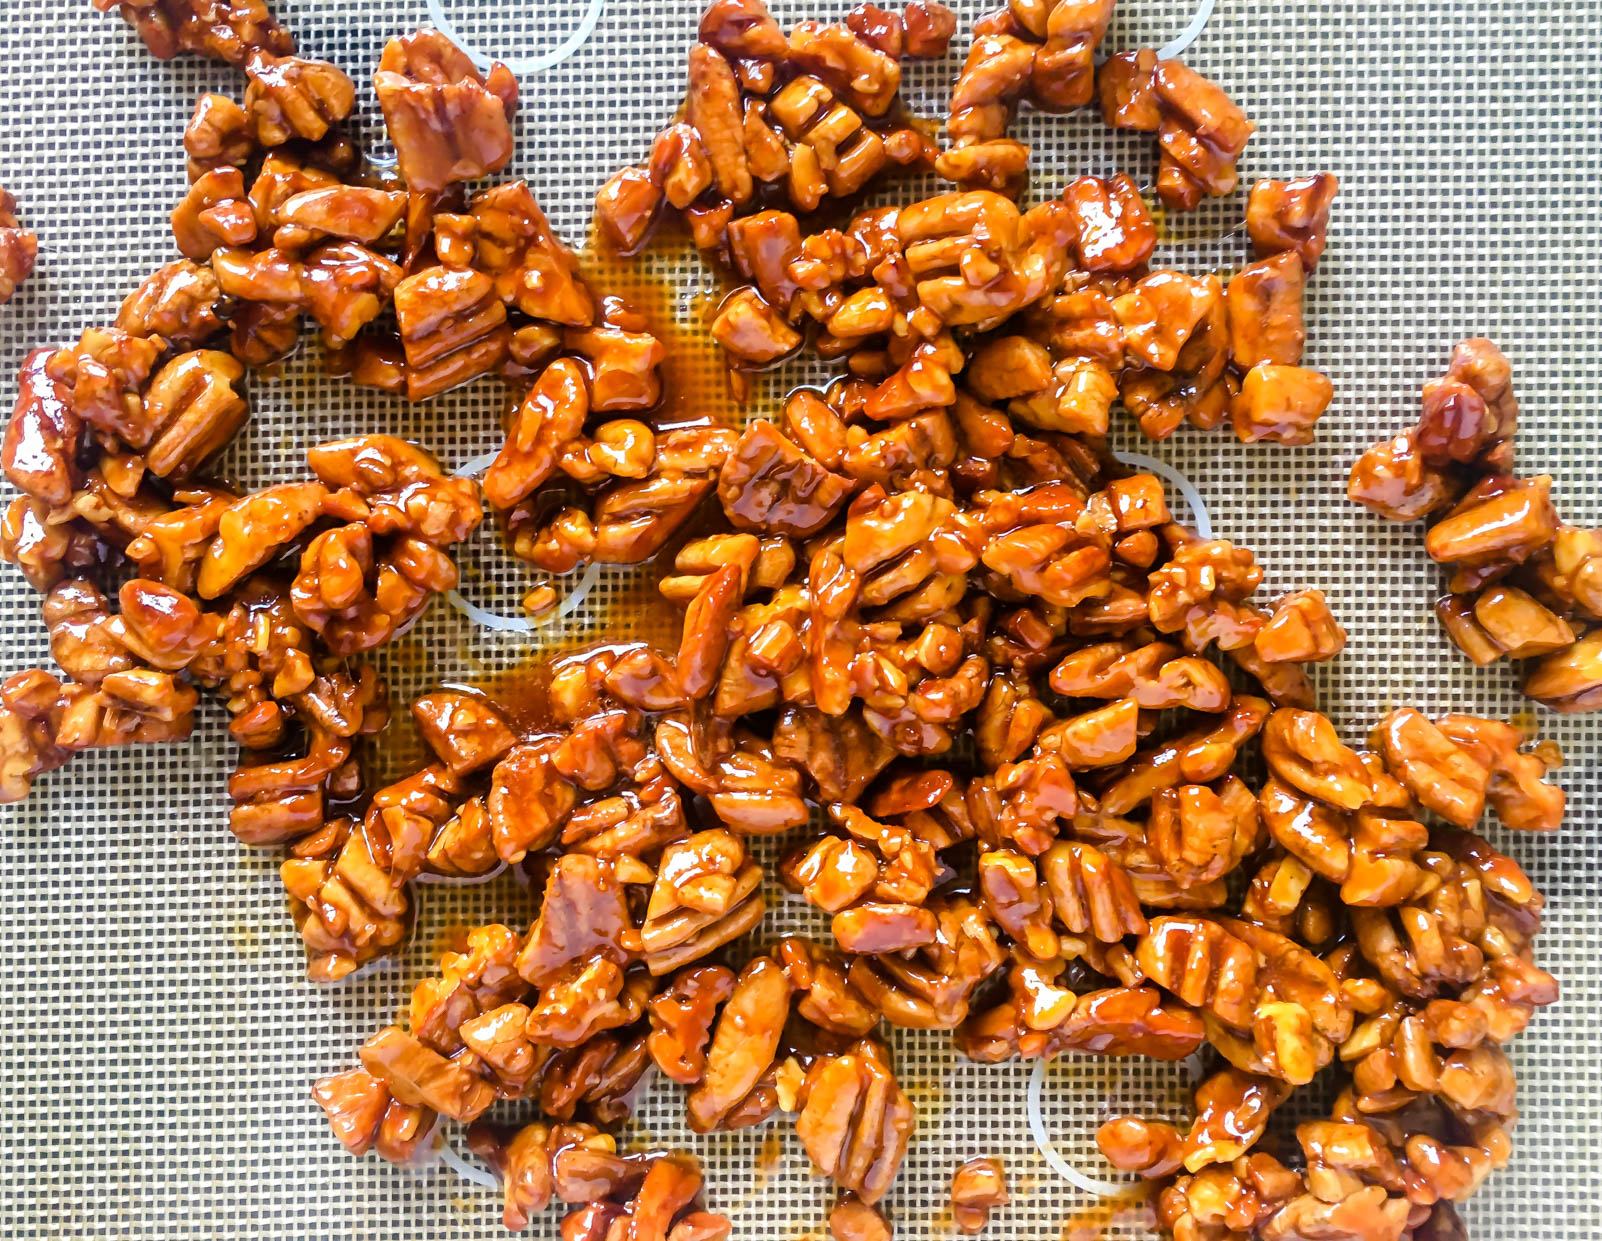
the candied pecans- If you remember my post about all the things I learned from working in a restaurant pastry kitchen, one of my biggest takeaways was that one of the easiest ways to elevate your dessert is to add some texture. Pumpkin pie is traditionally very creamy. I wanted to give it a little crunch without changing the pie base itself so I simply added some candied pecans. I included some step by step photos in the recipe because working with caramel can be a little daunting. You can use walnuts or almonds, add a splash of bourbon at the end…it’s your dessert so really anything goes.


SquashPieFinal5.jpg

Roasted Squash Pie with Brown Sugar Cinnamon Bavarian Cream and Candied Pecans

Yield: 1 9” pie

Ingredients: 

for the pie crust (adapted from Yossy Arefi)

10 oz all purpose flour 

2 oz spelt flour

9 oz butter, cold and cubed 

2 tsp apple cider vinegar 

4 oz ice water *see note in recipe*

1 tsp salt

1 tbsp sugar

for the roasted squash filling (adapted from Bon Appetit)

1 large butternut squash, roasted (about 15 oz)

1/4 cup sugar

1/4 cup brown sugar

3 whole eggs

1 egg yolk 

1 cup heavy cream

2 tbsp melted butter

1 tsp ground cinnamon

1 tsp ground ginger

1/4 tsp ground nutmeg

1/4 tsp ground cardamom

pinch of cloves

1/4 tsp salt 


for the creme anglaise/bavarian cream: 

3/4 cup heavy cream

1/4 cup half and half

3 cinnamon sticks 

1 tsp vanilla

3 egg yolks

1/4 cup brown sugar

Pinch of salt 

1 cup heavy cream #2

for the candied pecans:

1/2 cup sugar

1 cup chopped pecans

1 tsp vanilla extract 

2 tbsp butter, softened

Pinch of salt 

Procedure: 

for the pie crust: 

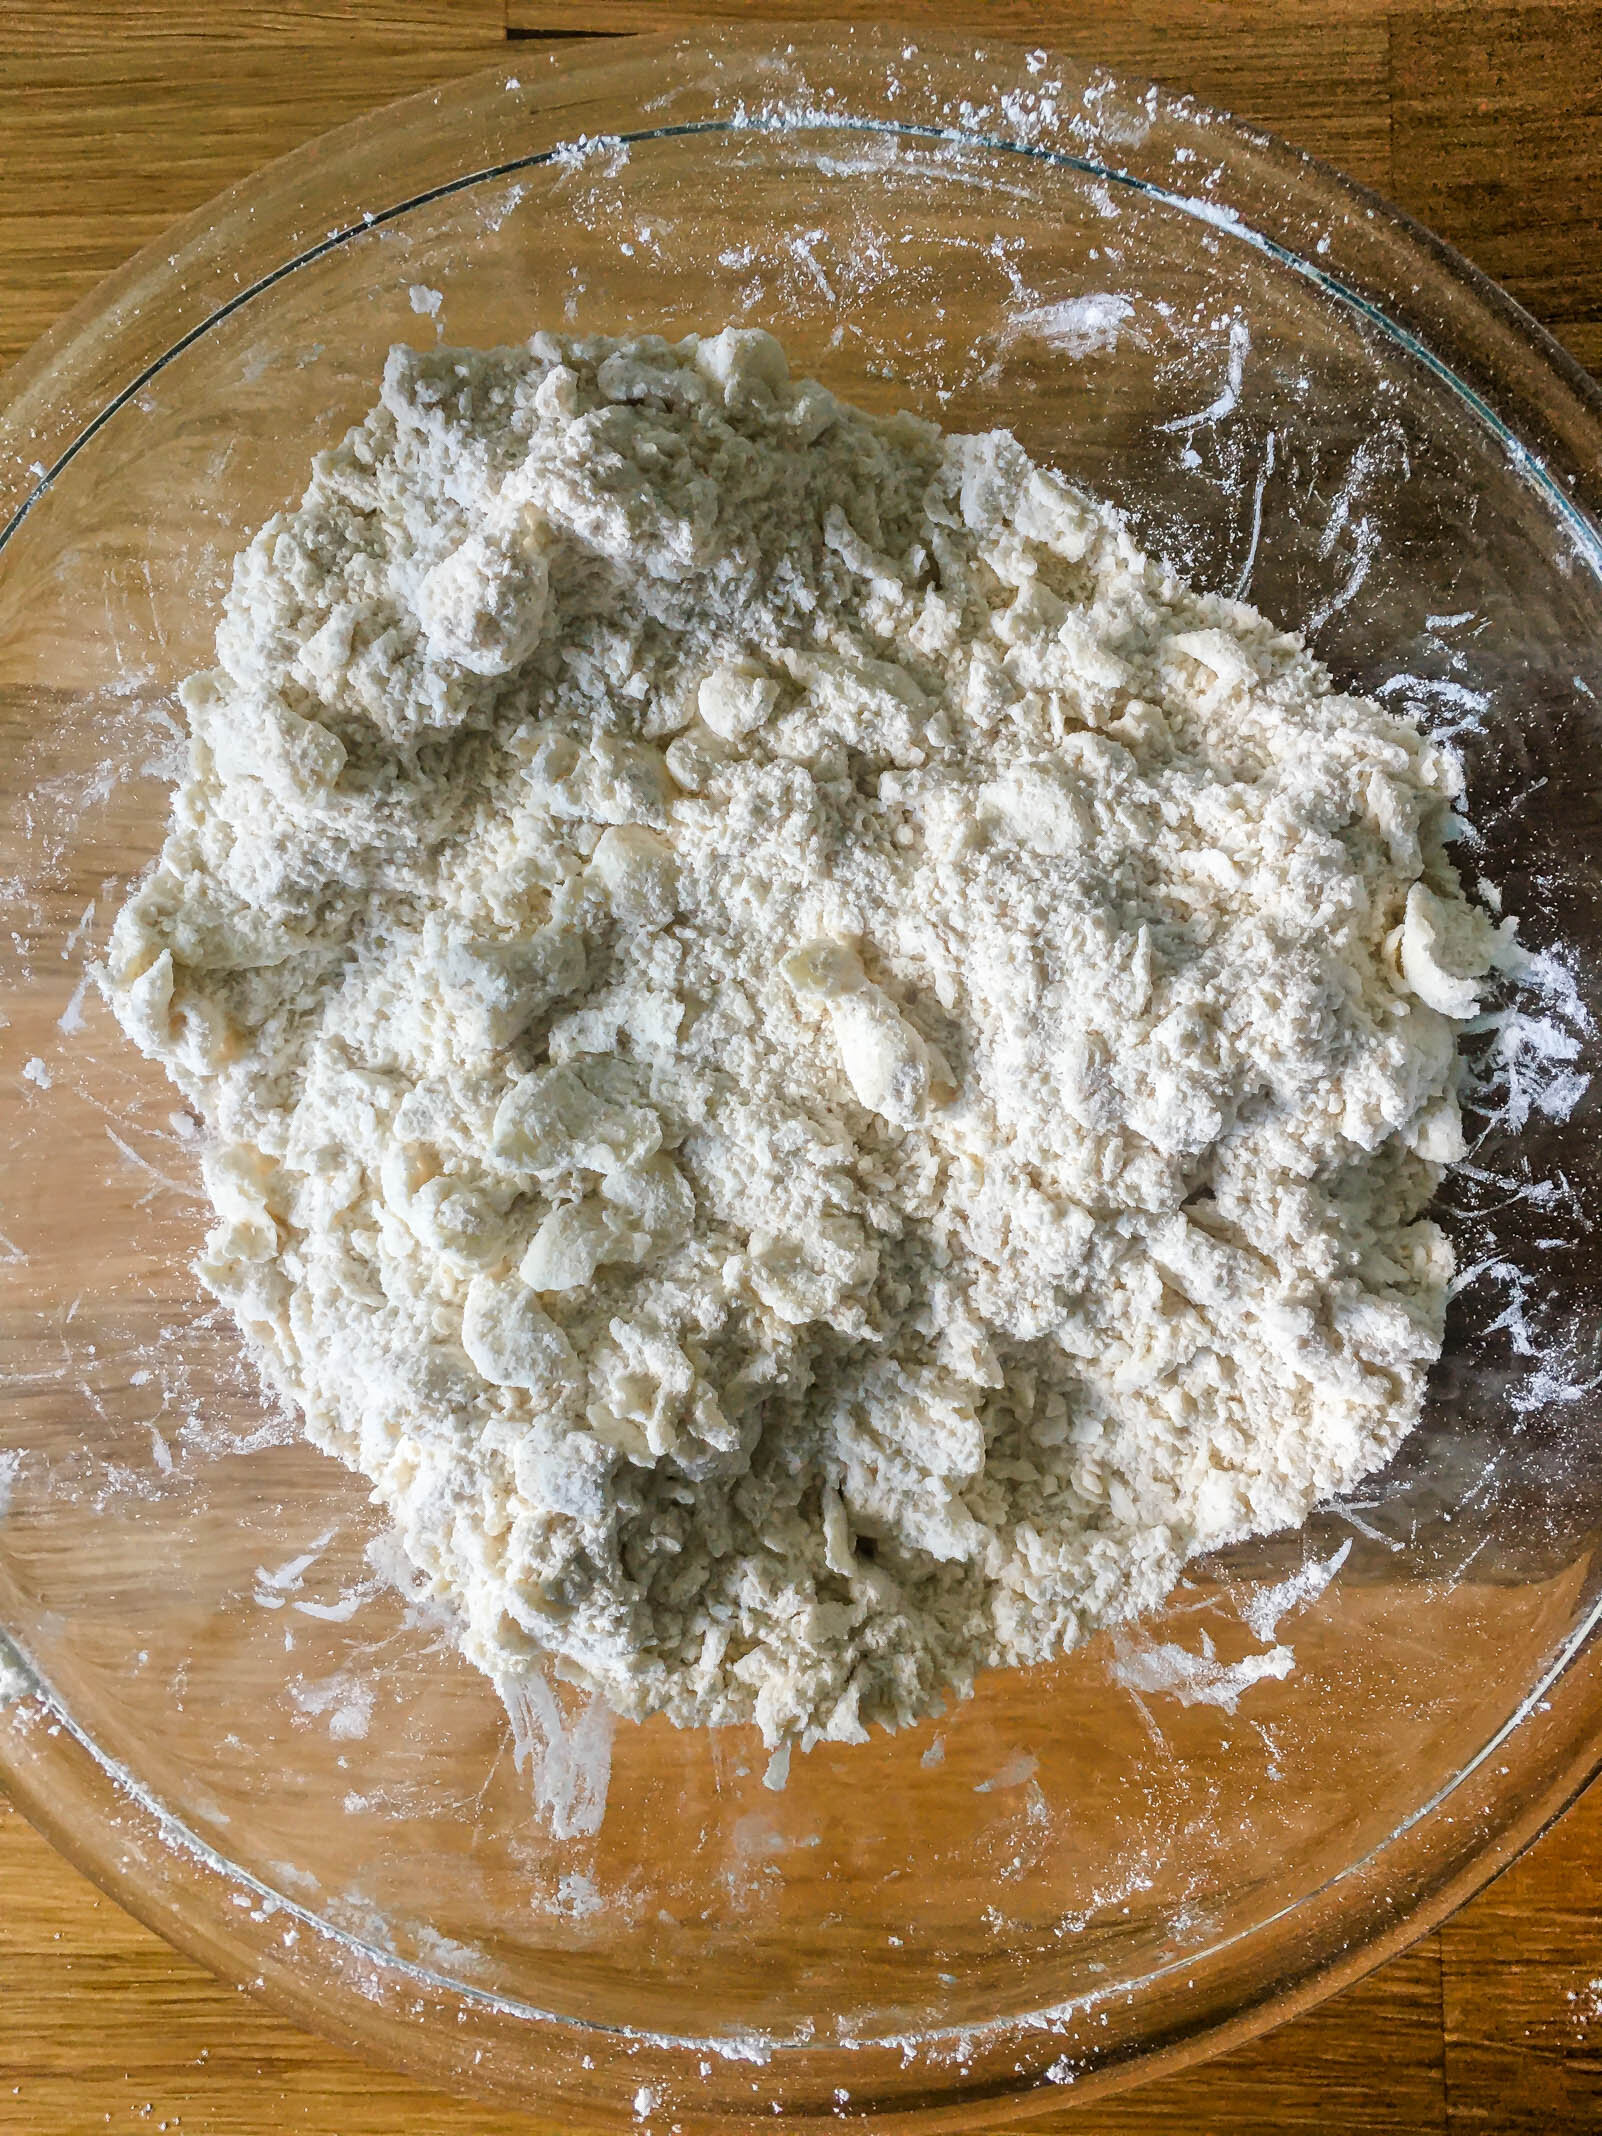
  1. Toss together flour, salt, and sugar in a large bowl. Add in cubed butter and use your hands to cut the butter into the flour until the mixture resembles a very coarse sand, with a few chunks of butter the size of large peas left. I like to pinch each cube of butter between my fingers, flattening it out into the flour mixture.

  2. In a glass measuring cup filled with ice, add 4 oz of cold water and the 2 tsp of apple cider vinegar and stir to combine. *You will probably not use all of this water!*

  3. Drizzle ice water into the flour mixture a little at a time, tossing to combine. You want to add just enough water that the dough is able to hold together when you squeeze it in your first. Remember, you can always add more water to your dough, but you can’t take it away. Be conservative with your water!

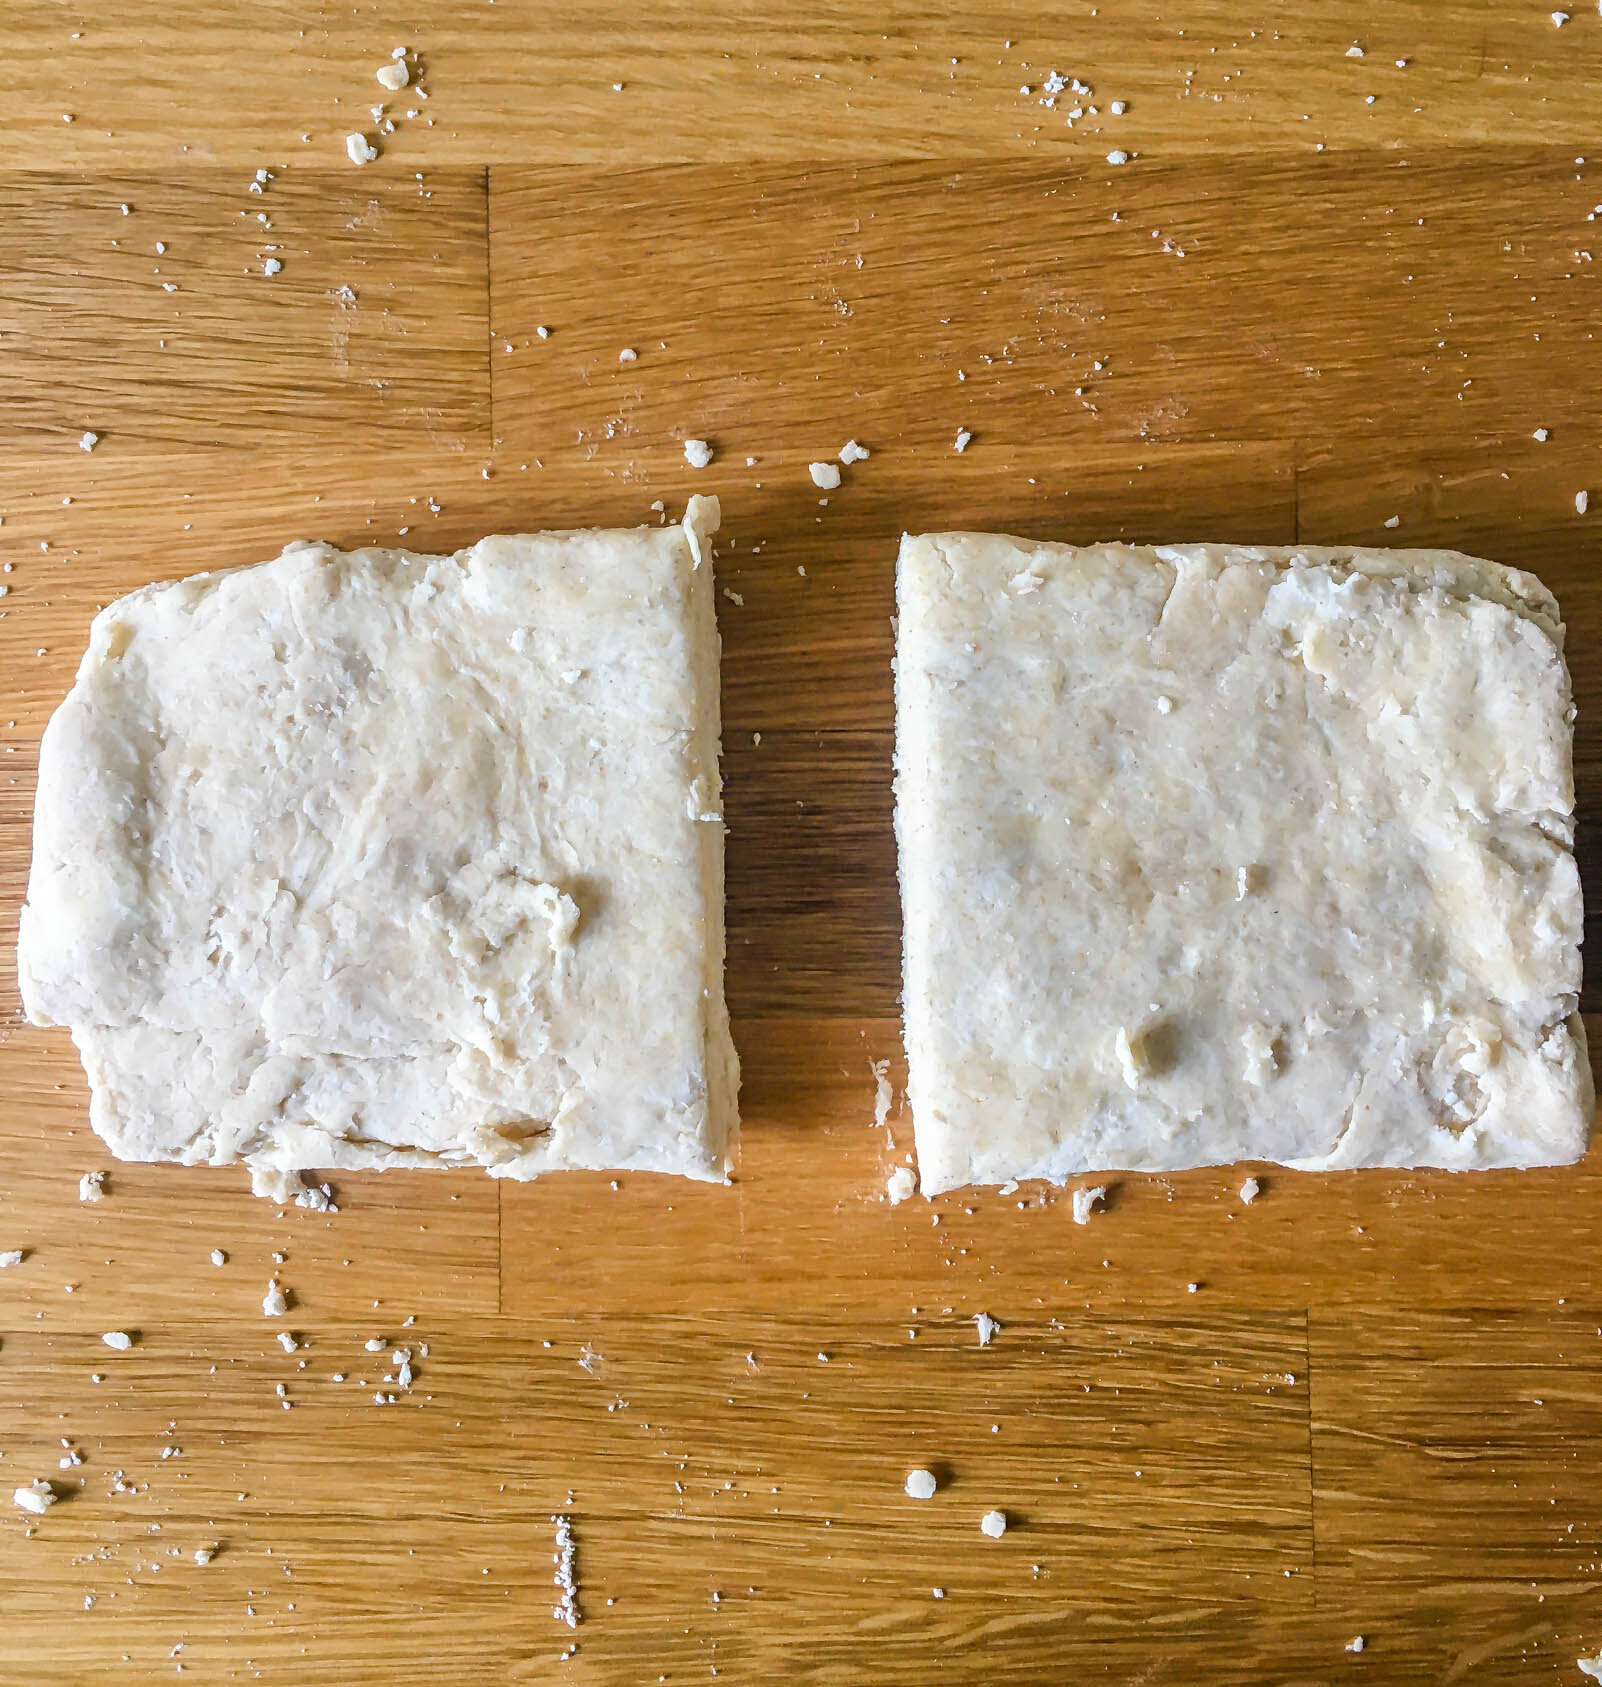
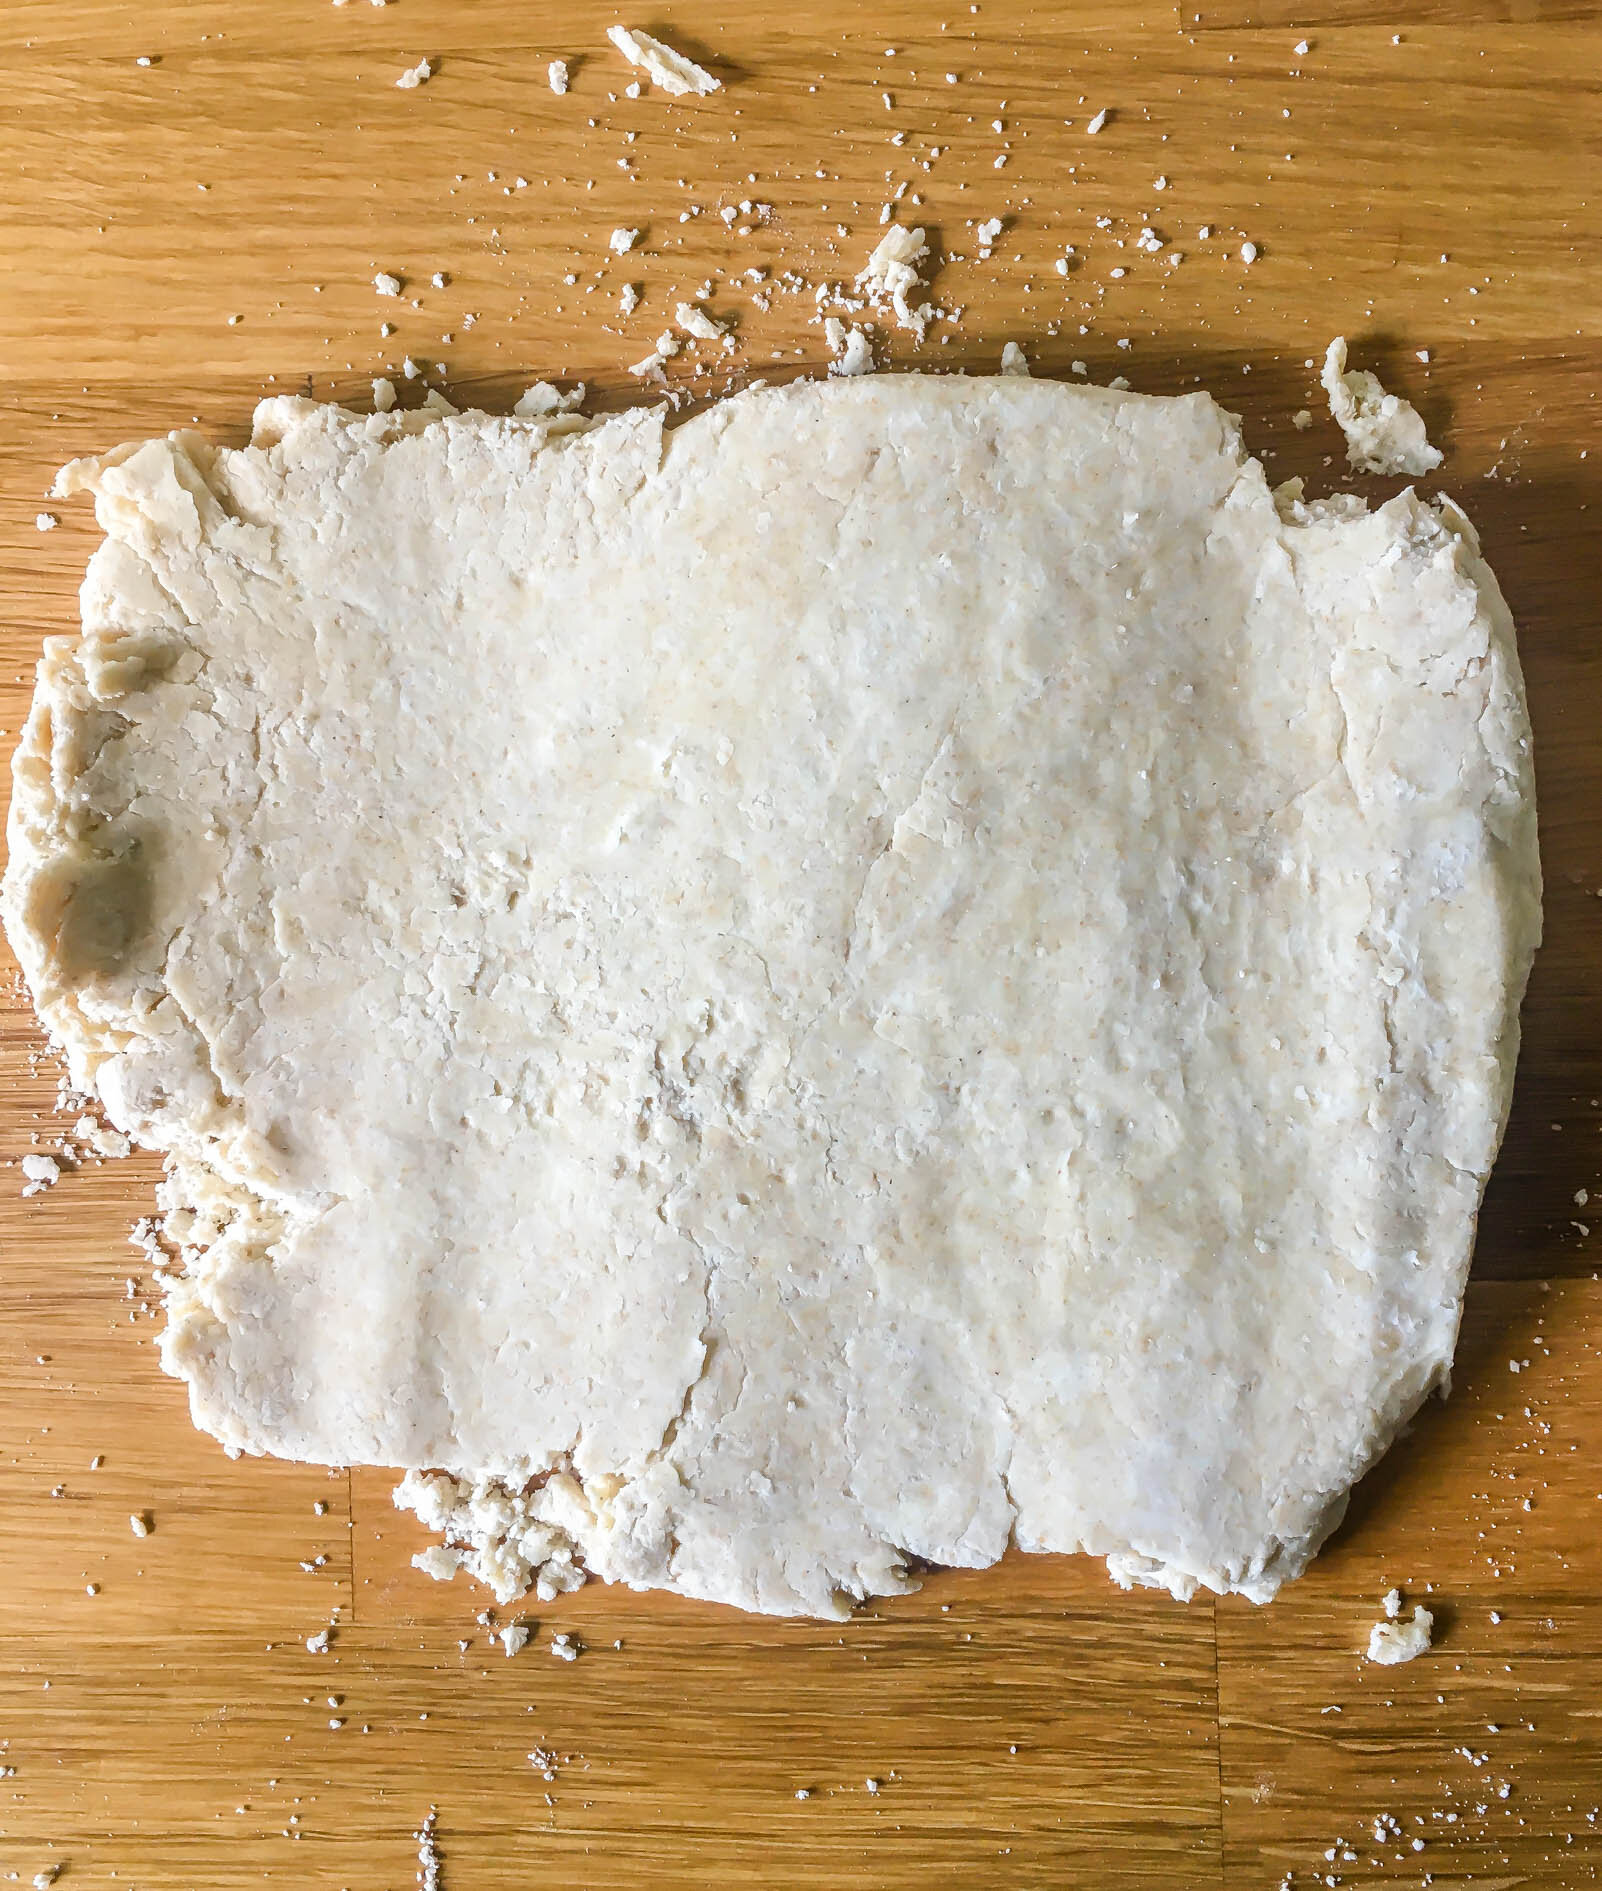
  4. Turn the pie dough onto a lightly floured work surface. Use your hands to press the dough into a rectangle. Fold the left third of the dough into the center, and then fold the right third of the dough on top of it, like you are folding a letter. Use a rolling pin to roll the dough out to about an 1” thick, divide it in half, and wrap each smaller square in plastic wrap. Refrigerate for at least an hour, and preferably overnight.

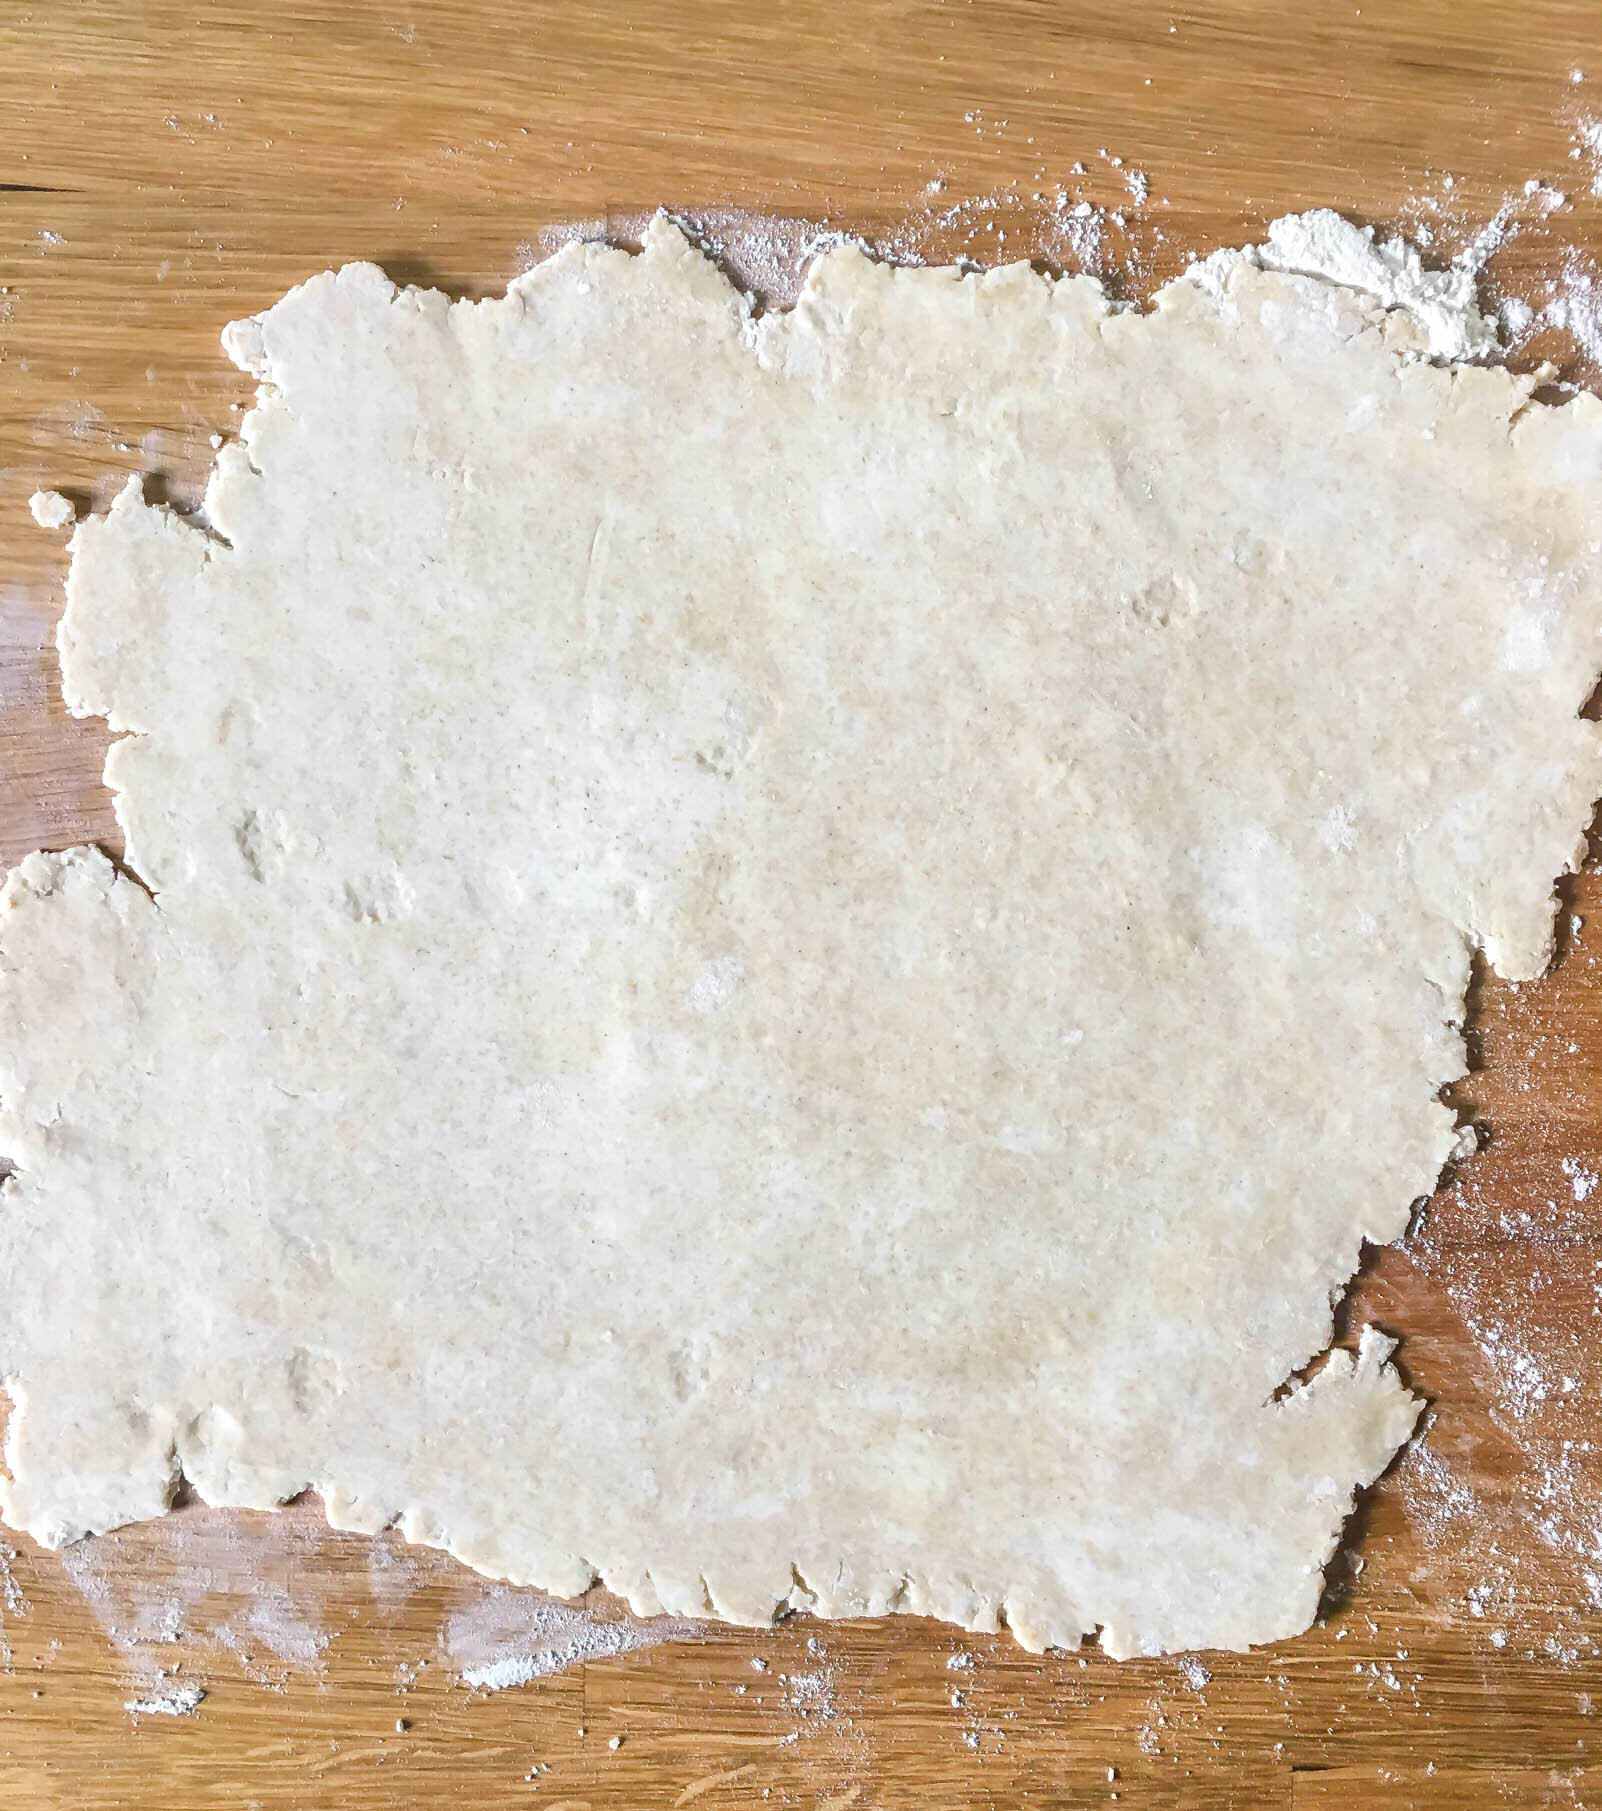
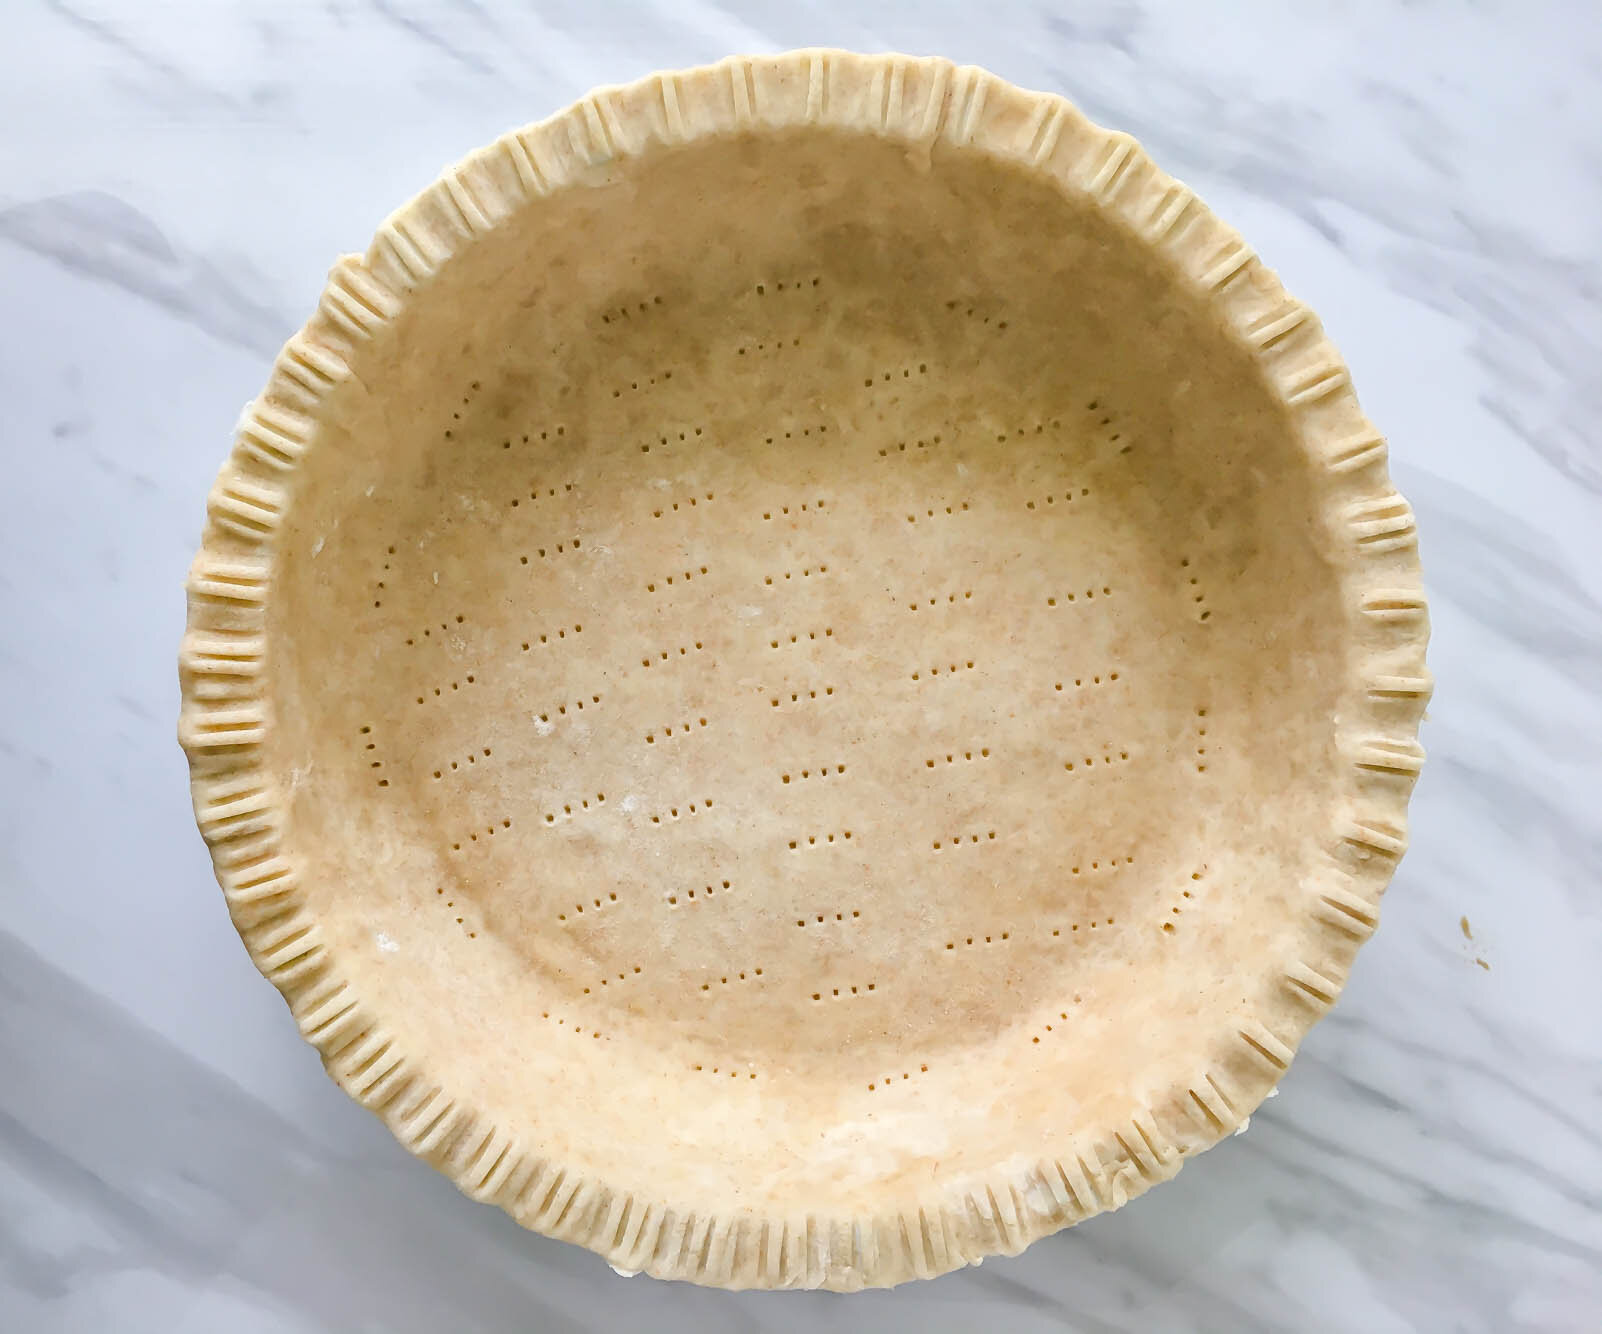
  5. When you’re ready to bake, remove one disc from the refrigerator. On a lightly floured work surface, roll dough out into a large rectangle/circle. Make sure that it is large enough to cover your pie plate, with quite a bit leftover. Carefully drape the dough into your pie plate, pressing it gently into the corners. Trim the edges and crimp as you like.

  6. Use a fork to poke holes in bottom of the pie dough and then set the whole thing in the refrigerator to chill while you make the filling.

for the roasted squash filling: 

To roast a butternut squash: Preheat the oven to 400° F and line a baking pan with aluminum foil. Trim the top and bottom from squash so that it sets flat against the cutting board. Carefully, slice downwards from the top, dividing the squash in half vertically. Scoop the seeds out of the squash, drizzle each side with a little olive oil, and then place cut side down on your prepared pan. Roast for 25-30 minutes, until you can easily pierce the squash with a fork. Let cool completely and then scoop the flesh out from the squash and set aside. (Alternatively, you can buy butternut squash puree in a can at Trader Joe’s or substitute in canned pumpkin if you want to make a classic pumpkin pie.)

  1. Preheat oven to 400° F.

  2. Place butternut squash and all other filling ingredients in a blender and blend until combined and homogenous. Set aside.

  3. Remove your pie crust from the refrigerator and line with parchment paper or foil. Fill with dried beans or pie weights, place on a baking sheet, and bake for 15-20 minutes, until the edges begin to brown. Remove beans/weights and parchment from the crust and return to oven. Decrease oven temperature to 350° F and return crust to bake another 15-20 minutes until golden.

  4. Pour filling into crust and bake at 350° F for 40-45 minutes until filling is set and there is just a slight wobble. Remove from oven and cool completely then cover and transfer to the refrigerator to chill overnight.

for the creme anglaise/Bavarian cream: 

  1. Combine 3/4 cup heavy cream, half and half, and cinnamon sticks in a medium saucepan. Set over medium heat, stirring occasionally until simmering around the edges (between 180-190° F). Remove from heat, cover and let steep for 10-15 minutes. Remove cinnamon sticks.

  2. Return the milk mixture to heat and bring back to a simmer.

  3. In a medium bowl, whisk together egg yolks, brown sugar, vanilla extract, and salt.

  4. When the milk is hot, pour some of it (about half) into the egg mixture, whisking continually. Pour the egg mixture back into the milk and return to heat. Heat, stirring continually, until thickened and sauce coats the back of a spoon. You don’t want this to boil, but you want it get up to about 180° F.

  5. Strain through a mesh strainer and set aside to cool completely.

  6. To make the Bavarian cream, whip 1 cup cold heavy cream to medium peaks. Gently fold in chilled anglaise sauce and then spread cream topping on chilled pie. Chill for at least 30 minutes.

for the candied pecans: 

  1. In a large skillet set over medium heat, make a dry caramel by sprinkling sugar in a single layer on the bottom of the skillet. Cook, without stirring until little liquid puddles appear on the surface. Use a wooden spoon to gently push the sugar around the outsides of the pan into the center and then sprinkle in another layer of sugar, repeating the process until all of your sugar is in the skillet. Cook, stirring only when at the liquid stage, until the caramel turns a medium amber color.

  2. Quickly add the chopped pecans, tossing quickly to coat and continue cooking until caramel turns a deep amber color.

  3. Remove from heat and stir in butter, vanilla, and salt. Pour caramelized pecans onto a silat-lined sheet pan and spread out. Let cool completely and then break apart and store in a cool, dry place.

  4. Sprinkle as generously or as conservatively as you like on your finished pie.


Classic Chocolate Cake with Chocolate Milk Swiss Meringue Buttercream

I spent this past weekend in Knoxville drinking wine on front porches (and huddled around fires) and soaking up all the fall weather that I could. The official purpose of my trip was to help out with a Side by Side wine dinner some friends were hosting. It was a private dinner perched atop an East Tennessee hillside, with sprawling views of the city, a picturesque backdrop for one of the most beautiful dinners I’ve ever been a part of. I spent the weekend hand rolling agnolottis, singing karaoke, having drinks with one of the most prolific food writers around, and drinking 1995 vouvray. It’s been a long time since I’ve had friends that felt more like family and every time I leave Knoxville I start thinking about my next excuse to return.

Recently, I’ve been trying to shift my mindset from apprehension to gratitude. There has been a lot of transition in leaving a full-time career to pursue a future in food writing and my day-to-day has taken some getting used to. Having to manage my time and discipline myself to put in the work, whether in the kitchen or at the computer, has challenged me in ways I didn’t anticipate. Sometimes I feel like I’ve been working all day and still don’t have anything to show for it and I often find myself holding a tight grasp to the “someday”, looking forward to the day when I see a paycheck, my name on a byline, or my own book in my hands. Don’t get me wrong, it’s great that I have a goal to push towards on the days when I feel like I don’t know what I’m doing, but I’m realizing that I also don’t want to miss the time I have right now. I’m trying to view my days as flexible instead of empty, grateful that I am able to take a weekend in Knoxville or that I have the time to make a birthday cake, like this one, for a sweet friend. These are the times I want to make the most of.

Cake3.jpg

All of that being said, let’s be grateful for whatever season we’re in and let’s chat about Swiss meringue buttercream. I have never been a fan of traditional American buttercream, it’s a little too sweet for me and I don’t like its gritty texture. During culinary school, however, I discovered an entire world of buttercreams. Swiss buttercream is one of the easier buttercreams to execute and its silky smooth texture makes it one of the best for frosting layer cakes. You begin by heating egg whites and sugar over a double boiler, stirring frequently to make sure that you don’t end up with chunks of cooked egg whites because that’s gross. You’re going to heat the mixture to about 160 degrees F (feel free to use a candy thermometer if that floats your boat), but I find it’s easiest to just watch for the sugar to dissolved. The mixture should be warm to the touch and you should be able to rub a little between your fingers without feeling any sugar crystals. You will then transfer the mixture to the bowl of a stand mixer with a whisk attachment and beat it until it is stiff and glossy and room temperature. This is really important because your meringue and your butter need to be the same temperature or you will either have a chunky mess or a liquid mess-either way, a mess. With the mixer on medium high speed, add the butter piece by piece. As soon as the butter is completely added, switch from the whisk attachment to the paddle attachment and beat until smooth. At one point, your buttercream may look a little curdled and you may think it’s about to break. This is okay, as you continue to beat it, it will thicken up and start to take on that voluptuous buttercream shape. If it looks a little liquidy after you’ve added all the butter, pop the entire bowl into the fridge for a few minutes to cool it off and then try mixing it again. Because of all the butter in this recipe, when you add the melted chocolate, this buttercream tastes like a big glass of Ovaltine and takes on an ultra smooth consistency, perfect for cake swooping.

Chocolate Olive Oil Cake 

Yield: 1-1/2 sheet pan or 3-8” cake layers or 6-5” cake layers

Adapted from Ina Garten


Ingredients: 

1 3/4 cup all purpose flour

3/4 cup cocoa powder, sifted

2 cup sugar

2 tsp. baking powder

1 tsp. baking soda

1 tsp. salt 

1 cup buttermilk, room temperature

1/2 cup olive oil 

1 T vanilla extract

2 eggs, room temperature 

1 cup brewed coffee, warm 

Procedure:

  1. Preheat oven to 350 degrees. Coat pan with cooking spray and line with parchment paper.

  2. In a medium bowl, whisk together flour, cocoa powder, sugar, baking powder, baking soda, and salt.

  3. In a large measuring cup, whisk together buttermilk, olive oil, eggs, and vanilla. Add wet ingredients to dry ingredients and whisk until no lumps or flour streaks remain. Whisk in warm coffee until homogenized.

  4. Divide and/or pour batter into your prepared cake pans. Baking times will vary depending on the size of your pans. For a 1/2 sheet pan, I baked the cake for 7 minutes, rotated it, and baked for another 10-12 minutes. For 8” cake pans, I would recommend baking for 12 minutes, rotating, and then another 12 minutes, adding more time if needed. You will know that the cake is done when the top springs back when touched and the edges begin to pull slightly away from the sides of the pan.

  5. Remove from oven and let cool completely. Slice and layer as desired!


Cake10.jpg

Chocolate Milk Swiss Meringue Buttercream

Ingredients: 

115 g egg whites

230 g sugar

345 g unsalted butter, room temperature

1 tsp vanilla extract

Pinch of salt

4 oz bittersweet chocolate


Procedure: 

  1. Create a double boiler, using a heat-proof bowl and a medium saucepan. Combine egg whites and sugar in the bowl and heat, stirring frequently, until the temperature reaches 160 degrees or mixture is hot to the touch. Make sure that all of the sugar crystals are dissolved.

  2. Transfer mixture to the bowl of a standing mixer fitted with the whisk attachment and whip on medium-high speed until completely cool. You should have a stiff, glossy meringue that forms peaks when the whisk is lifted out of it.

  3. With the mixer on medium-high speed, add butter, 1 tablespoon at a time, making sure each piece is incorporated before adding the next. It is very important at this point that the butter and the meringue are the same temperature before adding the butter. As soon as you add the last of the butter, switch from the whisk attachment to the paddle attachment and beat on high speed until mixture is smooth, light, and fluffy. It should look like a familiar buttercream at this point.

  4. Melt chocolate over a double boiler and then cool to room temperature.

  5. With the mixer on low speed, add melted chocolate, vanilla, and salt and mix until combined. Scrape down the sides of the bowl and use a rubber spatula to fold buttercream, ensuring that everything is evenly mixed.

*Note: Measuring egg whites without a kitchen scale is a pain in the butt, so you will notice that this recipe is written using metric measurements. If you’re interested in why I think all baking should be done using a kitchen scale, you can read more here. If you don’t have a kitchen scale and have your heart set on making this Swiss buttercream, there is a bit a of a workaround. An average large egg weighs about 50 grams and each white weighs about 30 grams. You can do a little mental math to divide 30 into 115 and then use the number of egg whites that will get you closest. Also, one stick of butter weights about 113 grams and a cup of sugar weighs about 200 grams. If you are feeling like a real arithmetic whiz, you can scale this recipe up or down fairly easily. Swiss Meringue buttercream always uses 1 part egg whites, 2 parts sugar, and 3 parts butter. Feel free to get a little wild!

Browned Butter Peach Upside Down Cake with Honey Whipped Cream

A simple, browned butter and sour cream snack cake topped with brown sugar caramel and the best summer stone fruits.

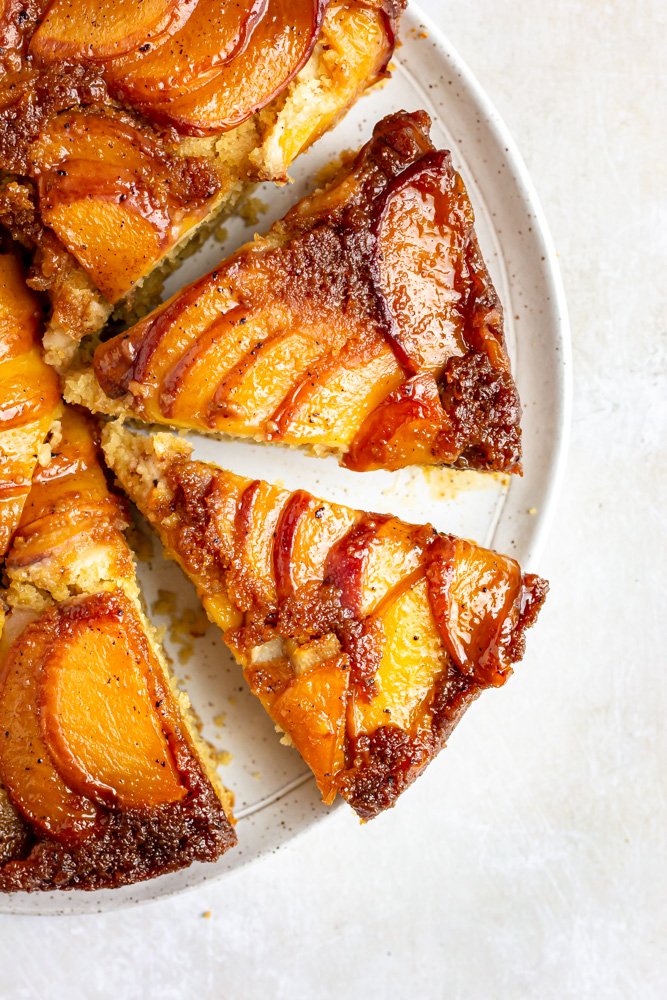
If you are anything like me, you are extremely well-intentioned when purchasing fruit. However, that does not always translate into the actual consumption of fruit. I’m especially terrible at this in the summer. There are so many options and fruit is at it’s bounty! It’s also burning hot outside in Florida and the cute little peaches and berries appeal to my quest for all things “refreshing”. Fast forward a week or two later, and I my refrigerator full of peaches and berries are decidedly less cute. It’s not that I dislike fruit, I just struggle to eat it straight up, and I will always choose a more savory, vegetable centered snack. So in walks this cake. A one-bowl, ultra moist, perfect little vessel for all of that well-intentioned fruit currently ripening in your kitchen.

how to make an upside down cake

The cake is made using the blending method, a simple mixing method where you whisk together your dry ingredients and wet ingredients separately and then combine them. This method is used when making recipes that call for a liquid fat, like oil or melted butter, and the aim is minimal gluten development, which results in a ultra-moist final product. If you’re feeling fancy and want a lighter crumb, you could substitute cake flour for the all-purpose, or even do a mix of the two. The cake’s flavor hinges on browned butter, which is one of my favorite kitchen smells. (Someone please tell Yankee Candle that we don’t need any more “vanilla cookie” scents, but if they could work out a browned butter candle, I would definitely be interested.) Browning the butter essentially carmelizes the milk solids in the butter. You will see the butter beginning to foam and it will start to smell nutty and fall-like. That’s when you pull it from the heat. There will be little mocha-colored specks on the bottom of the pot, make sure to scrape all of that up because that’s where the flavor lies! When adding your melted butter to your final cake batter, the fat in the butter will probably cause the batter to do a little slip-n-slide action and it might be a little difficult to whisk. You can help to curb the slickness by taking a little bit of batter, maybe 1/4 cup, and adding it to your butter first. Whisk vigorously to combine the two and then add it all back into your big bowl of batter. The butter will integrate much more easily leaving you with a little less mess.

This cake can be made with all sorts of fruit in danger of losing its pizzazz. Nectarines and peaches really shine and they are sturdy enough to hold their shape during baking, but pineapple would give a little classic Hawaiian vibe, if you’re here for that.

Browned Butter Peach Upside Down Cake
Yield one 9" cake
Author Anna Ramiz
Prep time
10 Min
Cook time
40 Min
Total time
50 Min

Browned Butter Peach Upside Down Cake

An easy upside down cake recipe that spotlights a variety of summer fruits. With browned butter, fresh peaches, and honey whipped cream this is a simple, seasonal snack cake.

Ingredients

for the cake
  • 1/2 cup (1 stick) + 2 T unsalted butter
  • 1 1/2 tsp vanilla extract
  • 2 cups all-purpose flour
  • 1/2 cup granulated sugar
  • 1 cup brown sugar, divided
  • 1 1/2 tsp baking powder
  • 1/2 tsp baking soda
  • 3/4 tsp salt
  • 1/2 cup whole milk
  • 1/2 cup greek yogurt or sour cream
  • 2 large eggs
  • 3 peaches, thinly sliced
for the honey whipped cream
  • 1 cup heavy cream
  • 3 T honey

Instructions

  1. Preheat the oven to 350 degrees. Spray a 9” round cake pan with cooking spray and set aside.
  2. In a small saucepan, combine 1/2 cup of the brown sugar with 2 tbsp of butter. Cook over medium heat, stirring frequently, until sugar is dissolved and caramel is homogenized and smooth. Pour the hot caramel into the prepared pan and tilt to cover the bottom and arrange the peach slices on top. Set aside.
  3. In a small saucepan set over medium heat, melt the remaining 1/2 cup of butter. Cook, swirling the pot every few minutes, until the butter begins to foam and brown at the bottom. It should smell nutty and delicious. Scrape up the browned bits from the bottom of the pan and then set aside to cool slightly.
  4. In a medium bowl, whisk together flour, granulated sugar, remaining 1/2 cup brown sugar, baking powder, baking soda, and salt. Set aside.
  5. In a large measuring cup, whisk together eggs, yogurt, milk, and vanilla. Add the milk mixture to the flour mixture, and whisk just enough to blend everything. Pour the butter into the batter and whisk again, just until everything is emulsified. Be careful not to over mix.
  6. Pour batter over the nectarines and smooth with a small offset spatula. Bake until the edges are golden brown and the center of the cake is set, about 35-40 minutes. Remove the cake from the oven and let cool in the pan for about 10 minutes. While the cake is still warm, place a large plate on top and use a towel to flip the cake out onto the plan. Let cool completely and serve with whipped cream.
  7. To make the whipped cream: Pour cold cream into a mixer fitted with the whisk attachment. Begin whipping on low speed, increasing speed gradually as the cream begins to thicken. When the cream has gained a little body, add honey and continue whipping until soft peaks form.

Notes

This cake can be made with all sorts of fruit in danger of losing its pizzazz. Nectarines and peaches really shine and they are sturdy enough to hold their shape during baking, but pineapple would give a little classic Hawaiian vibe, if you’re here for that.

Did you make this recipe?
Tag @gatheredatmytable on instagram and hashtag it #gatheredatmytable