Roasted Tomato Cornbread

sliced4.jpg

When I was working at the restaurant, I always dreaded cornbread day. As a part of the bread baking team, we were in charge of making all of the breads and pastries for the entire resort, the types varying based on the days of the week or the events taking place on property. Cornbread was for outdoor events, usually large groups, so days when we made cornbread, we were cranking out about 300 little golden muffins an afternoon. Mixing the batter was easy, but baking them off was quite a feat. Because of the set up of the kitchen, we would corner ourselves in front of the 400° F convection ovens, filled with pre-heated muffin tins. Then, with that hot air blowing from the oven, we quickly pulled out the hot tins, sprayed them with cooking spray, and scooped batter into each little crevice, before shoving them back in and slamming the door. After ten minutes, we flipped them out and repeated the whole process over again. (It was definitely a two-person job so at least you had someone to commiserate with.) Between the hot oven air and that warm, East Tennessee July summer sun, you were dripping with sweat and all of your pores were filled with cooking spray by the end of the whole she-bang. We always saved cornbread for last, so thankfully, we were able to pull our last trays just before dragging our cornbread-smelling bodies home where I beelined straight for the shower. Needless to say, when I got back home to Orlando, I took a little cornbread baking hiatus.

Lucky for us, this cornbread doesn’t make 300 muffins and you don’t have to stand in front of a hot oven, shoveling the batter in at record-high speeds. This is a much more chill cornbread, perfect for any summer dinner party. I slow roasted grape tomatoes in a hefty glug of olive oil and then poured cornbread batter right over top before baking. It may not be the prettiest cornbread, but it’s simple and delicious and I think it will become a favorite around here.

whole2.jpg

Roasted Tomato Cornbread

Yield: 1-10 inch cast iron skillet

Ingredients 

roasted tomatoes

1 pint grape tomatoes

2 T olive oil

1/2 tsp kosher salt

cornbread

1 3/4 cup (245 g) cornmeal

1 cup (125 g) all purpose or whole wheat flour

1 tsp granulated sugar

1 tsp kosher salt

1 tsp baking powder

1/4 tsp baking soda

1 3/4 cup buttermilk

2 eggs

1/2 cup (113 g) unsalted butter, melted + 2 T for pan

Procedure:  

  1. Preheat oven to 300° F.

  2. In medium bowl, combine tomatoes, olive oil, and salt. Toss to coat tomatoes and then transfer to a cast iron skillet. 

  3. Bake for 90 minutes, checking and gently stirring every 20 minutes.

  4. When the tomatoes are finished roasting, increase oven temperature to 400° F and place 2 tablespoons of butter in the skillet to melt while you mix the cornbread. 

  5. Meanwhile, in a large bowl, whisk together cornmeal, flour, sugar, salt, baking powder, and baking soda. 

  6. In a small bowl or large measuring cup, whisk together buttermilk, eggs, and melted butter until homogenous. 

  7. Pour liquid ingredients into the bowl with the dry ingredients and whisk until combined and no dry streaks remain. 

  8. Pour cornbread batter over top of roasted tomatoes and bake for 20-25 minutes until crust is deeply golden brown. Remove from oven and top with a little more butter. When cooled slightly, gently flip cornbread out onto a plate and serve. 

Print Friendly and PDF

Floral Strawberry Poptarts

final9.jpg

As a child, prior to maturing into what some would lovingly call a “food snob”, I had some very specific (and kind of strange) eating habits. Pepperoni and mayonnaise sandwiches. Dipping everything (not just fries and pizza, but green beans, those little packs of salad crackers, steak, potato chips…) in Hidden Vally Ranch Dressing. And pop tarts. Pop Tarts were a very serious matter in my house and as a 10 year old, I had perfected my pop tart process. First, the best/only pop tart options were 1) brown sugar cinnamon 2) s’mores 3) frosted strawberry. Ranked in that order. All other pop tarts had no place in my heart. Second, pop tarts had to be toasted. They should be just warmed, so that the corners are a very light golden brown. Then, here’s where things get a little weird, right after removing the pop tarts from the toaster, they got smeared with butter. (And actually, not even really butter, because it was the mid 2000s, but I Can’t Believe It’s Not Butter from the tub.) Immediately after smearing, you sandwich the pop tarts together so that the butter is smushed in between the two. Wrap it in a paper towel and let it set for 5-10 minutes so the butter/margarine stops melting and sort of re-solidifies. Then you can eat your pop tarts. PLEASE DO NOT JUDGE ME FOR THIS. Also, if I were to eat pop-tarts today, with the exception of using real butter, I would stand by this process every step of the way.

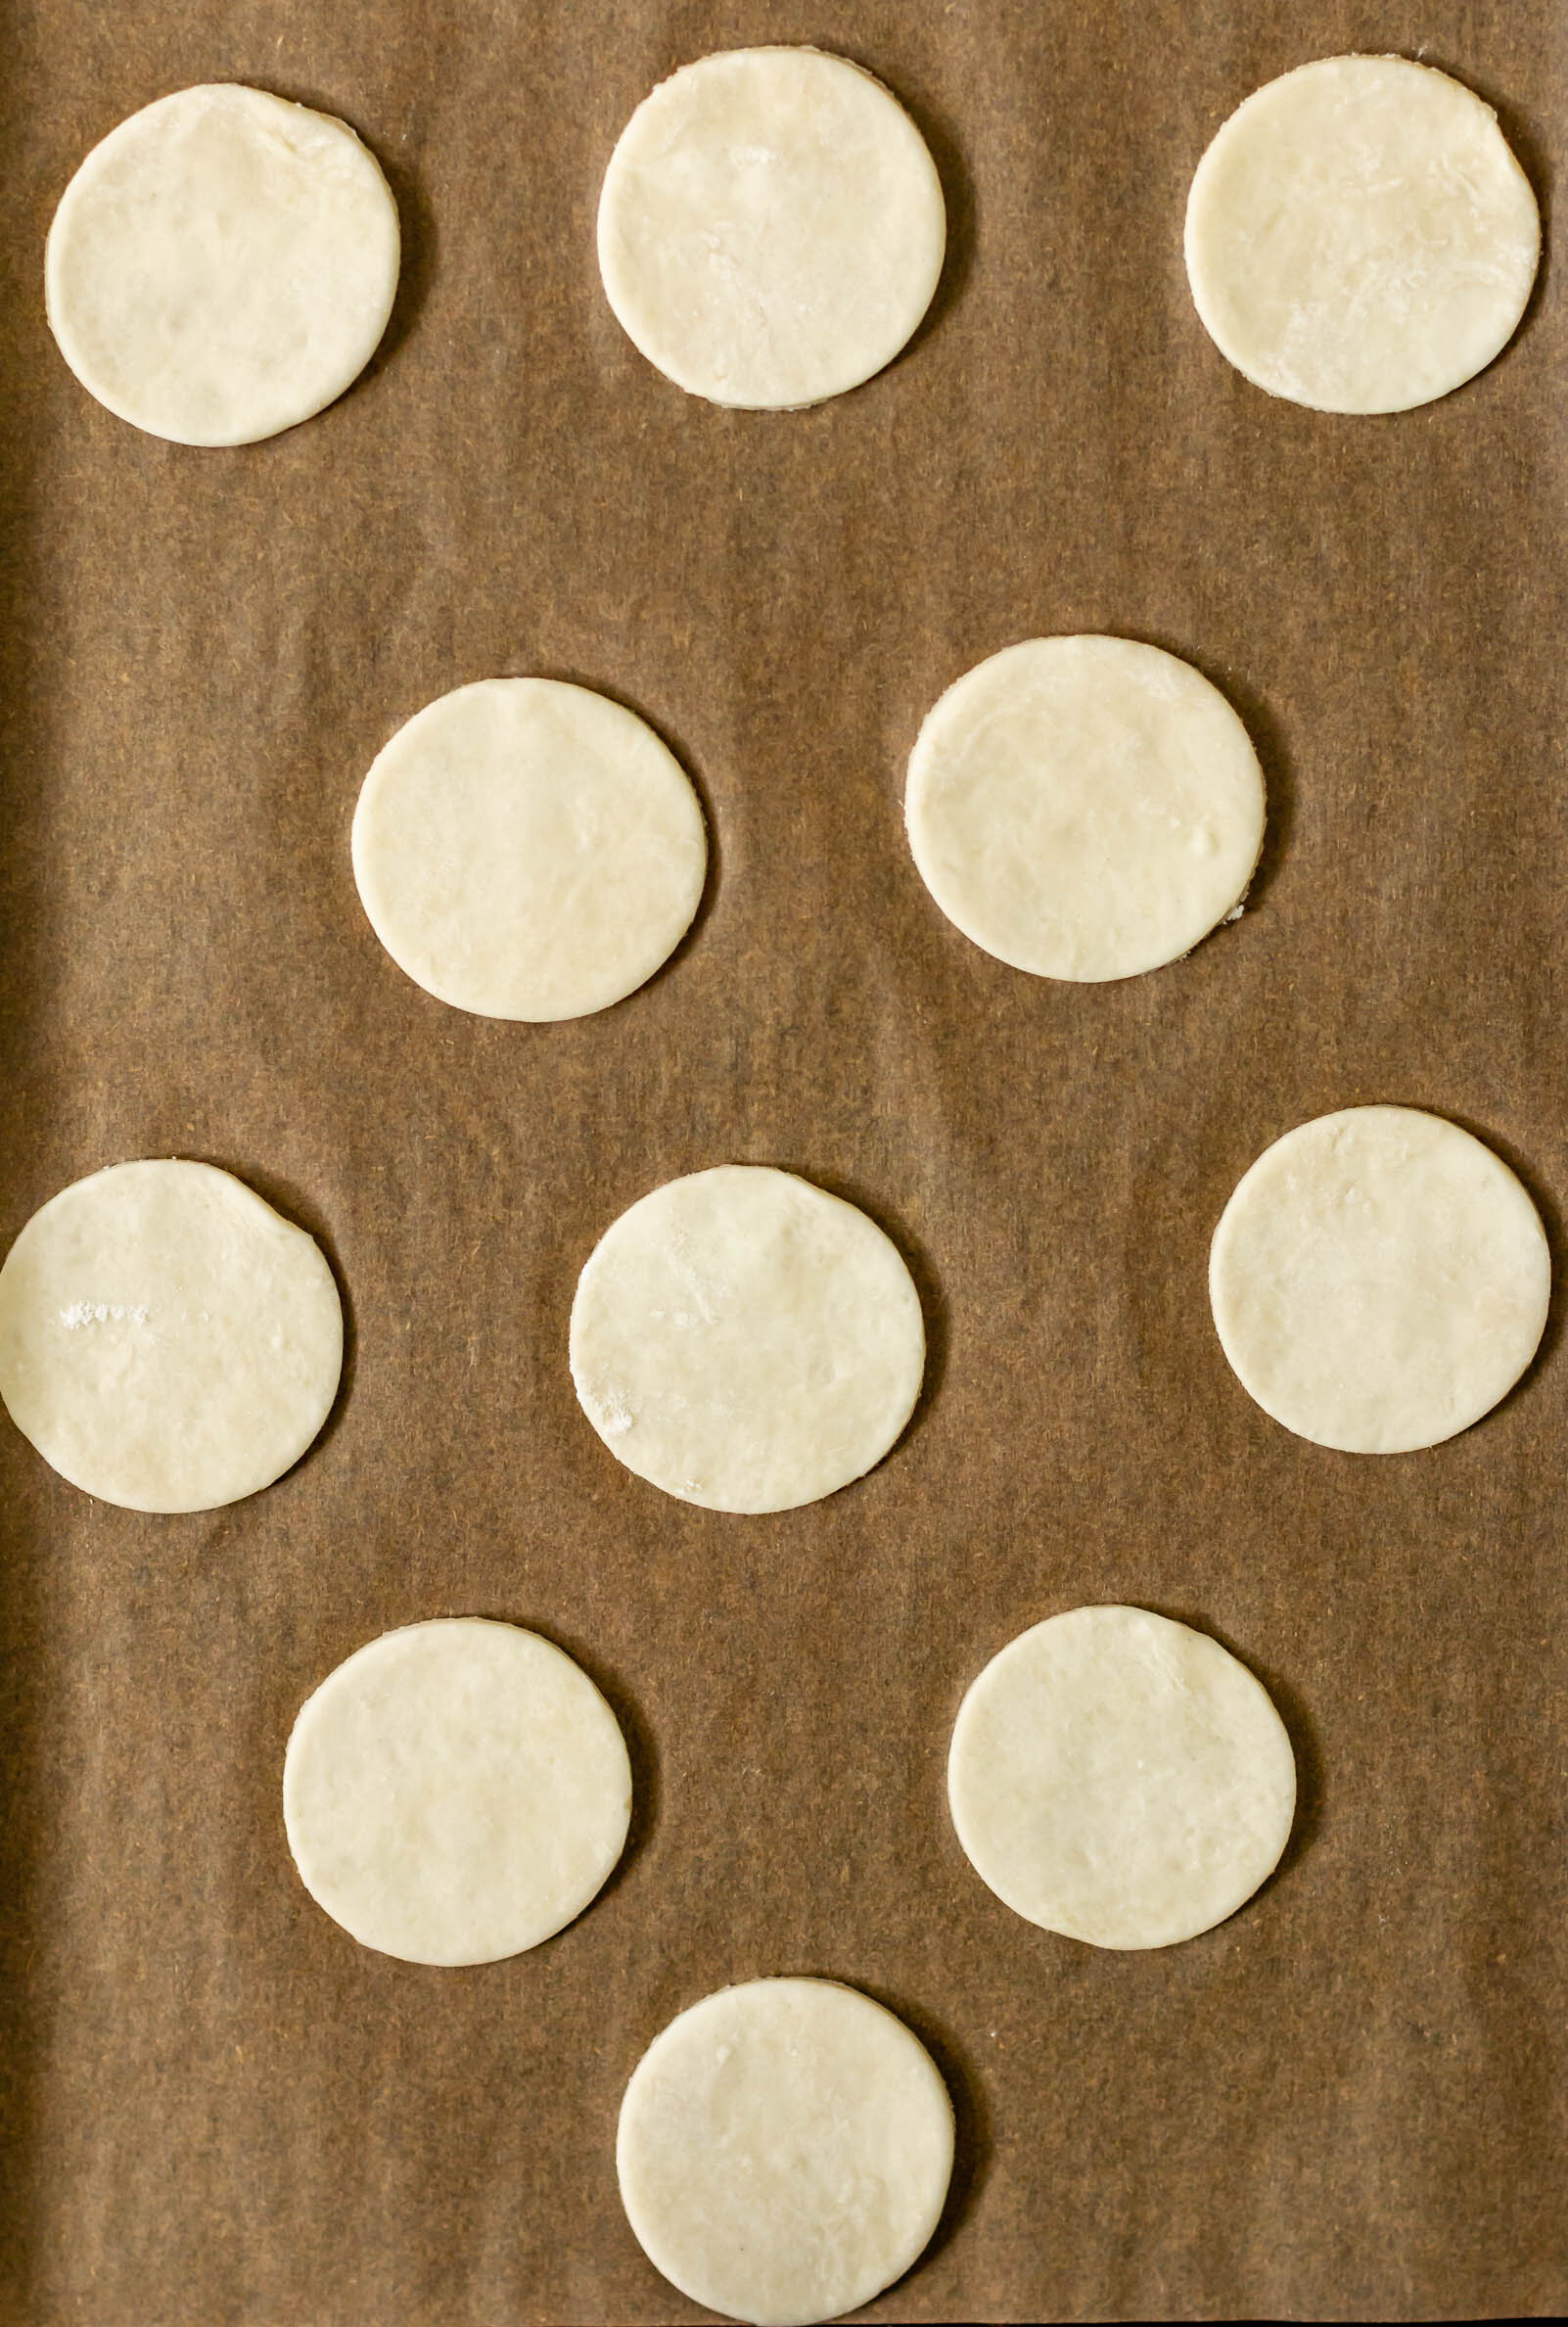
doughrounds3.jpg

These pop tarts are cuter, less processed, and more adult than the silvery packets at the store. Strawberries are cooked down into a jam with elderflower syrup and a splash of gin and then they are tucked into the most adorable stamps of pie dough. After they are baked, they are drizzled with a little glaze and covered with rose petals because that makes them even cuter and you can eat them in one bite. Use any fruit you’d like for the filling and if you’re feeling extra nostalgic, cut your pie dough into big rectangles and make a pop tart a little closer to the classic.

final10.jpg

Floral Strawberry Pop Tarts

Yield: 24 baby pop tarts

Ingredients: 

for the pie crust

1 1/4 cup (165 g) all purpose flour 

1 1/4 cup (140 g) cake flour

1 T granulated sugar

3/4 tsp kosher salt

2 sticks (226 g) unsalted butter, cold and cubed

6-8 T ice water

for the strawberry elderflower filling 

10 oz strawberries, chopped

2 T elderflower syrup*, see notes below

1 T gin

1 tsp cornstarch

1 T water

for the glaze 

1/3-1/2 cup sifted powdered sugar

pinch of salt

1/2 tsp vanilla extract

1-2 T heavy cream

rose petals, sprinkles for decoration

egg wash

Procedure: 

to make the pie crust 

  1. Cut butter into cubes and place in the freezer while you assemble the rest of your ingredients (about 5 minutes).

  2. In a medium bowl, toss together flours, salt, and sugar.

  3. Add butter cubes to the flour and toss to coat. Use your fingers to press each butter cube flat into the flour, breaking them up until the butter chunks are roughly the size of walnut halves. Make a well in the center of the flour. 

  4. Pour 6 T of ice water into the well and then use your fingers to gently toss the mixture to begin hydrating the flour. Add more water, a tablespoon at a time, until the dough begins to come together.

  5. Turn the dough out onto a work surface and knead gently until there are no more dry spots of flour and dough can be pushed into a cohesive mass. Divide the dough in half, pat each half into a rectangle, and wrap in plastic wrap. Chill overnight. 

to make the filling 

  1. In a saucepan set over medium heat, combine strawberries, elderflower syrup and gin. Bring to a simmer, and cook for 15-20 minutes until strawberries are broken down. 

  2. In a small bowl, whisk together cornstarch and water. Stir cornstarch slurry into strawberries and bring to a boil. Cook for 1-2 minutes more, stirring continually and then remove from heat. Let cool completely. 

to assemble pop tarts 

  1. About 30 minutes prior to assembling, remove pie dough from the refrigerator. 

  2. Working with one dough block at a time, turn dough onto a floured work surface. Roll out, flouring as needed and moving the dough around frequently to prevent sticking, until the dough is 1/8” thick. 

  3. Use a 2” dough cutter to cut out circles out of the dough. You should have about 24 circles. 

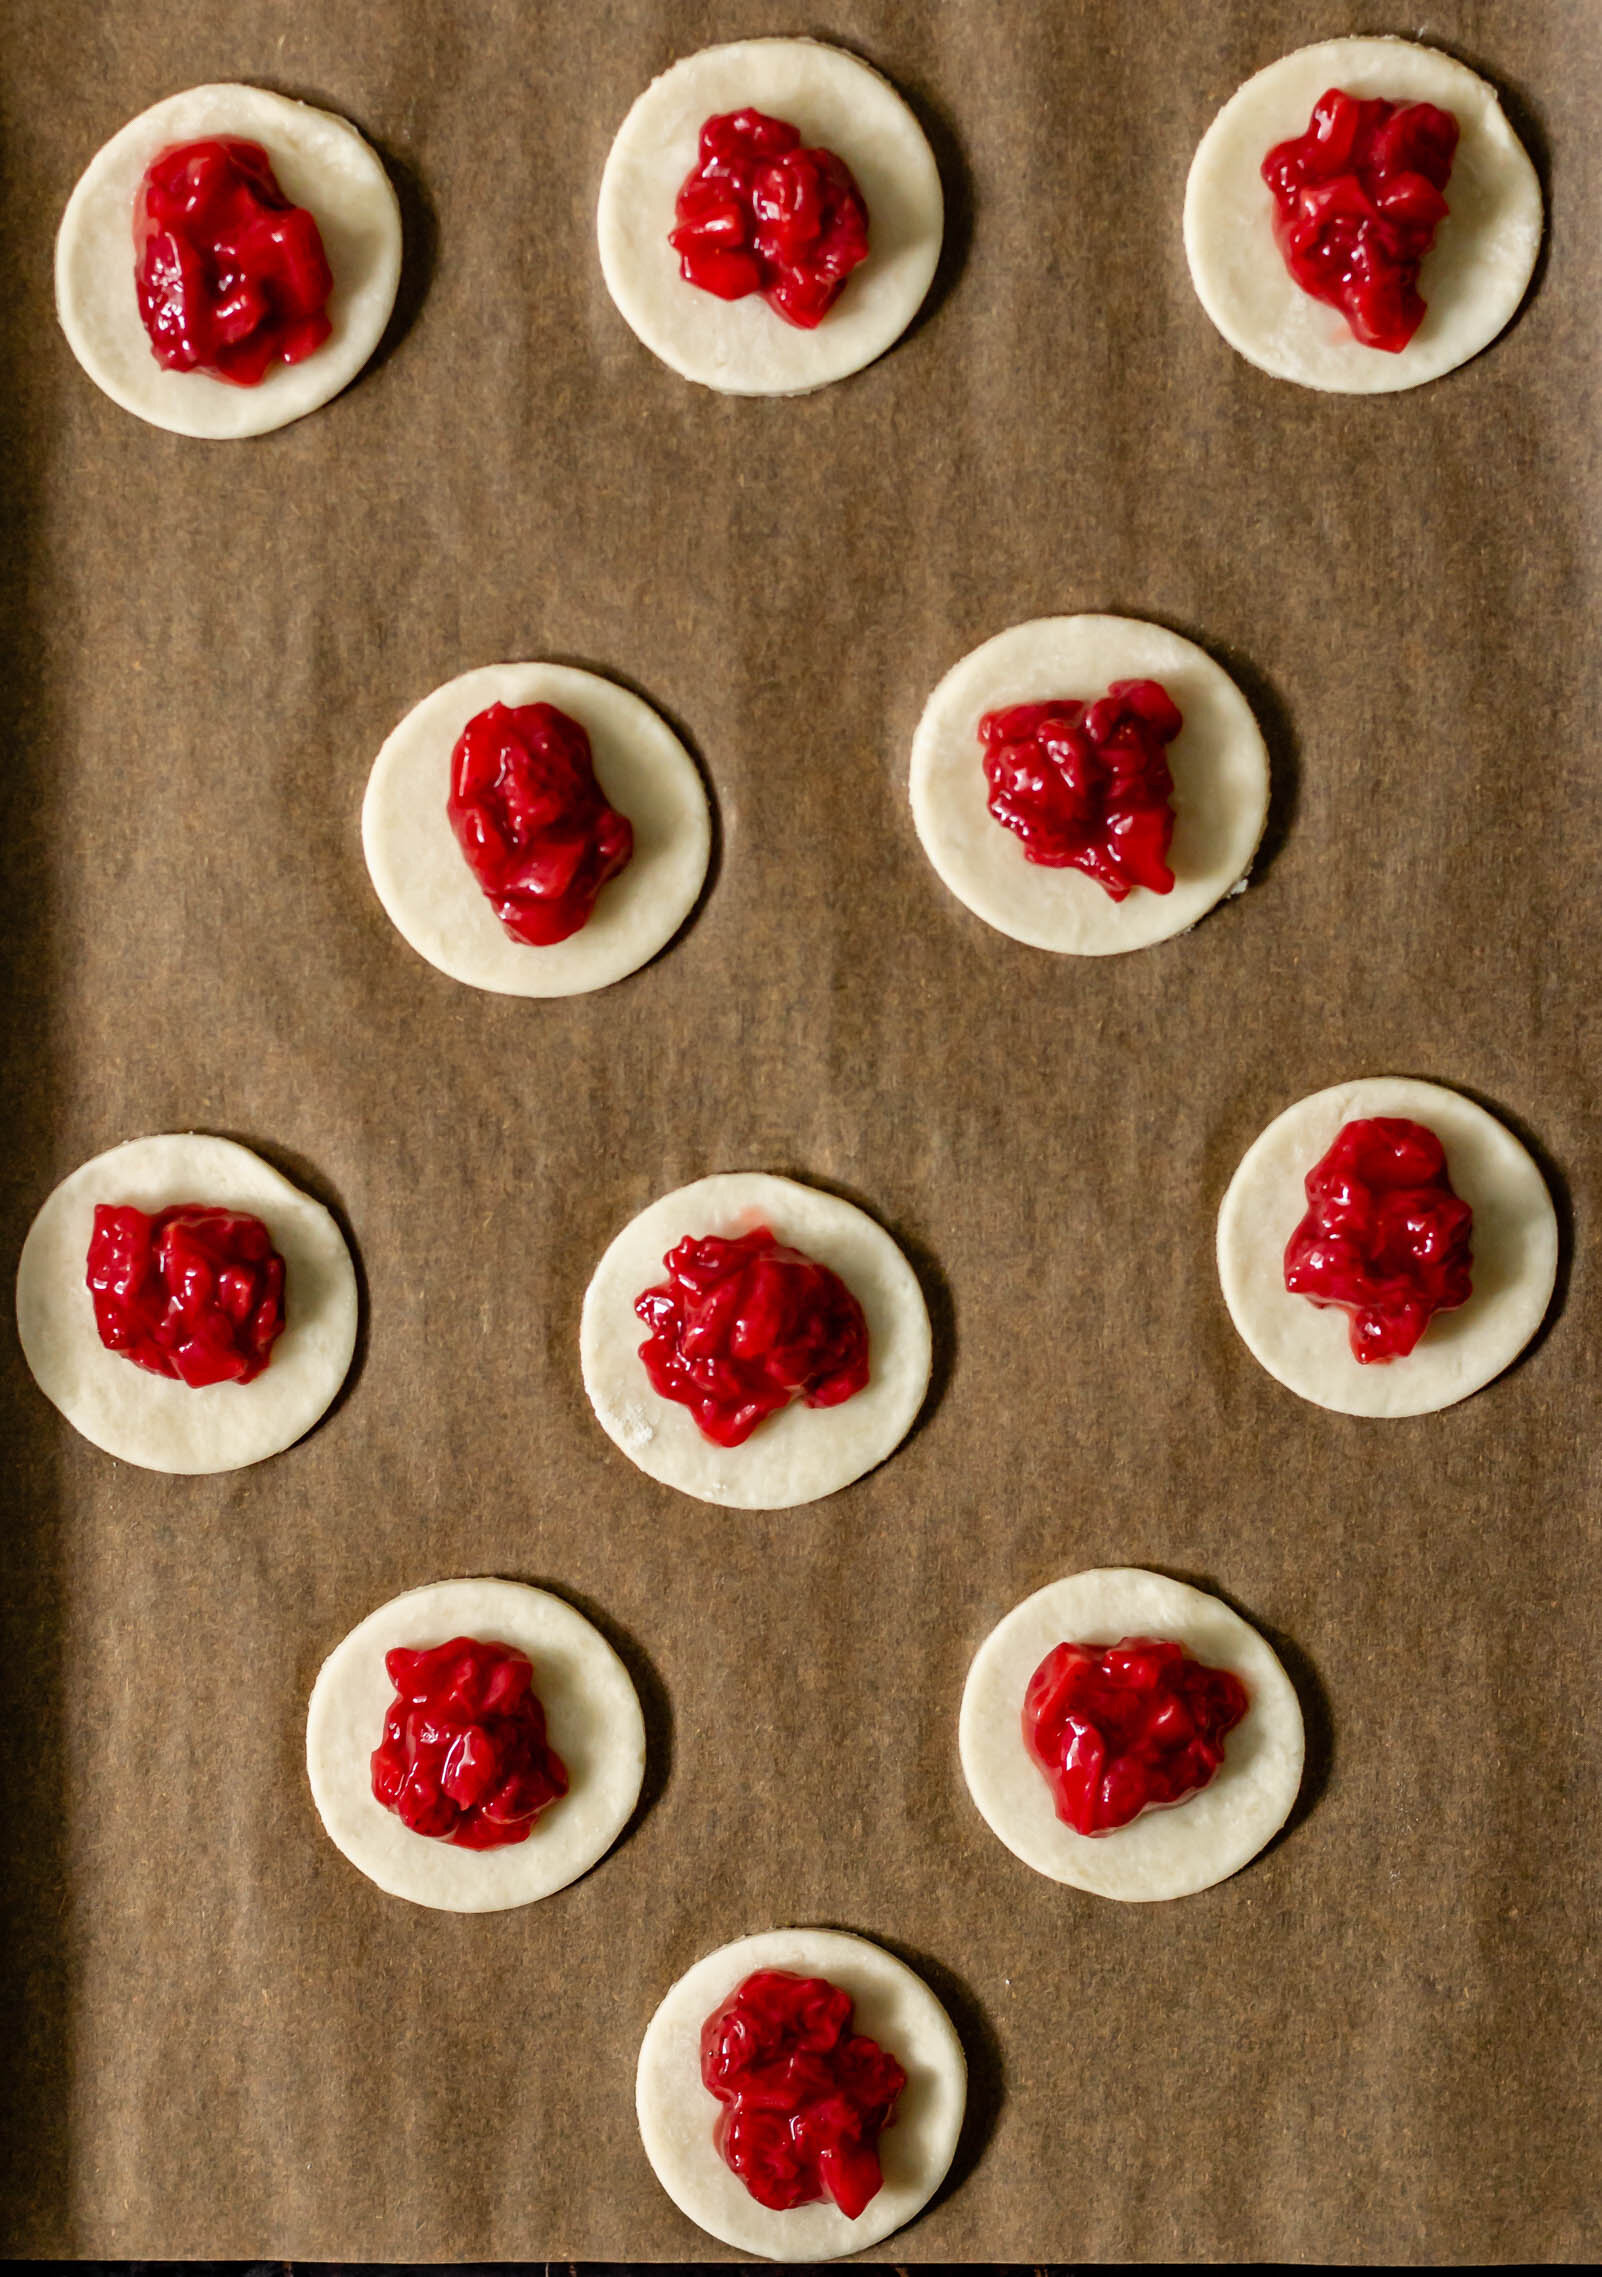
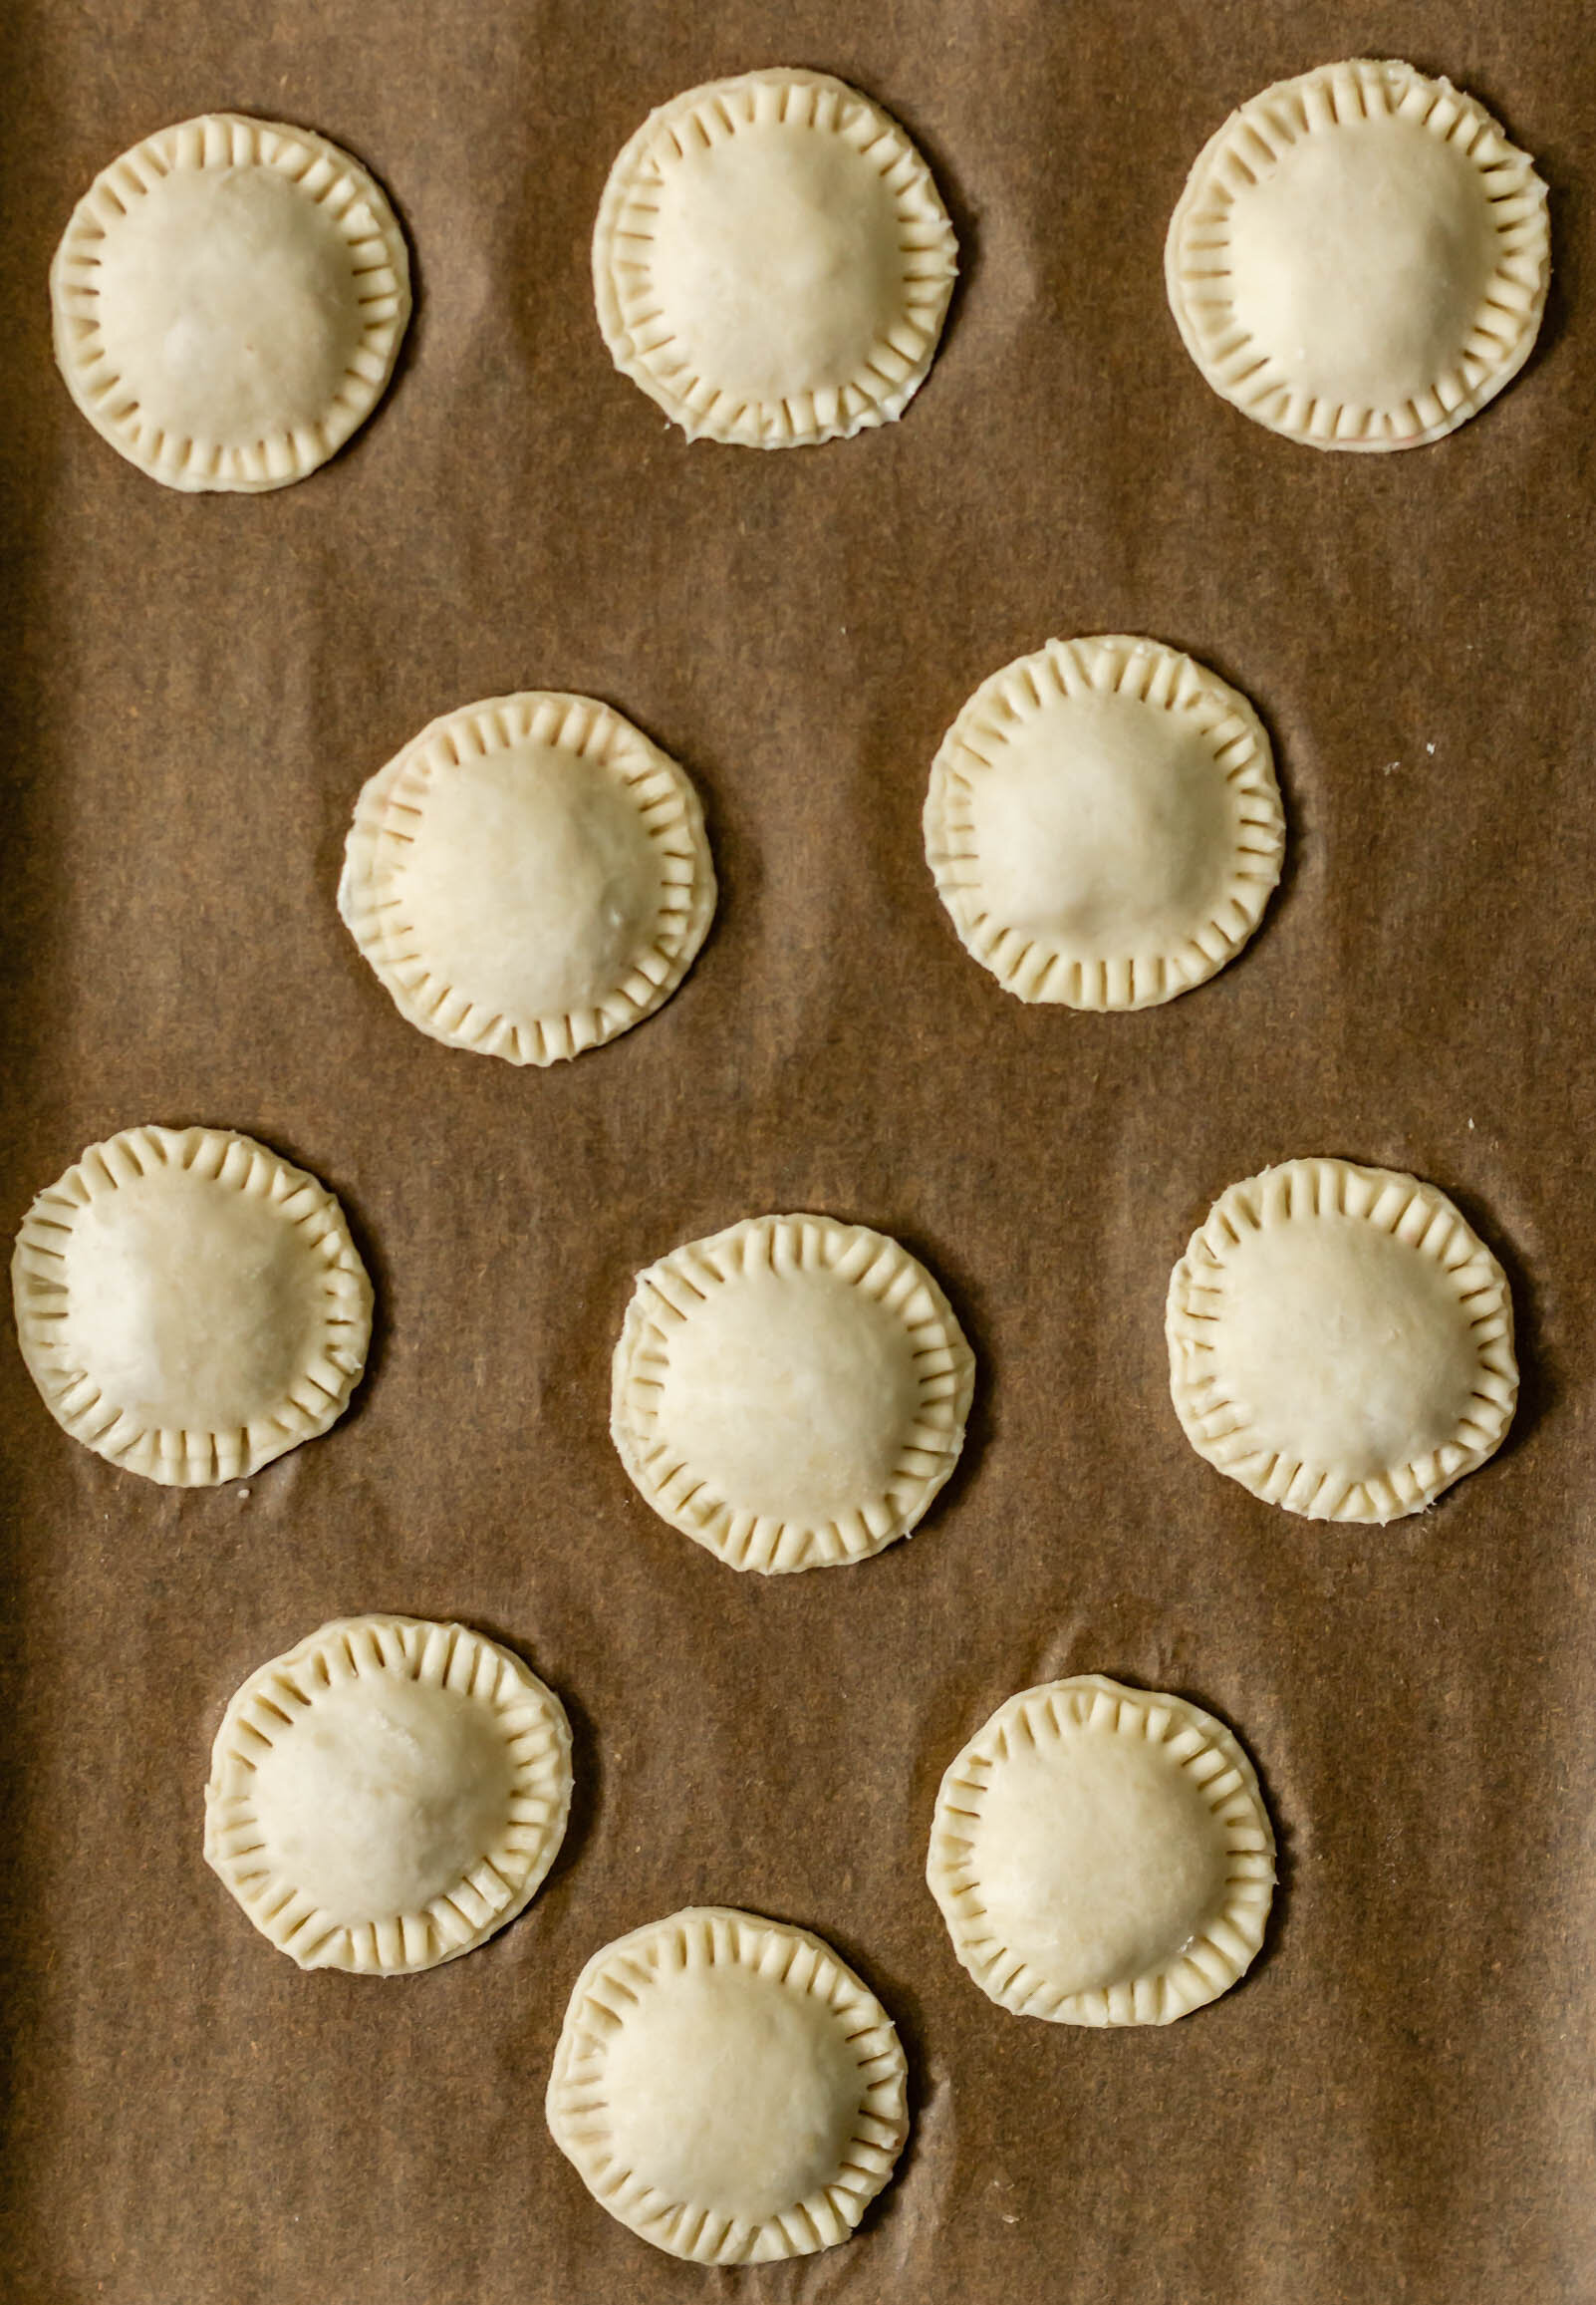
  4. Transfer half of the dough circles to a parchment-lined baking sheet. Spoon 1 tsp of strawberry mixture in the center of each circle. Use a pastry brush to lightly brush the edges with egg wash, and then top each strawberry-filled circle with the remaining unfilled circles. Use a fork to seal the edges. 

  5. Repeat steps 2-4 with the remaining block of dough and strawberry filling. 

  6. Preheat the oven to 350° F and transfer pop tarts to the freezer while the oven preheats. When the oven is ready, brush the tops lightly with egg wash and bake for 20-25 minutes, rotating the pan halfway through, until the tops and bottoms of the pop tarts are golden brown. 

to make the frosting 

1. Whisk together powdered sugar, salt, and vanilla extract. Add heavy cream, a little at a time until glaze reaches your desired consistency. Spoon over pop tarts and then decorate with rose petals and sprinkles. 


Notes: Flora Wellness forages and makes the best flower syrups around. I keep a variety on hand for everything from cocktails to cappuccinos, buttercream and to pie fillings and you can use any of her floral syrups in this recipe. If you don’t have a Flora Wellness syrup on hand, you can sub 1 T sugar, 1 T of water, and a tsp of your favorite edible flower.

Print Friendly and PDF


more recipes like this

littlesquares3.jpg

guava and cheese pastelitos

shortcake7.jpg

a fancy strawberry shortcake

Spiced Scallion Semolina Bread

butter2.jpg

I tested this bread four times in one week. The idea for a spiced, savory loaf that didn’t need a sourdough starter had been swirling in my head for a couple of weeks and I had been researching and tweaking until I got the flavors right. Trial Loaf #1 was proofed overnight and baked first thing in the morning. It was a thing of beauty. The crust was golden, the scoring was symmetrical, and the crumb had little threads of ground spices and scallions marbled throughout. The weather, however, was the absolute worst and it stormed all day. It was the kind of storm where those heavy gray clouds filled the sky and though I waited all day, there was never enough light in my house to photograph it. So we did it again. Trial Loaf #2 was fine. I tried playing a bit with the proofing times and didn’t give it a cold proof, which left a little to be desired when it came to oven spring. For Trial #3, I changed the hydration and salt levels and it ended up being both the best tasting and ugliest loaf so far. Figures. By the time we got around to Trial Loaf #4, I’d had my fair share of spiced scallion semolina bread. Luckily, in this case, the fourth time was the charm and though I wasn’t thrilled with the scoring, I was able to get a few passable photographs. All of this to say, if it first you don’t succeed, keep baking bread until you never want to see a loaf again.

All of that being said, this is a fantastic loaf of bread. Like I mentioned before, it doesn’t use a sourdough starter so if you are uninterested in the ten-day culture making process, this one is for you. The procedure does follow that of an artisan bread, with a longer bulk fermentation, followed by an overnight cold-proof. It’s ultra-savory, and has a flavor a little like that of a scallion pancake. You could definitely sub in caramelized onions if you don't have scallions, toss in a little roasted garlic, or experiment with the spices. Don’t skimp on that semolina flour though! It gives a bright, yellow color and a slightly more coarsely ground texture to the final loaf that you won’t want to miss.

Lastly, because I was close to drowning in a sea of spiced scallion semolina bread last month, I can say with great authority that this bread makes excellent breakfast sandwiches. Swoosh it with a little mayo or aioli, pile on your favorite greens and top it with a fried egg. Bon Appetite!

sliced3.jpg

Spiced Scallion Semolina Bread 

Yield: 1 loaf

Ingredients: 

12 oz (340 g) warm water

1 1/2 tsp active dry yeast

1 tsp honey

2 T (20 g) olive oil, plus more for greasing the bowl and sautéing the scallions

2 tsp kosher salt

250 g all purpose flour

200 g semolina flour

1 bunch (7-8) scallions, trimmed and chopped

1 T cumin seeds

1 T fennel seeds

Procedure: 

to make the dough:

  1. In the bowl of a stand mixer fitted with a dough hook, combine water, honey, and yeast. Let set for 5 minutes, until yeast is foamy. 

  2. Add olive oil, all purpose flour, semolina flour, and salt and mix on low speed until flour is combined. Increase the speed to medium-high and knead for 3-5 minutes, until a cohesive dough forms and is no longer sticking to the sides of the bowl. 

  3. Transfer dough to a large bowl that has been rubbed with olive oil and cover with plastic wrap.

proofing the dough and making the spiced scallions (first proof: total of 3 hours)

  1. Let proof for 1 hour. 

  2. While the dough is proofing, heat a tablespoon of oil in a large skillet. Add chopped scallions and cook for 3-5 minutes until softened. Roughly chop cumin and fennel seeds and then add them to the pan with the scallions. Cook another minute or two, until the mixture is fragrant, and then remove from heat and let cool completely. 

  3. After an hour of proofing, perform a fold on the dough. Gently pull the dough from the bottom, out and over the top of the dough. Turn the bowl 90° and repeat. Do this four times in total, until you have folded all four sides of the dough. Cover dough, and let proof for another hour. 

  4. After the second hour, repeat the same series of folds as the first time. Add the cooled spiced scallion mixture, and gently pinch it in until evenly distributed throughout the dough. Cover and proof for one more hour. 

shaping the dough (and an overnight proof)

  1. After the final hour, turn the dough onto a well-floured work surface. Flour it the top and gently press into a rectangle. Pull the bottom of the dough out and fold up, about 2/3 of the way up the rectangle. Pull the left and right sides out and fold them in, over the center of the dough, and then flip the entire parcel up over the top third of the dough, like you are closing an envelope. Cover with a dish towel and let rest for 15-20 minutes. 

  2. After this resting period, you will form the final shape of the dough and transfer it to proofing baskets to complete its final rise. To shape the dough, use your bench knife to flip your round over on the surface, so that your smooth side is down. This will be the outer crust of your bread. Gently pat the dough into a rough rectangle shape. Grasp the bottom lip of the dough and fold it up, about 2/3 of the way, like you are folding a letter. Press the edge into the dough. Grasp the right side of the dough, stretch it out and over so that it crosses to the left side. Repeat this with the left side. You should have an envelope looking dough shape now. Grab the top side of the dough, stretch it out slightly and fold it over the entire package like you are closing an envelope. Take hold of the dough nearest to you and flip the entire package up and over (away from you) so that all of the seams are on the bottom. Wrap the basket in plastic wrap and transfer to the refrigerator to rest overnight.

baking the bread: 

  1. When you are ready to bake, place a large Dutch oven with a lid in your oven and preheat to 500° F. You want the Dutch oven to be very hot when you add your bread to it.  

  2. When your oven and pot are preheated, carefully remove the Dutch oven. Flip your dough out of the basket onto a piece of parchment paper. Quickly, use a knife or a lame to score the top of your dough and then grab the sides of the parchment paper and carefully lower it into the Dutch oven. Place the lid back on the Dutch oven and bake for 20 minutes, covered. 

  3. After 20 minutes, carefully remove the lid from the Dutch oven and lower the oven temperature to 450 degrees and bake for another 15-20 minutes.

Print Friendly and PDF

more recipes like this

briolata8.jpg

briolata: sicilian-style sausage bread

HerbFoc13.jpg

herbed focaccia

apeinkornloaf7.jpg

classic sourdough