

Holiday Charcuterie Board How-To
/I love the holiday season because it is a wonderful excuse to gorge on cheese and salty meats. I love it even more now that highly-styled, decorative plates filled with said meats and cheeses have become a cool, trendy thing because it gives me another excuse to play with my food. The beauty of a great charcuterie board is it’s versatility. You can use pretty much anything that you like snacking on and it’s great for any occasion- from that Christmas potluck you signed up to bring an appetizer for, to Thursday night snack-dinner. Charcuterie boards are always there for you.
I put together a holiday-esque snacking board a few weeks ago and have compiled a few tips and tricks to help you create your own.
Step 1:

Start with a board. Fancy bamboo platters are very nice and beautiful, but they can also be kind of expensive and, if your kitchen storage is anything like ours, a little tricky to find a home for. If you already have a big platter, then by all means, cheese it up. But if you don’t have a fancy platter, not to worry. You can really use any, large flat-surfaced item that you have. I used a baking stone for mine, and just trimmed a piece of parchment to lay on top of it. My board was 12”x16”.
I find that it’s also really helpful for me to pull out all of the items I’m going to put on the board before starting to arrange so that I get an idea of how much space I will need. If you’re only using 1-2 cheeses and a couple of other little snacks, you might want to use a smaller platter or a plate. For more cheese/snacks/charcuterie, use a bigger platter.
Step 2:
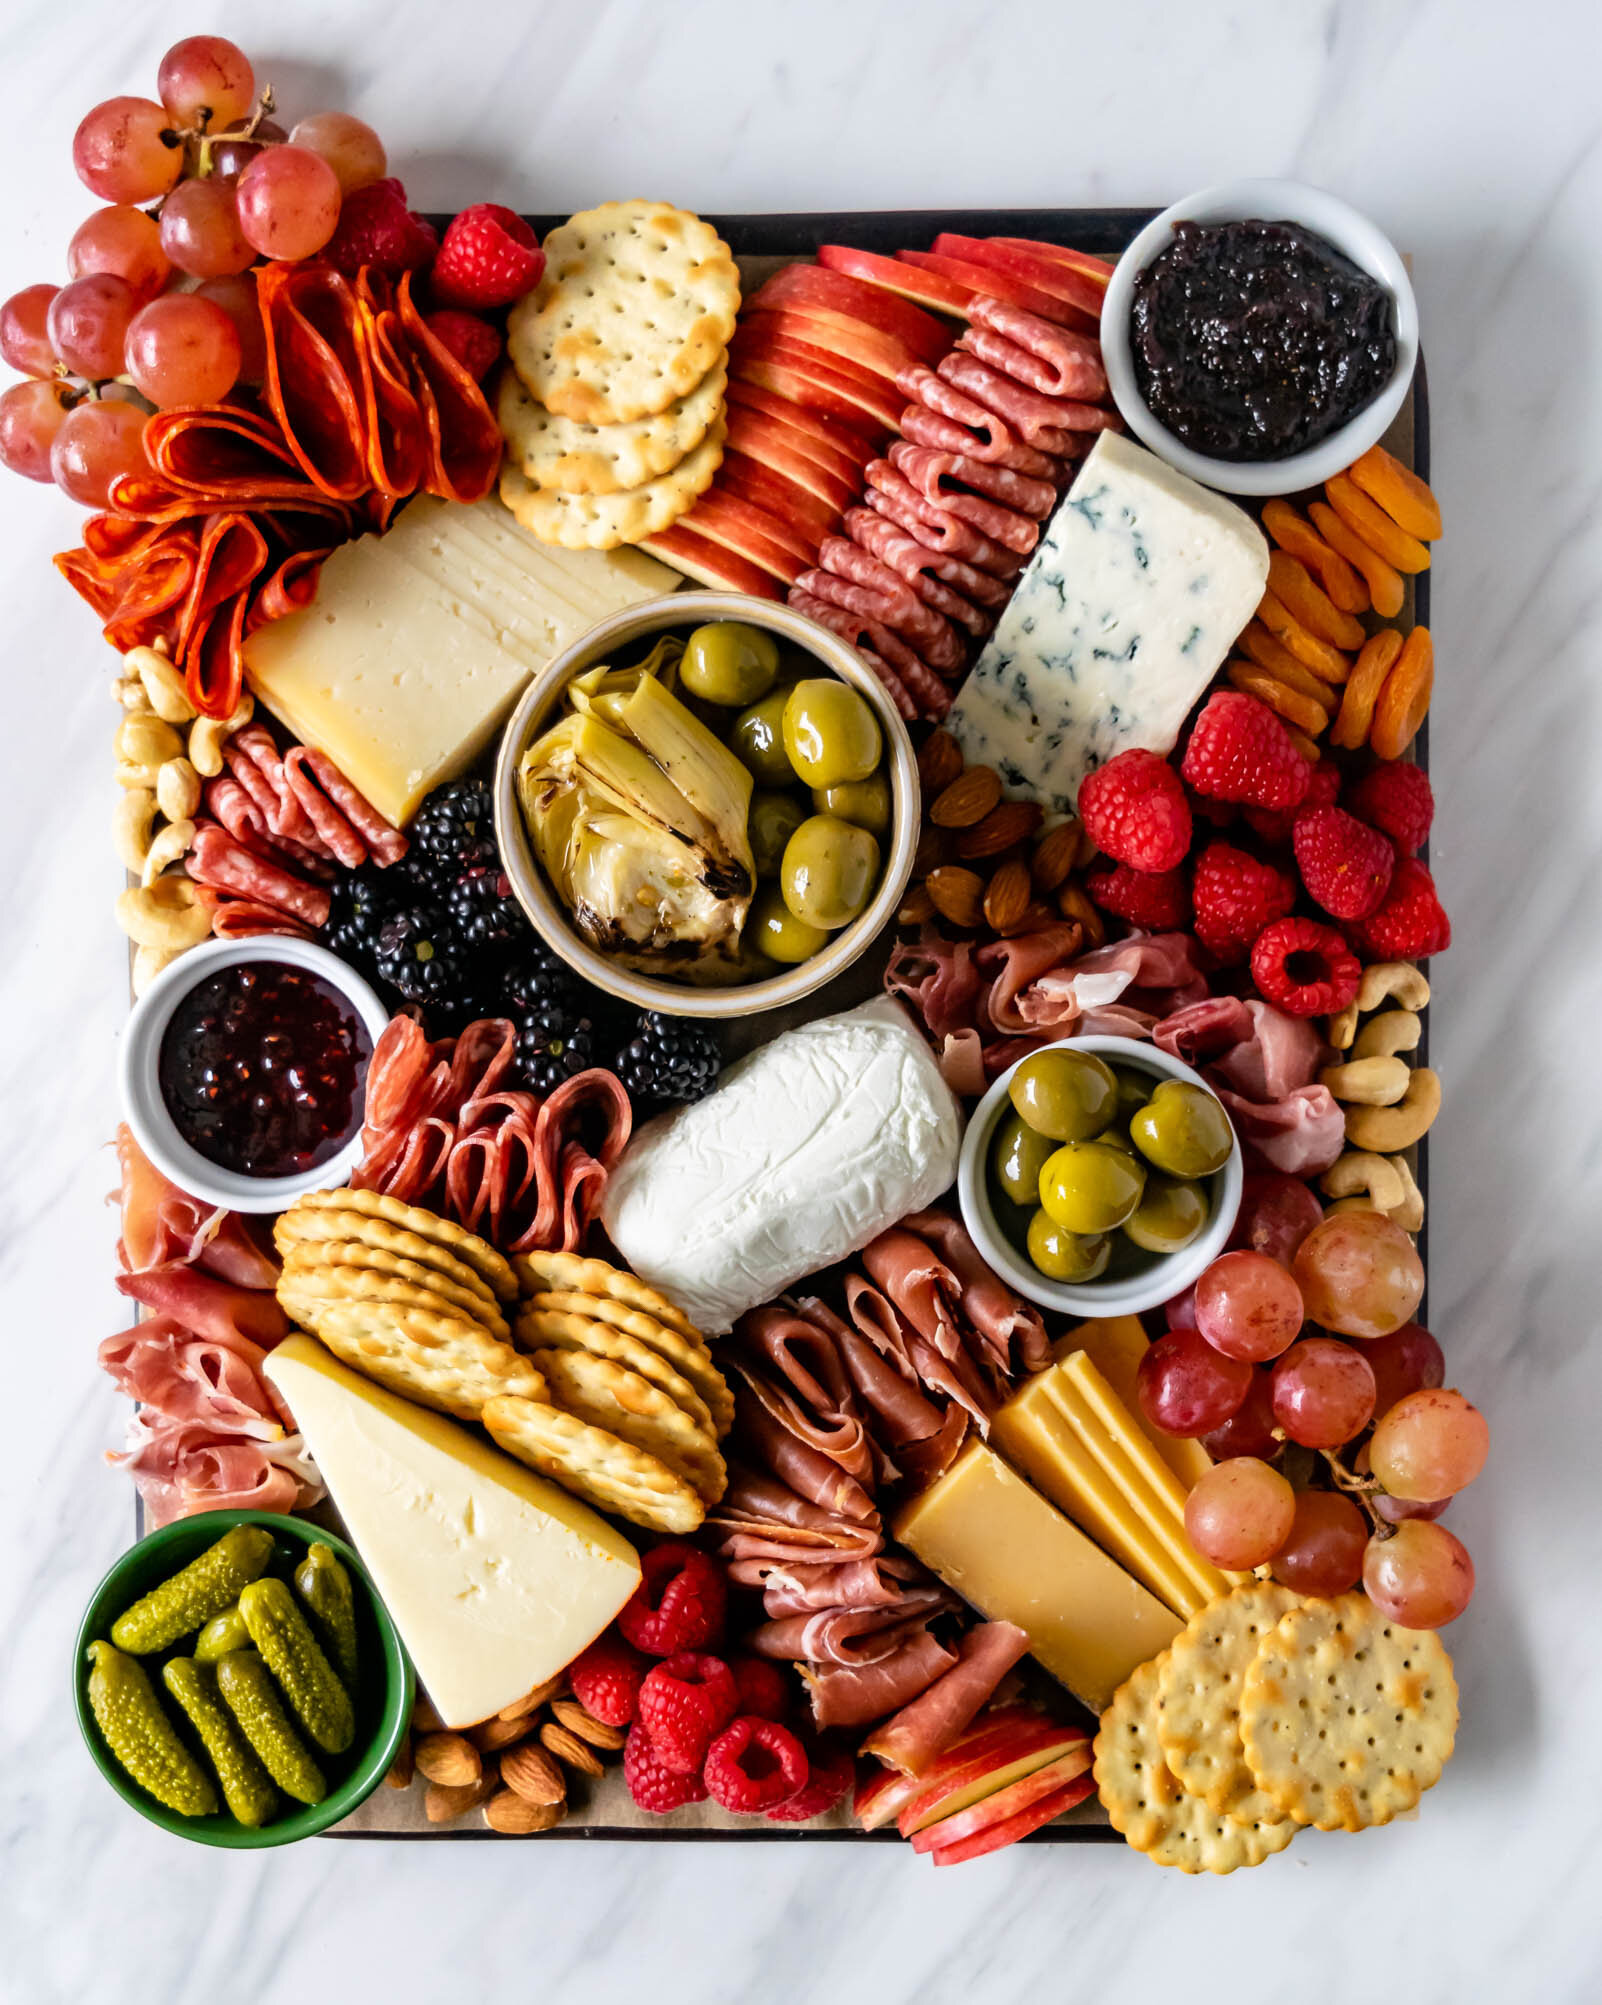
Place your cheeses, spread out a bit, on the board. They are your anchors and the whole board will revolve around them. I’ve read quite a few charcuterie board “recipes” that call for a soft cheese, a hard cheese, an aged cheese, and a blue cheese. This is a good rule of thumb to ensure you have a little diversity on your board, but ultimately, you should pick cheeses that you like.
For this board, I used: goat cheese, a very mild blue cheese, a salty gouda, a creamy port salut, and a smoked sheep’s milk cheese called etxegarai.

Shop local when you can, and when you can’t, there is always Trader Joe’s. Cheese boards can get expensive. Cured meats and good cheese are some of the pricier items in the store and building a whole board out of them can quickly add up. Since I unfortunately do not have a never-ending supply of cheese money, I like to get one or two meats/cheese from my local cheese shop (in Orlando, I like La Femme du Fromage at East End Market) and then bulk the rest of my board up with less-expensive cheese from the grocery store. If you have a Trader Joe’s anywhere near you, it is worth the drive! Their cheese selection is really great and really affordable.

Step 3:
After you lay out your cheeses, place small bowls or ramekins on the board for your jams, dips, mustards, and olives. I like to spread these out in empty spaces around the cheeses. Don’t fill your bowls, just yet. We will just use them as placeholders for now.
Step 4:
It’s time for the meats. I cannot exaggerate enough how much I enjoy a salty, cured, meat. I would eat slices of chorizo or salami everyday for breakfast, lunch, and dinner if I could. (In fact, on my most recent trip to Spain, I did.) I choose my meats the same way I choose my cheese- a variety of different types, splurging on one or two really great ones. When placing your meats on the board, you want to make sure that you are folding or bunching them into little, easy to grab parcels. For larger pieces of meat, like prosciutto or jamon, slice them in half before folding so that everything is bite size.
For this board, I used: prosciutto, chorizo, salami, salchichon, and Serrano jamon.
Step 5:
Fill in all empty space with cheese board accoutrements. Again, pick a variety of bite-sized, stackable foods that you like. Here are some suggestions:
Fruit- Fresh and/or dried. I am berry girl myself, but Martin likes grapes and apples so I included a little of each on this board.

Nuts- It’s nice to have a crunchy contrast to all of the soft, creamy things on the board. I used cashews and almonds, but pistachios are also great.
Jams, Jellies, and Dips- For this board, I used raspberry jam and fig butter, because I thought their flavors paired well with the port salut and the blue cheese. I also like the addition of seedy, whole grain mustards, yogurt-based dips with lots of garlic and chives, or marmalades.
Olives and other Marinated/Pickled Goodies: I don’t want a cheese board if it doesn’t have olives. I found some little, buttery green olives, but I also really love Kalamatas, or really anything swimming in oil coming off of an olive bar. Martin doesn’t like olives, so I added grilled marinated artichoke hearts so he didn’t feel left out. Pickles and other pickled vegetables give a briny, pucker-y flavor to the board.
Crackers and Bread: Not exactly a part of the board, I alway like to have a basket of bread off to the side for slathering with cheeses and jams and piling with salami. I like baguettes sliced into little rounds or squares of focaccia best. I also like to include crackers of some sort on the board, for a little extra crunch and for when the bread runs out. I prefer butter crackers without a lot of added flavors so that the cheeses can really sing, but if you’re a water cracker kind of person, go for it. If you can, it’s nice to include a gluten-free cracker for those who are sensitive to gluten, but still love a good cheese board.

We still have a week until Christmas, and two weeks until New Year’s. There is plenty of time to add a cheese board or two to your holiday plans! Swing by your local cheese monger, pick up some snacky foods and let your creative side loose. Happy boarding!
