

Classic Sourdough
/
I think that 2019 should be the year of bread. Over the last year or so, I’ve been wading into the homemade artisan bread pool and this year I’m diving in head first. (Two of my actual 2019 goals are “regular bread making” and “make more croissants” so obviously, I have a great handle on my priorities.)
We are starting off with this classic artisan sourdough, which is a naturally fermented bread. This means that the leavening (and sourdough flavor) come from naturally occurring yeast, not active dry or instant yeast you can get at the store and also means that you will be working from a sourdough culture or starter. If you don’t yet have your own little starter, jump on over to my Sourdough Culture How To for a full rundown on how to start your own. (Mine is named Pierre and he is now an integral part of our family).
I’ve been tweaking and testing this process to try and get it right so that even the most novice bread bakers will have success and I’ve learned most of my gluten handling skills from Chad Robertson’s Tartine Bread and Tara Jensen’s Baker Hands. Bread making is a special process because although it is very precise and measurement-reliant, it is also a very tactile and intuitive process. It was a little difficult to write this process out because the more you bake, the more you rely on the feel and look of the dough. Over the next few weeks, I will be working on creating an Instagram story that follows my bread process to help out in the visual department. Making your own bread is not a quick and easy adventure, but I promise that when you bite into your first craggy piece, it will all be worth it and you will be running back to your kitchen to do it all again.
Recipe updated 3/14/20: Since posting my original sourdough recipe, I’ve continued to play with the ratios and flours used. I also spent part of my summer at the restaurant baking loaves of sourdough everyday for the resort and my sourdough skills have improved greatly. This recipe will probably always be evolving as I discover new flours and play with hydration ratios, but this updated recipe has been honed and perfected and is my regular, everyday sourdough.
Classic Sourdough Bread
Yield: 2 loaves
Ingredients:
For the leaven:
100 grams starter
200 grams water
200 grams bread flour
For the bread:
620 grams bread flour
60 grams whole wheat flour
24 grams kosher salt
2 grams active dry yeast
500 grams water, 75-80°F
270 grams leaven (see above recipe)
Procedure:
The night before baking, make the leaven:
In a large plastic bowl, stir together 100 grams of your starter, 200 grams of water, and 200 grams of bread flour. Cover (I like to use plastic wrap and a rubber band) and let set on the counter overnight.
To make the bread:
In a large bowl, mix together leaven, warm (75-80 degree) water, and yeast and stir gently. The leaven will begin to break up leaving you with a cloudy water.
Add the bread flour and whole wheat flour and stir to combine, until there are no more streaks of flour and you have a rough dough. Cover the bowl with a dish towel and let rest for 30 minutes. (This period is called autolyse and it allows the flour to absorb the water before the addition of the salt, which is hygroscopic and will soak up the water immediately.)
After your autolyse, add the salt. I like to sprinkle the salt over the dough and pinch it in distribute. Using your fingers and a bowl scraper, work the salt into the dough. You will feel the dough tighten a bit and develop tension as the salt mixes in.
At this point, you can transfer the dough to a large clear proofing container, if you have one, or to a clean bowl. Cover the bowl with the dish towel and place in a warm area of your kitchen. This is the bulk fermentation period. The dough will proof for about 3 hours, during which the yeast will begin creating rise and gas bubbles. We won’t knead the dough, but it will undergo a series of folds which help strengthen the gluten development. When folding, take care not to crush all of the little gas bubbles forming in the bread- we want to keep those!
Proof the dough on the counter for three hours, turning every 30 minutes. To complete a turn/fold: grab the bottom of the on side of the dough and stretch it up and over to the other side of the rest of the dough. Turn the dough 90 degrees and repeat until you have folded all four sides of the dough. This is considered one turn. Cover and continue to proof, repeating the turn every 30 minutes (for a total of 5 times).
After 3 hours, the dough should have noticeable bubbles and should have slightly puffed and increased in size. Turn the dough out onto a well-floured work surface and divide it into two pieces. Dust the top of one dough piece with flour and fold the cut side onto the dough. Use your floured hands and a bench scraper to shape the dough piece into a round. By the end of shaping, your dough should have a taught, smooth outer surface. Repeat with the other dough piece, cover bowl with the dish towel and let rest for 20-30 minutes.
After this resting period, you will form the final shape of the dough and transfer it to proofing baskets to complete its final rise. To shape the dough, use your bench knife to flip your round over on the surface, so that your smooth side is down. This will be the outer crust of your bread. Gently pat the dough into a rough rectangle shape. Grasp the bottom lip of the dough and fold it up, about 2/3 of the way, like you are folding a letter. Press the edge into the dough. Grasp the right side of the dough, stretch it out and over so that it crosses to the left side. Repeat this with the left side. You should have an envelope looking dough shape now. Grab the top side of the dough, stretch it out slightly and fold it over the entire package like you are closing an envelope. Take hold of the dough nearest to you and flip the entire package up and over (away from you) so that all of the seams are on the bottom. Let rest while you repeat this with the other dough piece.
Dust your proofing baskets with a good amount of flour* and transfer your dough to the baskets, so that the smooth side is facing down and the seams are upright. Cover with a dish towel.
At this point, you have two options for final proofing. You can either proof both loaves traditionally, on a warm countertop for about 3 hours, or you can wrap the loaves and transfer them to the fridge to cold proof for 8-12 hours.
To bake the loaves:
When you are ready to bake the loaves, place a large Dutch oven with a lid in your oven and preheat to 500 degrees. You want the Dutch oven to be very hot when you add your bread to it.
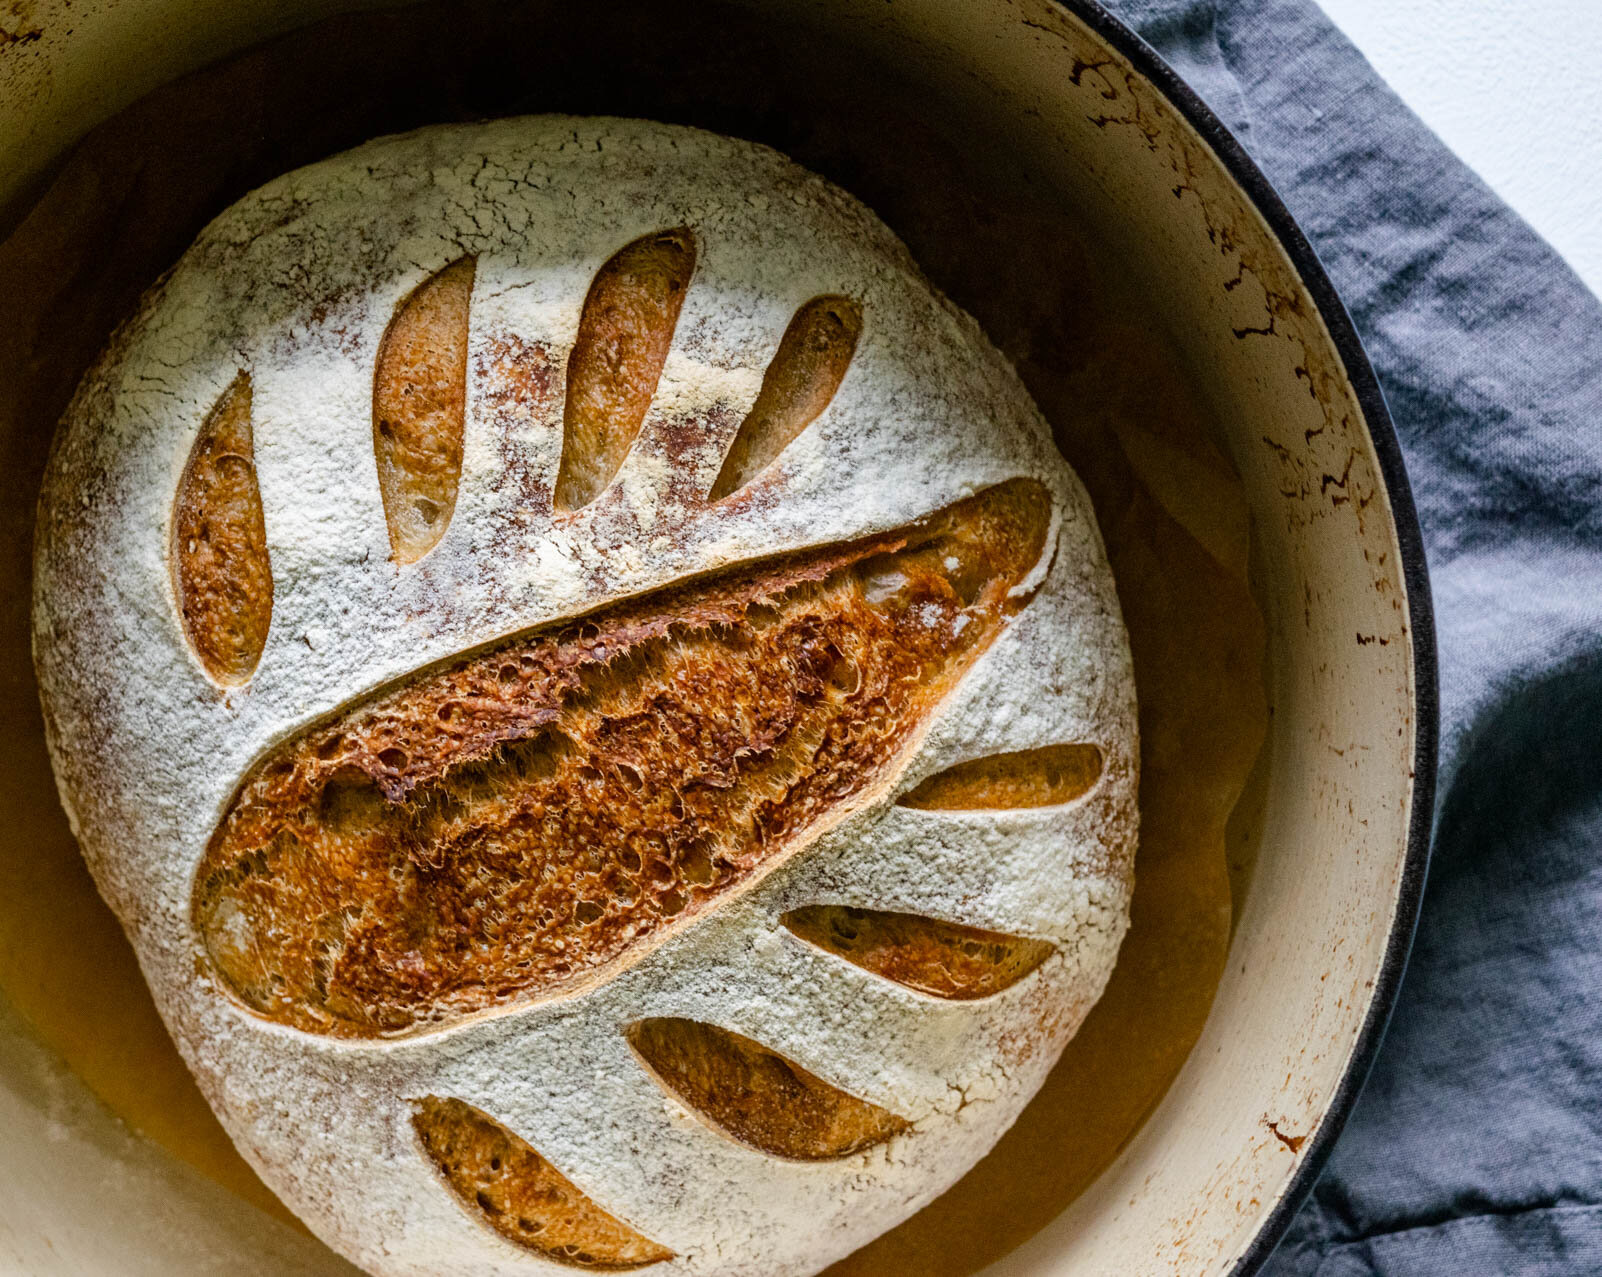
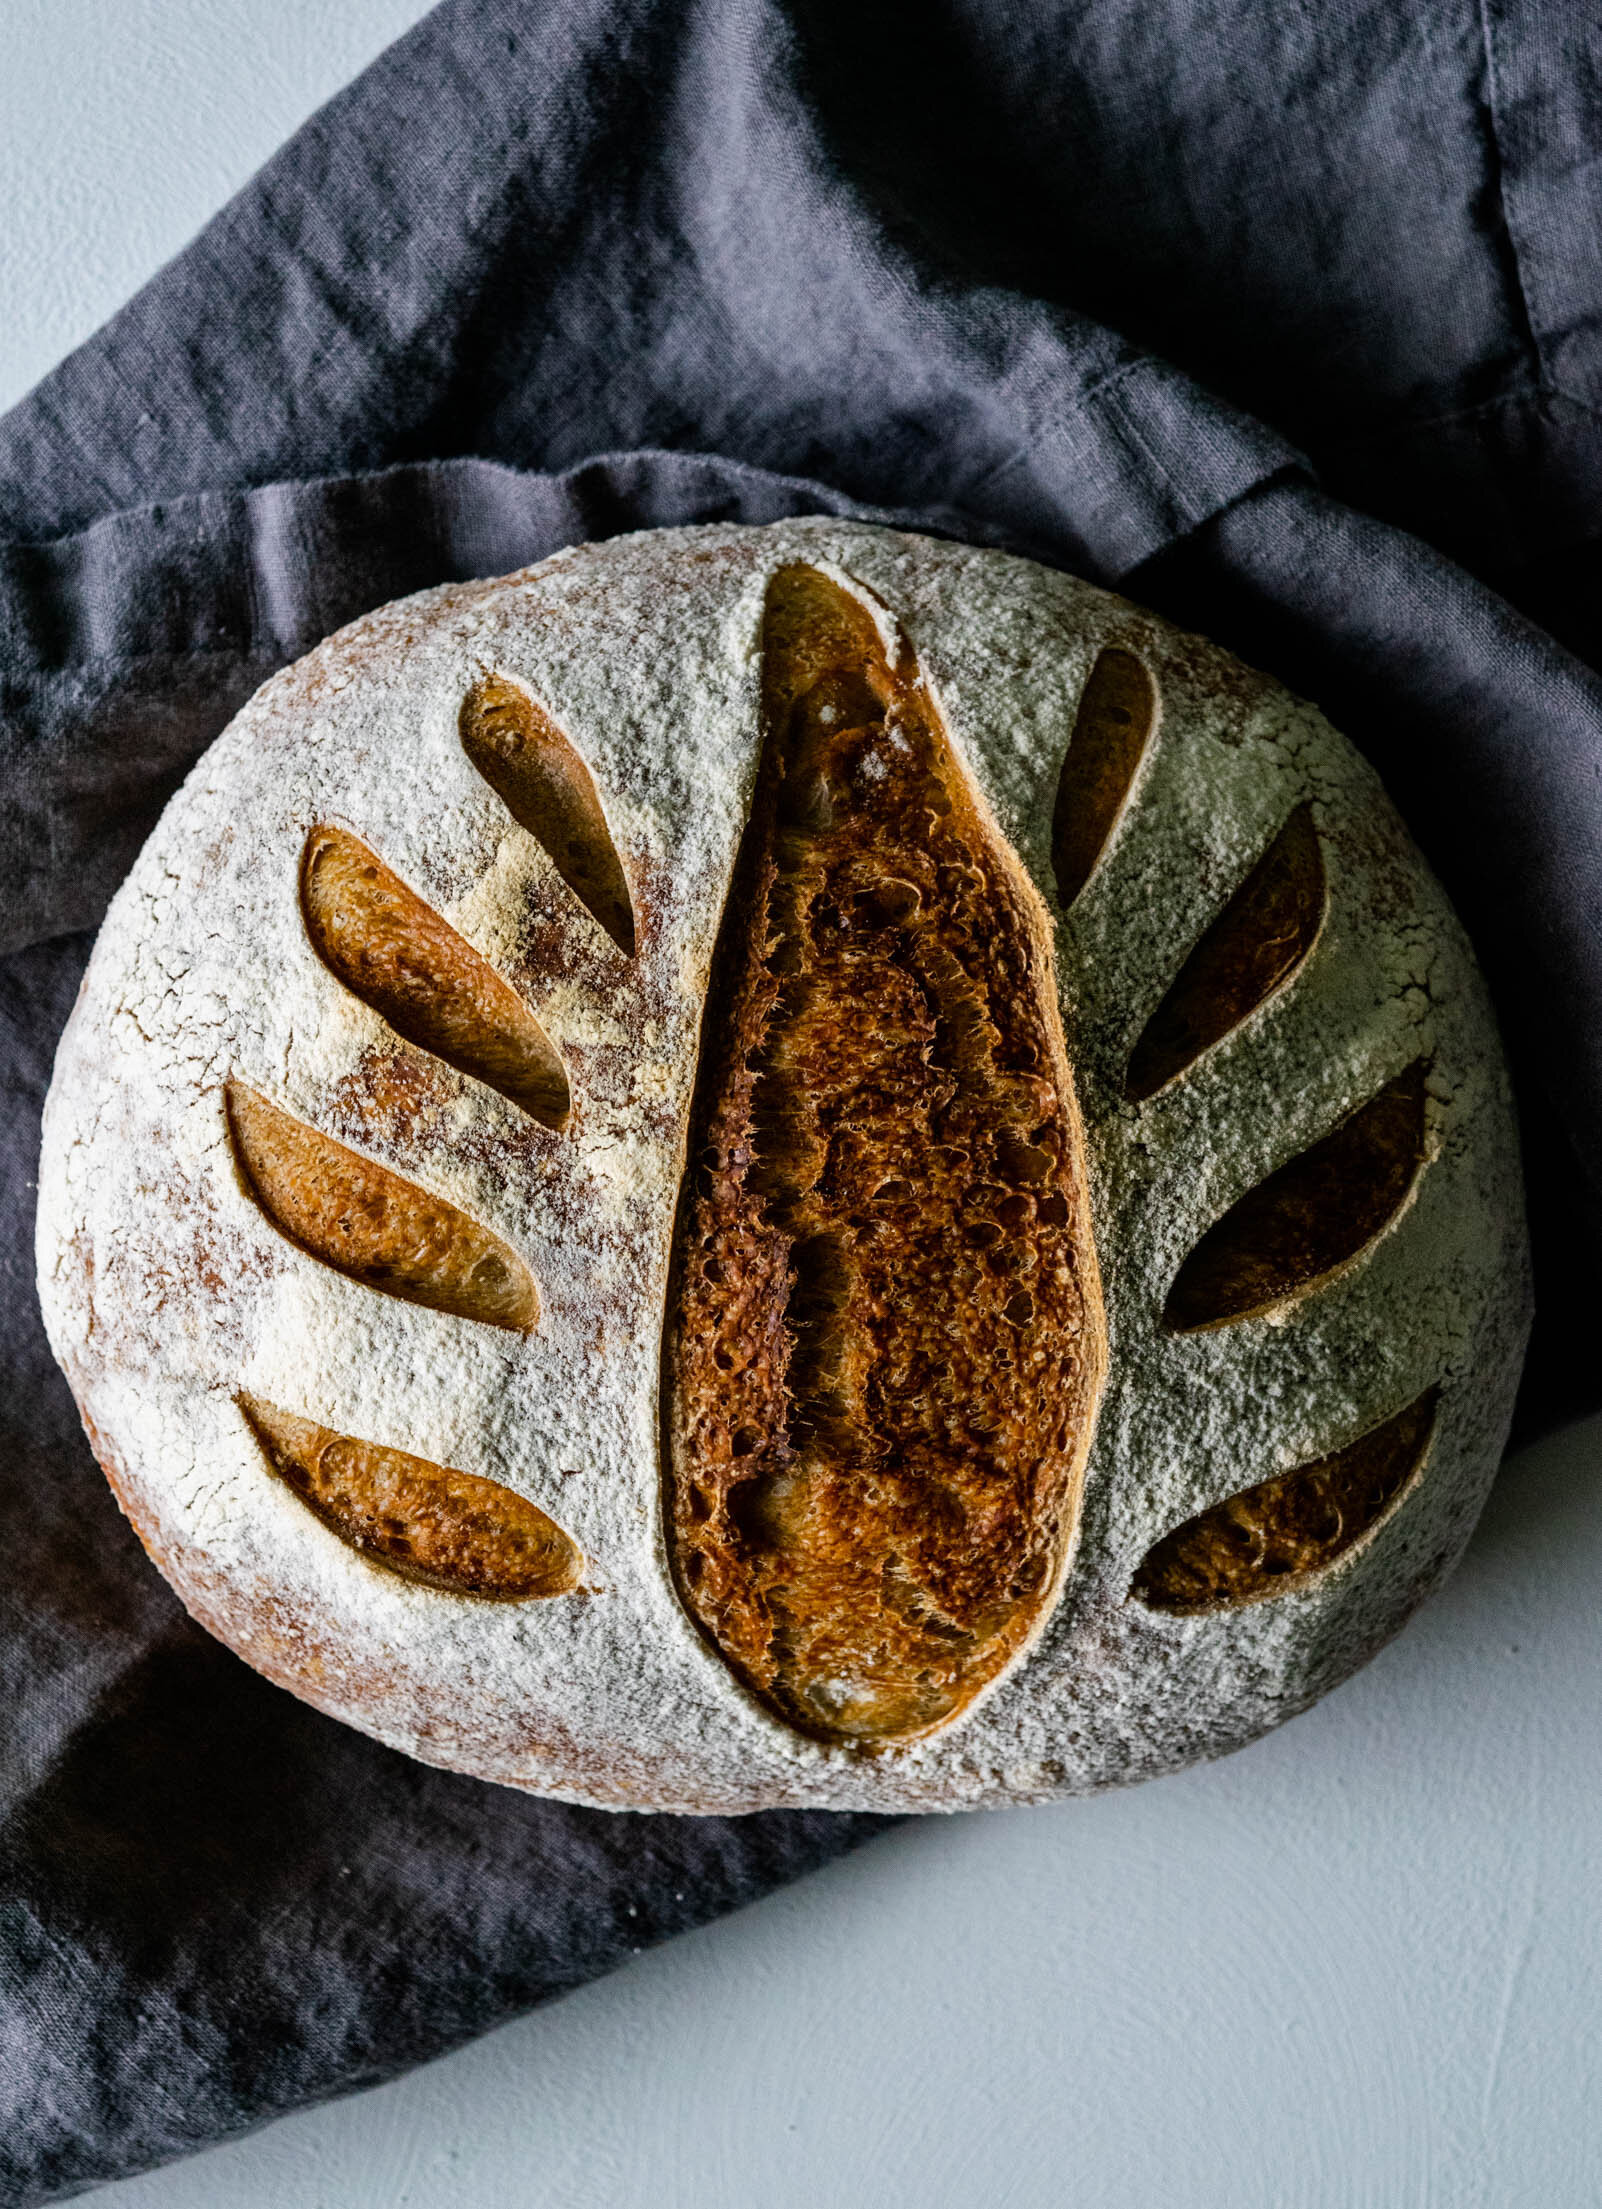
When your oven and pot are preheated, carefully remove the Dutch oven. Flip your dough out of the basket onto a piece of parchment paper. Quickly, use a knife or a lame to score the top of your dough and then grab the sides of the parchment paper and carefully lower it into the Dutch oven. Place the lid back on the Dutch oven and bake for 20 minutes, covered.
After 20 minutes, carefully remove the lid from the Dutch oven and lower the oven temperature to 450 degrees and bake for another 15-20 minutes. The bread is done with the top crust is deeply browned and the bottom has a hollow-side when you tap it.
Before repeating with the other loaf, let the Dutch oven preheat again in the hot oven.
